LINKING TRANSMITTER AND DISPLAY
INSTALLATION
76
Link Button
Learn Button
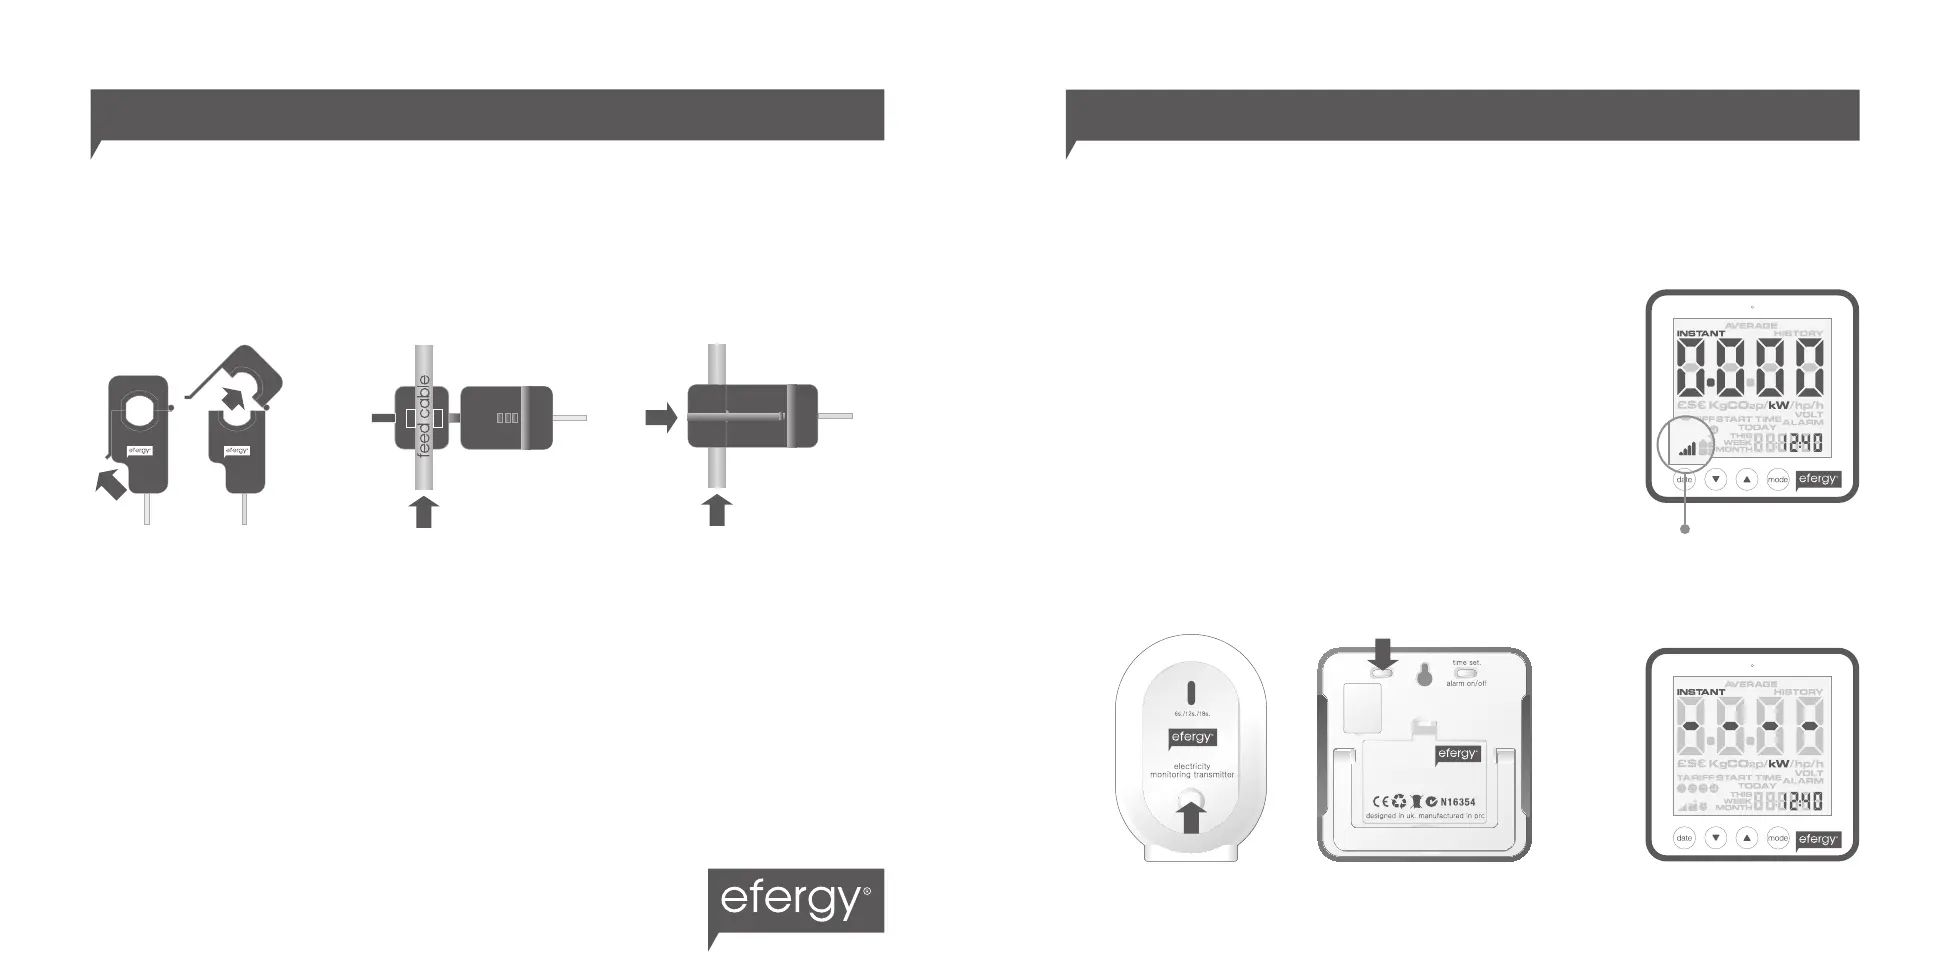
If the LINK is COMPLETED
you will see the
transmission signal
If the LINK is NOT
COMPLETED you will see
dashes on the display
transmission signal
1. Ensure three AA batteries are inserted in the transmitter and
three AAA batteries inserted in the display unit.
2. Push the Link Button on the reverse of the display unit for 2 or
3 seconds. The transmission signal symbol will flash for one
minute.
3. While the transmission signal in the display flashes push the
Learn Button in the transmitter and wait until the transmission
signal symbol becomes solid.
Note: The default value for the transmission frequency is six
seconds. This means the transmitter is sending information
every six seconds. You can change the frequency from 6s (red
flashing light) to 12s (orange flashing light) and to 18s (green
light) pushing and holding the transmitter button.
1. Fit The Sensor
The sensor needs to be fitted to the live feed cable. Sensors are suitable for cables up to
12mm in diameter. You should not force the cable to fit. The sensor should fit loosely around
the cable and there should be no packing used.
2. Plug The Sensor Cable Into The Transmitter
Insert the jack on the end of the white wire into any of the three input sockets on the
transmitter. The clip-on sensor acts as a current sensor and relays the current being drawn into
the home to the transmitter.
If your cables are too big for the sensor you can order
XL-sensors at www.efergy.com
1. Push the release cap
to open the sensor.
2. Select the correct feed
cable, then place the feed
cable into the top of the
sensor.
3. Close the sensor.
The sensor is secure
when a “click” is heard.