OWNER’S GUIDE GTS
®
800 541 4900 EFISPORTSMEDICINE.COM
11
GTS
®
OWNER’S GUIDE
OWNER’S GUIDE GTS
®
800 541 4900 EFISPORTSMEDICINE.COM
11
33
34
35
37
36
INSTALL LAT BARS (CONTINUED)
ATTACH THE LAT BAR BRACKET - PHASE 3 (CONTINUED)
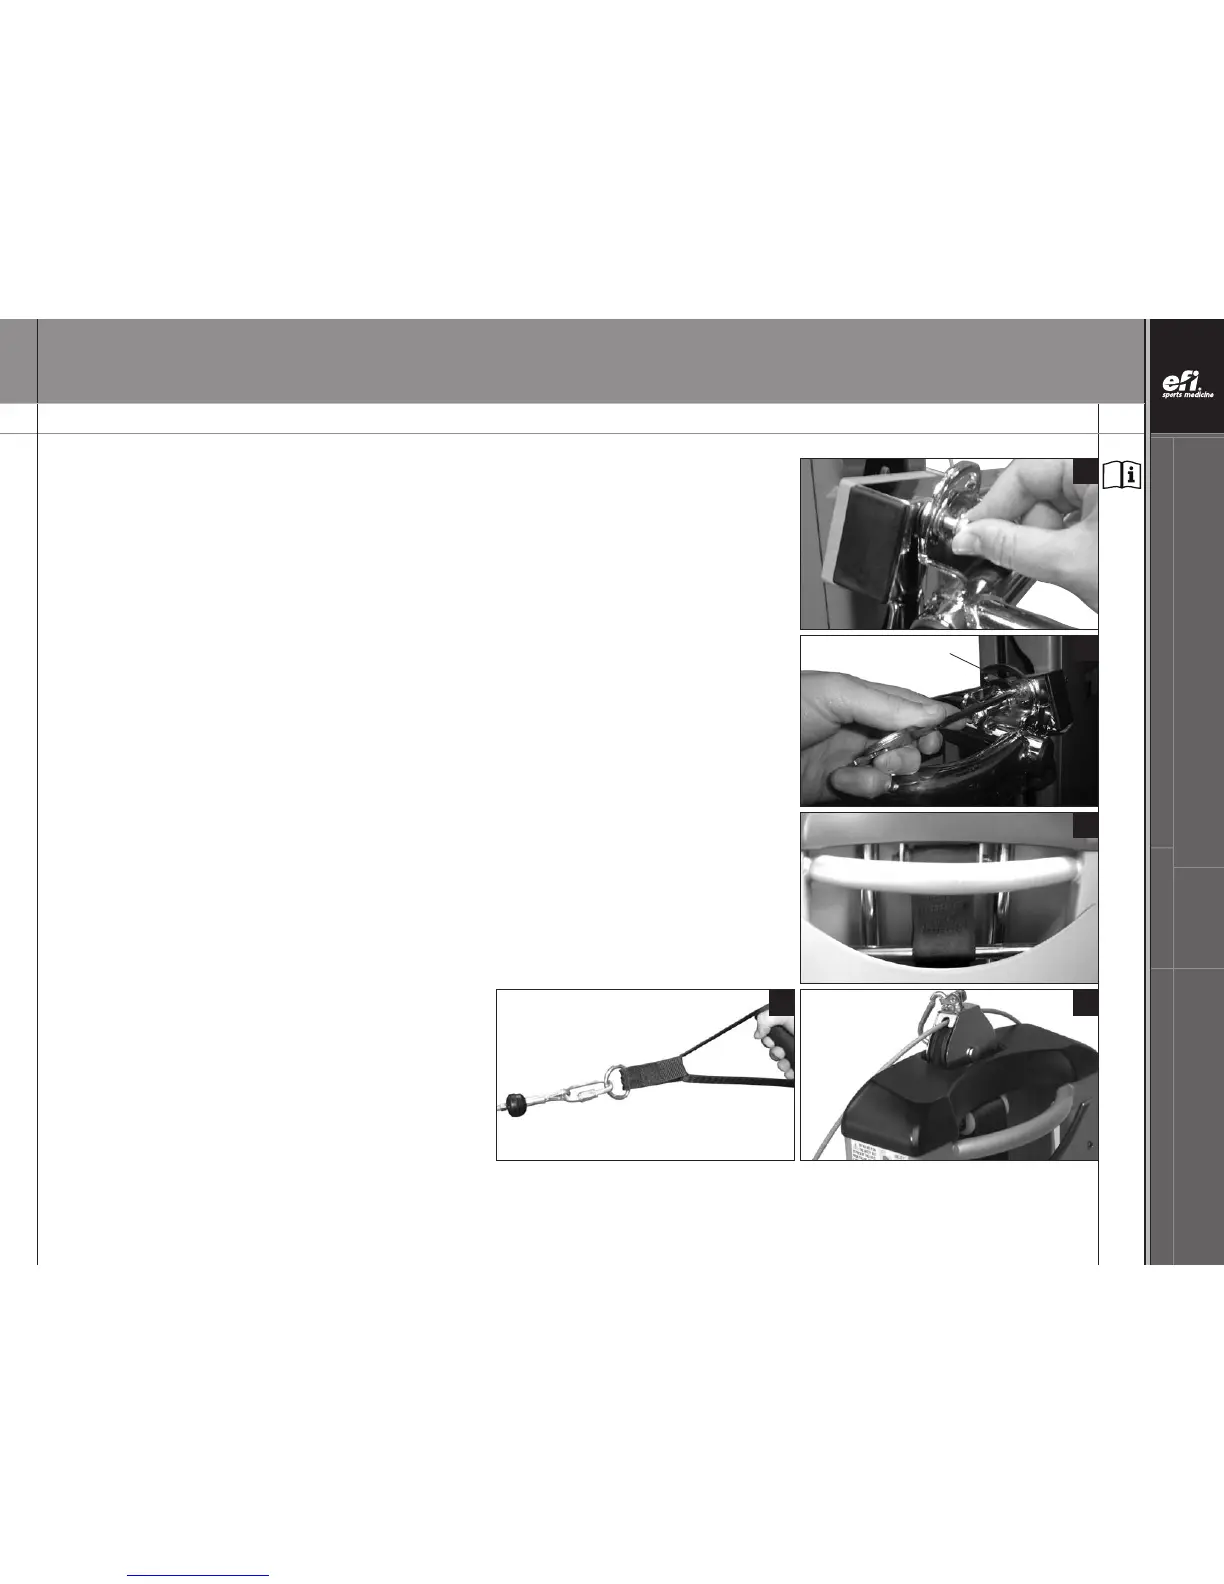
33.
Place another Bronze Washer (HH) on the screw on the other side of the bracket.
Thread the screw into the hole in the rail. Align the screw with the hole in the rail inside the
LAT Bar bracket and finger tighten the screw.
34. Tighten the Socket Head Screw (JJ) with the hex end handle of the Wrench (GG).
REPEAT PHASE 2 - Position the LAT Bar (Y) on the opposite side.
REPEAT PHASE 3 - Attach the LAT Bar bracket on the opposite side.
Then use both Wrenches (GG) to tighten the nuts on the Tower Crossbar (Z) until the nut is flush
with the end of the shaft.
35. A counterweight system is housed inside your GTS Tower (A). After installing the LAT Bars (Y)
and before exercising on your GTS, be sure to raise the rails to level 8 to re-center the
counterweight strap on the Tower Crossbar (Z).
Then check that the plastic Rectangular Bushings (V) are not tight against the Tower (A) sides.
Hold the Rails (K, N) above the Tower Hook at level 8 and push the Tower (A) back with one
hand, then let go. The Tower (A) should rock forward immediately. If the Tower (A) does not rock
forward by itself, loosen the nyloc nuts on the Tower Crossbar (Z) and repeat the process. If this
doesn’t correct the problem call efi Sports Medicine Customer Service.
With these steps (14 - 35) completed, your
LAT Bars (BB) are assembled.
36. Attach the Handles (MM) to the cable ends using
the Quick Links (KK).
37. Store the center pulley, when not in use, in the
Tower Pulley Pocket (CC), located at the top
of the Tower (A).
NOTE: Letters in (parentheses) refer to the PARTS IDENTIFIER on page 3 and/or the PARTS ASSEMBLY on page 4. Use as needed for clarification.
Socket Head Screw