NOTE: Letters in (parentheses) refer to the PARTS IDENTIFIER on page 3 and/or the PARTS ASSEMBLY on page 4. Use as needed for clarification.
GETTING STARTED
Keep hands, fingers, hair, etc. away from all moving parts. Avoid touching hinges.
Participants using GTS should wear athletic shoes and comfortable lightweight clothing. Long hair
should be tied back to avoid contact with the center pulley, center hinge or rollers. Before use, check to
ensure that all GTS parts are in place and working properly and the Support Strut Knob (M) is engaged.
Begin the exercise program at a level where participants can perform the exercise with good form
throughout the exercise set. As participants’ fitness level progress, raise the incline to increase the
load and level of resistance. Build gradually to higher resistance levels, always keeping form and control.
Avoid using momentum during cable exercises.
Remember to control the glideboard at all times, particularly when getting on or off the GTS.
The following tips will help you stabilize the glideboard as you approach the unit for mounting in
various positions.
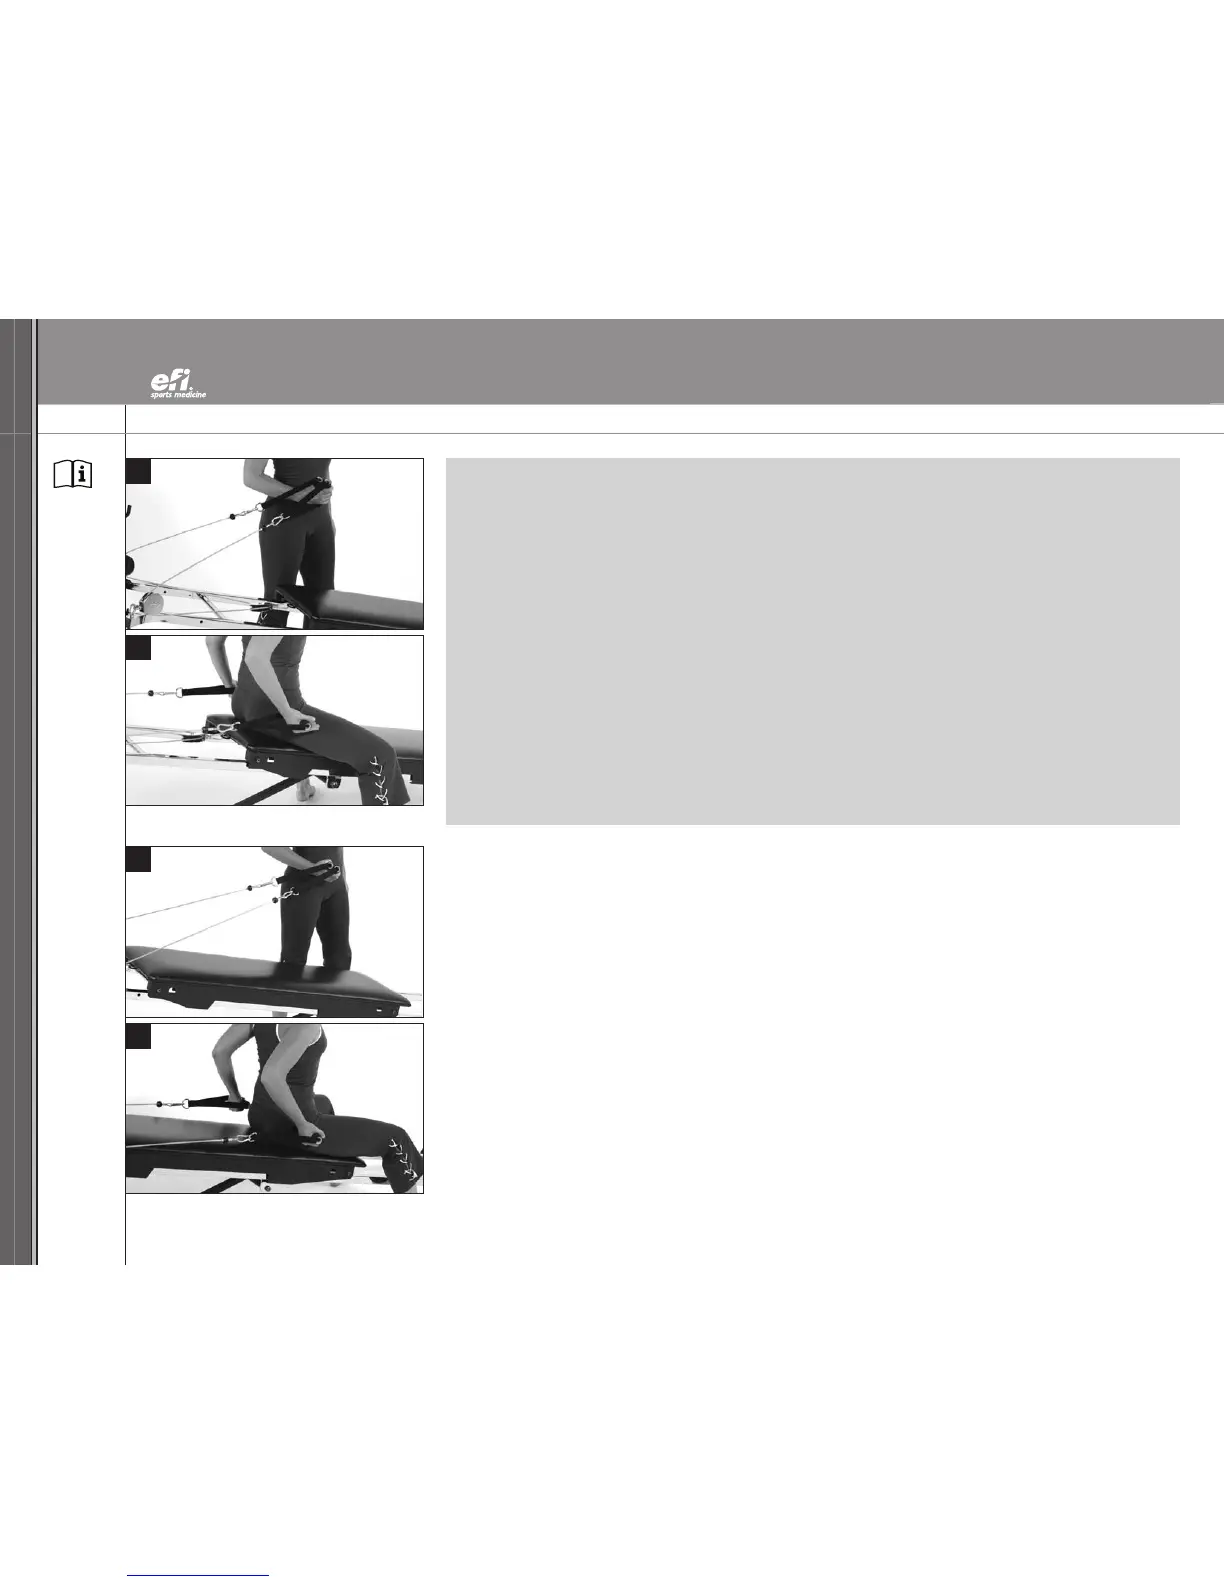
PROPER FORWARD ANCHORING SEQUENCE WITH DYNAMIC ARM PULLEY SYSTEM (W)
ATTACHED TO THE GLIDEBOARD (G)
75. Grasp both Handles (T) in the hand closest to the Tower (A) as you stand to one side of the GTS.
76. Pull the Glideboard (G) up the Rails (K,N) and sit in the proper position for the specific exercise
you will perform. If you are performing a sitting exercise, sit at the top of the Glideboard (G).
77-78. If the exercise requires you to lie back, pull the Glideboard (G) up so you can sit at the bottom of the
Glideboard (G) with one pulley Handle (T) in each hand.
75
76
77
78