NOTE: Letters in (parentheses) refer to the PARTS IDENTIFIER on page 3 and/or the PARTS ASSEMBLY on page 4. Use as needed for clarification.
28
29
30
31
INSTALL LAT BARS (CONTINUED)
POSITION THE LAT BARS - PHASE 2 (CONTINUED)
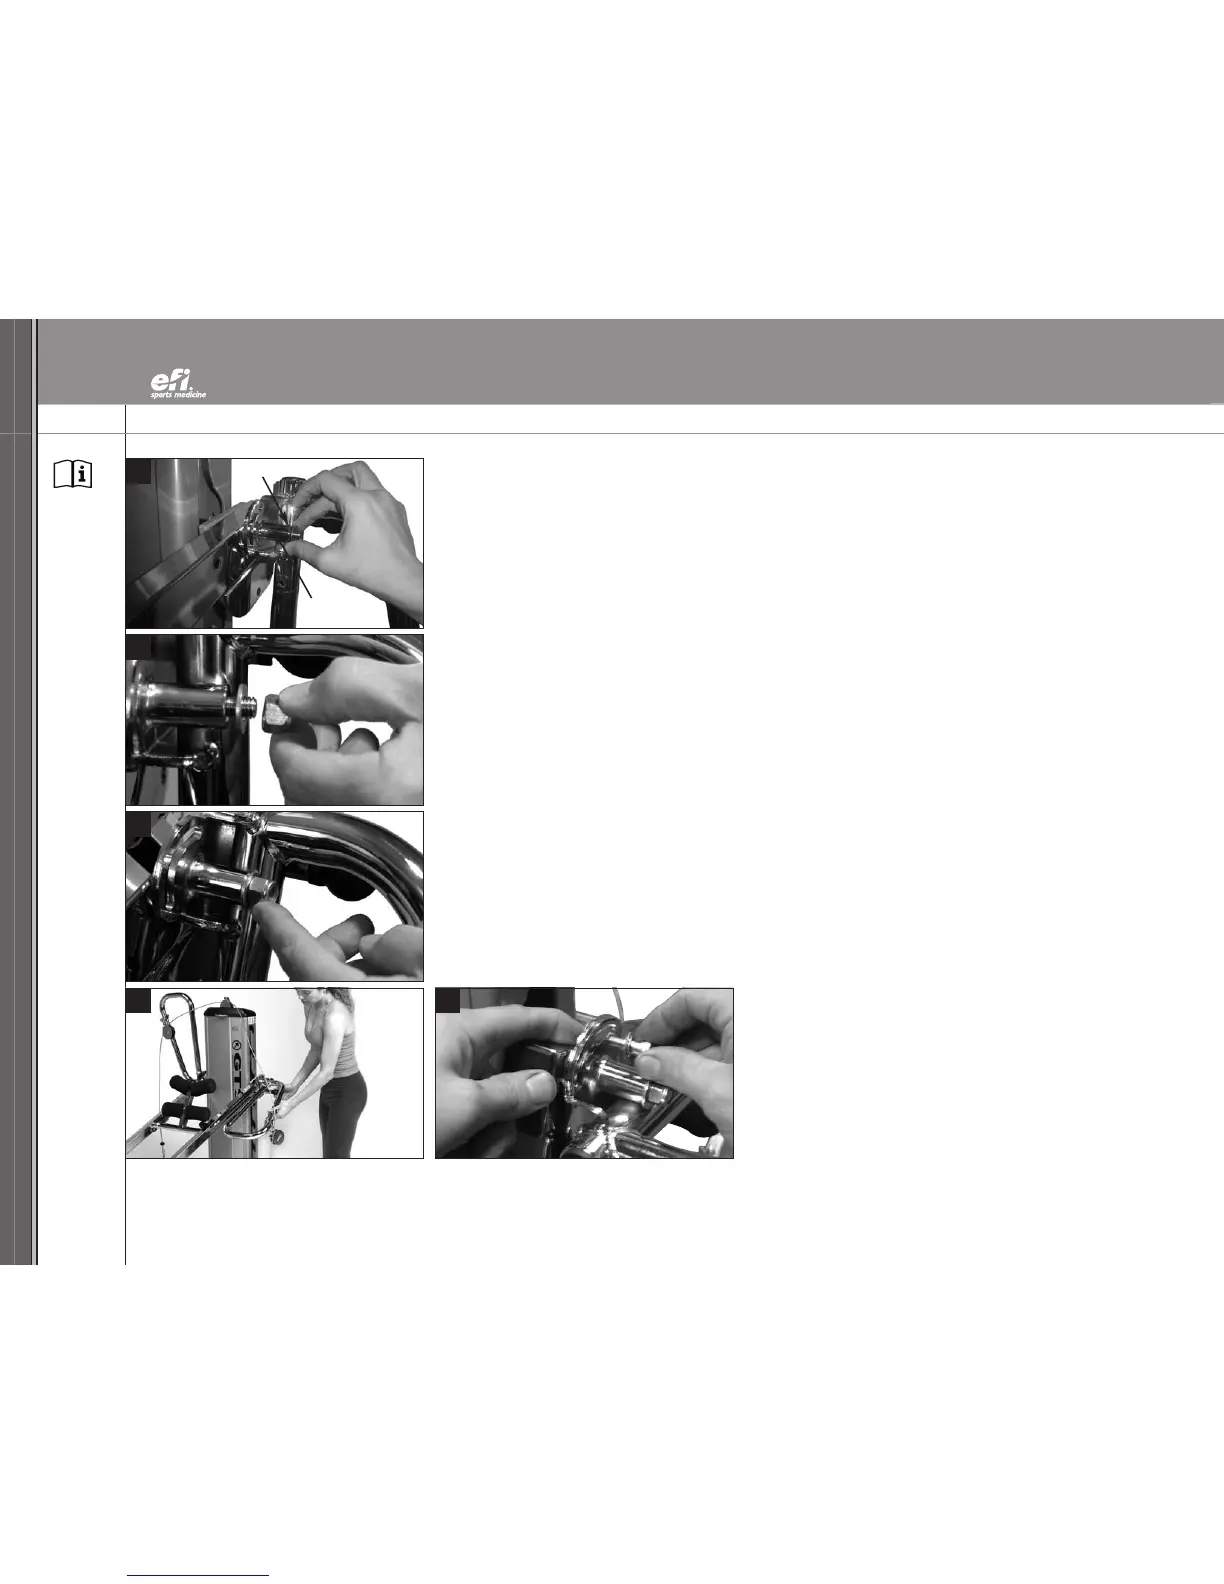
28.
Return the Chrome Washer (II) to the end of the Tower Crossbar (Z) that extends beyond the
LAT Bar cylinder.
29. Hold the LAT Bar (Y) steady with one hand. Attach and finger-tighten the nyloc nut onto the
Tower Crossbar (Z) with the other hand.
30. Press against the nyloc nut to push the Tower Crossbar (Z) until it lies flush against the LAT Bar
cylinder. This will help seat the LAT Bar (Y) against the rail.
ATTACH THE LAT BAR BRACKET - PHASE 3
31. Lower the Lat Bar (Y) to the pull-up position. Remove the remaining contents from your
Hardware Packet (contents of Hardware Packet shown on bottom of page 4).
32. Place a Chrome Washer (II) followed by a Bronze Washer (HH) on a Socket Head Screw (JJ).
Feed the Socket Head Screw (JJ) partially through the elongated slot .
Place another Bronze Washer (HH) on the screw on the other side of the bracket.
Thread the screw into the hole in the rail. Align the screw with the hole in the rail inside the
LAT Bar bracket and finger-tighten the screw.
32
Chrome Washer
Tower Crossbar