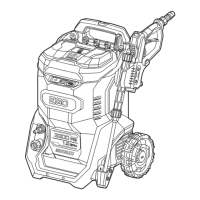
56V LITHIUM-ION PRESSURE WASHER — HPW2000E
11
5. If the pairing has failed, the speed indicators on the
washer and the gun will ash three green lights and
then turn off.
Using the Remote Control
After the pairing is completed, press the speed button
once on the gun, the 5-LED fuel gauge and speed
indicator will light up. Press the speed button again to
actually change the speed.
NOTE:
◾ The 5-LED fuel gauge and speed indicator will shut off
when there is no further action on the speed button of
the gun within 10 s.
◾ The 5-LED fuel gauge indicates the battery-charge
level. When two battery packs are installed, it indicates
the level of the battery pack with the higher charge.
◾ The speed indicator on the gun is always synchronized
with the speed indicator on the pressure washer unit.
SPEED SELECTION
◾ The speed of the pressure washer could be adjusted
by the speed button on either the washer or the paired
gun.
◾ The speed of the pressure washer could be adjusted
when the washer is powered on or during spraying.
◾ Every time the speed button is pressed, the speed
will toggle among high level, TURBO level and low
level. The speed indicator displays one green light,
two green lights, or three green lights to indicate the
pressure washer running at low speed, high speed, or
TURBO, respectively.
NOTE: When only one battery pack is inserted, the TURBO
speed can not be achieved and every time the speed
button is pressed, the speed will toggle between high
level and low level.
NOTE: If the pressure washer keeps operating at TURBO
speed, the runtime per charge may be affected.
CLEANING WITH DETERGENT
WARNING: Only use detergents specically
made for use with pressure washers. Comply with the
application, disposal, and safety instructions of the
detergent manufacturer.
1. Turn the bottle of the foam cannon counterclockwise
and remove it (Fig. L1).
2. Pour detergent into the bottle.
NOTICE: The temperature of the detergent should not
exceed 60 °C.
3. Replace the foam cannon and connect it to the
quick-coupler of the gun.
4. Rotate the detergent knob to adjust the amount of
detergent added to the water ow according to your
needs (Fig. L2).
MAINTENANCE
WARNING: To prevent serious personal injury,
remove the battery pack from the product before
servicing, cleaning, changing attachments, or removing
material from the unit.
GENERAL MAINTENANCE
Avoid using solvents when cleaning plastic parts. Most
plastics are susceptible to damage from various types of
commercial solvents and may be damaged by their use.
Use a clean cloth to remove dirt, dust, oil, grease, etc.
WARNING: Do not at any time allow brake uids,
gasoline, petroleum-based products, penetrating oils,
etc. to come in contact with plastic parts. Chemicals can
damage, weaken or destroy plastic which may result in
serious personal injury.
WARNING: To reduce the risk of re, personal injury,
and product damage due to a short circuit, never immerse
your machine, battery pack or charger in uid or allow a
uid to ow inside them. Corrosive or conductive uids,
such as seawater, certain industrial chemicals, and bleach
or bleach containing products, etc., can cause a short
circuit.
REPLACING THE COIN CELL BATTERY
(Fig. M1 & M2)
WARNING: Keep out of reach of children.
Swallowing can lead to chemical burns, perforation of soft
tissue, and death. Severe burns can occur within 2 h of
ingestion. Seek medical attention immediately.
NOTICE: Never push the battery directly into the
compartment (Fig. M3). Otherwise, the two clips will be
damaged, causing failure of the gun remote control.
NOTE: Repair the gun with the pressure washer after the
coin cell battery is replaced following the instructions in
the section “Short Pressure Gun Pairing”.
CLEANING THE FILTERS
◾ Unscrew and remove the knob on the water inlet port,
and then take out the metal mesh from the water inlet
port, rinse the metal mesh or replace it if necessary
(Fig. N1).
 Loading...