56V LITHIUM-ION CORDLESS 20" CHAIN SAW — CS2000/CS2000-FC 41
NOTICE: This is a good time to inspect
the drive sprocket for excessive wear or
damage.
Assembling the New Bar and
Chain
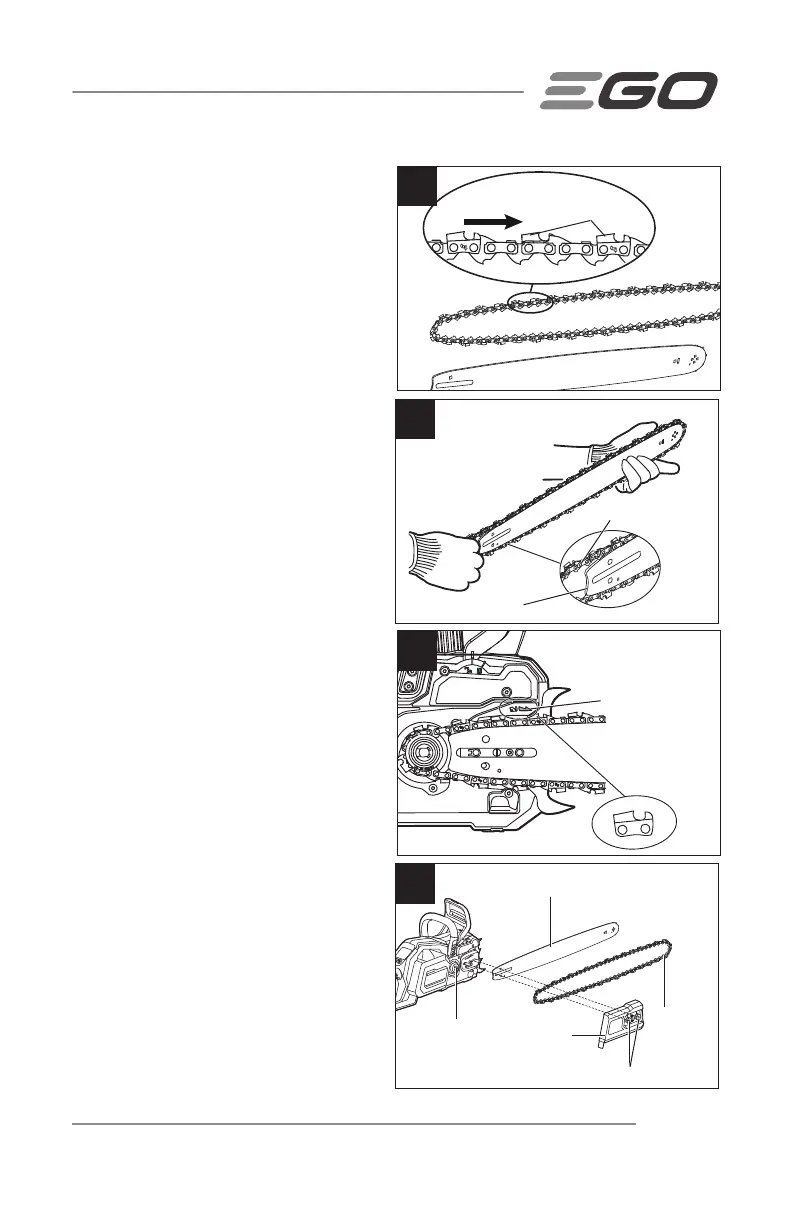
1. Lay the new saw chain in a loop on
a flat surface and straighten any
kinks (Fig. 28).
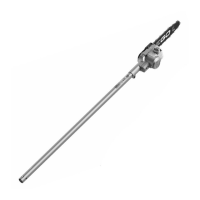
2. Place the chain drive links into the
guide bar groove. Position the chain
so there is a loop at the back of the
guide bar (Fig. 29).
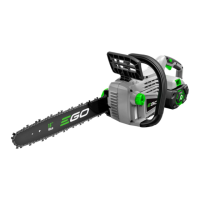
3. Hold the chain in position on the
guide bar and place the loop around
the drive sprocket of the saw.
NOTICE: When looping the saw chain
onto the guide bar, make sure that, after
mounting the guide bar onto the saw, the
direction of the saw chain cutter match
the cutter pattern and rotation direction
arrow on the housing (Fig. 30a). If they
face in opposite directions, reassemble
the saw chain onto the guide bar with the
cutters facing the same direction.
4. Replace the side cover onto the
chain saw housing and fully tighten
the two lock nuts.
NOTE: Tension the chain by following
the next chapter “ADJUSTING THE
CHAIN TENSION” instructions.
5. Rotate the chain by hand to check
whether the chain is properly
assembled without binding.
Otherwise, reassemble the chain
and bar.
29
Guide Bar Groove
Chain Drive Links
28
Chain Drive Links
Chain Cutters
Rotation Direction
30b
Guide Bar
Drive Sprocket
Side
Cover
Saw Chain
Lock Nuts
30a
Rotation
Direction Arrow