pack(s) from the tool when assembling parts.
WARNING: If any parts are damaged or missing, do not operate this product until the parts are replaced. Use of this
product with damaged or missing parts could result in serious personal injury.
WARNING: Do not attempt to modify this tool or create accessories not recommended for use with this product. Any
such alteration or modification is misuse and could result in a hazardous condition leading to serious injury.
UNPACKING
Use two people to grasp the rear handle and the front part of the product at the same time and carefully lift the
tool up and out of the carton. Remove any other accessories from the carton. Make sure that all items listed in
the packing list are included.
CAUTION: Heavy object. Team lift required. At least two persons are required to be lift this snow blower out of
the package.
WARNING: Do not use this product if any parts on the packing list are already assembled to your product when
you unpack it. Parts on this list are not assembled to the product by the manufacturer and require customer
installation. Use of a product that may have been improperly assembled could result in serious personal injury.
Inspect the product carefully to make sure that no breakage or damage occurred during shipping.
Do not discard the packing material until you have carefully inspected and satisfactorily operated the tool.
If any parts are damaged or missing, please return the product to the place of purchase.
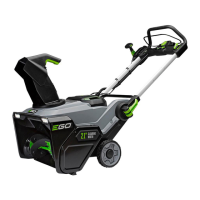
LIST OF CONTENTS
PART NAME QUANTITY
Snow Blower 1
Snow-Discharge Chute Assembly 1
Handle Assembly 1
Operator’s Manual 1
Chute Clean Tool 1
Shear Pin 2
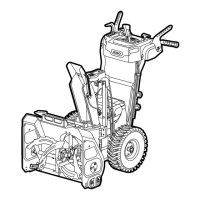
TO INSTALL THE HANDLE ASSEMBLY
NOTICE: The handle assembly requires assembly before operating the snow blower (Fig.2).
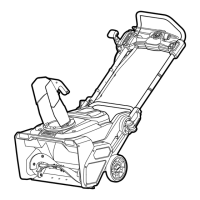
1. Loosen the four locking knobs and remove the four bolts from the rear handle (Fig.3).
2. Lift the handle assembly, align the holes in the side rails with the holes in the rear handle, select the preferred
handle height, then secure the handle assembly with the bolts and locking knobs (Fig.4).
Please see section “HANDLE HEIGHT ADJUSTMENT” for detailed adjustment instructions.
 Loading...