EN
- 14 -
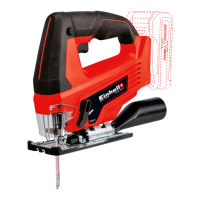
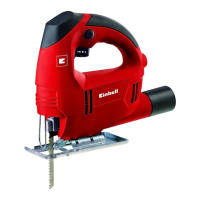
6. Operation
6.1 On/Off switch (Fig. 10/Item 2+3)
Switching on:
Press the locking button (2) and the On/Off switch
(3).
Infi nitely variable stroke speed control is possible
with the On/Off switch (3). The further you push
the switch, the higher the stroke speed.
Switching off :
Release the locking button (2) and the On/Off
switch (3).
6.2 Setting the pendulum action (Fig. 11/Item
7)
•
The strength of the pendulum action of the
saw blade (10) can be adjusted using the
selector switch for pendulum action (7).
•
You can adjust the cutting speed, cutting
performance and appearance of the cut to the
workpiece you want to saw.
Set the selector switch for pendulum action (7) to
one of the following positions:
Position A = No pendulum action
Material: Rubber, ceramic, aluminium, steel
Please note: For fi ne clean cuts, thin materials
(e.g. sheet steel) and hard materials.
Position B = Small pendulum action
Material: Plastic, wood, aluminium
Please note: For hard materials
Position C = Medium pendulum action
Material: Wood
Position D = Large pendulum action
Material: Wood
Please note: For soft materials and sawing along
the grain
The best combination of speed and pendulum
action depends on the material you want to saw.
We recommend you to make a trial cut on a waste
piece in order to check the ideal settings.
6.3 Making cuts
Caution!
•
Make sure that the On/Off switch (3) is not
depressed. Only then should you connect the
battery pack to the equipment.
•
Do not switch on the jigsaw until you have
fitted a saw blade.
•
Use only saw blades that are in perfect
condition. Replace blunt, bent or cracked saw
blades immediately.
•
Place the saw foot flat on the workpiece you
want to saw. Switch on the jigsaw.
•
Allow the saw blade to accelerate until it
reaches full speed. Then slowly move the saw
blade along the cutting line. Exert only gentle
pressure on the saw blade as you do so.
•
When cutting metal, apply a suitable coolant
along the line you want to cut.
6.4 Sawing out sections (Fig. 12)
Drill a 0.4 in. hole in the section you want to saw
out. Insert the saw blade into this hole and start to
saw out the required section.
6.5 Making miter cuts
•
Set the angle on the soleplate (see section
5.4).
•
Observe the instructions in section 6.3.
•
Make the cut.
6.6 Charging the Li battery pack
The corresponding instructions can be found
in the original operating instructions for your
charger.
6.7 Battery capacity indicator (Fig. 9 / item
16)
Press the battery capacity indicator switch (17).
The battery capacity indicator (16) shows the
charge status of the battery using 3 LEDs.
All 3 LEDs lit:
The battery is fully charged.
2 or 1 LED(s) lit:
The battery has an adequate remaining charge.
1 LED fl ashing:
The battery is empty, recharge the battery.
All LEDs fl ashing:
The battery pack has been deep-discharged and
is defective. Do not re-use or charge a defective
battery pack.
Anl_TC_JS_18_Li_SPK7_USA.indb 14Anl_TC_JS_18_Li_SPK7_USA.indb 14 24.03.2020 11:24:1124.03.2020 11:24:11