cable to the push bar with the cable clips (Fig. 5/Item 14).
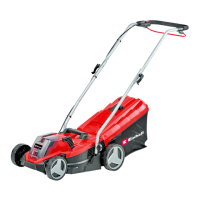
Mounting the catch basket (see Fig. 6)
Before you t the catch basket you must ensure that the motor is switched o and the blade is not rotating. Lift the
ejector flap (Fig. 6/Item 6) with one hand. With the other hand, hold the catch basket by the handle and hook it in
from above (Fig. 6).
Filling level indicator of the grass collector
The grass box is equipped with a filling level indicator (Fig. 1/Item 15). which is opened by the air ow that the lawn
mower generates during operation. If the flap closes during mowing, the grass collecting device is full and must be
emptied. To ensure the proper functioning of the filling level indicator, the holes under the flap must always be kept
clean and passable.
Adjusting the cutting height Caution!
Adjust the cutting height only when the machine has been switched o and the safety plug has been pulled out.
The cutting height is adjusted as follows (see Fig. 7):
1. Push the lever (5) downwards.
2. Set the lever (5) to the desired cutting height.
3. Release the lever (5) and check that it is securely seated in the lock.
Reading o the cutting height
The cutting height can be set between 25-65 mm in 5 intervals, and can be read o on the scale.
Before you begin to mow, check to ensure that the blade is not blunt and that none of the fasteners are damaged. To
prevent any imbalance, replace blunt and/or damaged blades. To carry out this check, first switch o the motor and
pull out the safety plug.
Charging the battery (Fig. 8)
1. Take the battery pack out of the equipment. Do this by pressing the push lock button (Fig.9/Item c).
2. Check that your mains voltage is the same as that marked on the rating plate of the battery charger. Insert the
power plug of the charger (9) into the socket outlet. The green LED will then begin to ash.
3. Insert the battery pack (8) into the battery charger (9).
4. In the section entitled Charger indicator you will nd a table with an explanation of the LED indicator on the
charger.
The battery pack can become a little warm during the charging. This is normal. If the battery pack fails to charge,
check:
whether there is voltage at the socket outlet whether there is good contact at the charging contacts If the battery pack
still fails to charge, send
the charging unit and the battery pack
to our customer service center.
To ensure that the battery pack provides long service, you should take care to recharge it promptly. You must
recharge the battery pack when you notice that the performance of the device drops. Never allow the battery pack to
become fully discharged. This will cause it to develop a defect.
Battery capacity indicator (Fig. 9)
Press the switch for the battery capacity indicator (Item A). The battery capacity indicator (Item B) shows the charge
status of the battery using 3 LEDs.
All 3 LEDs are lit:
The battery is fully charged.
2 or 1 LED(s) are lit:
The battery has an adequate remaining charge.
1 LED ashes:
The battery is empty, recharge the battery.
All LEDs ash: