GB
- 18 -
To ensure that the battery pack provides long ser-
vice, you should take care to recharge it promptly.
You must recharge the battery pack when you
notice that the performance of the device drops.
Never allow the battery pack to become fully di-
scharged. This will cause it to develop a defect.
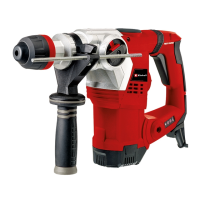
6.2 Drill / Impact drill / Chisel selector switch
(Fig. 8)
•
For drilling, press the button (E) on the rotary
switch (2) and simultaneously turn the rotary
switch (2) to position A.
•
For impact drilling, press the button (E) on the
rotary switch (2) and simultaneously turn the
rotary switch (2) to position B.
•
To set the chisel position, press the button (E)
on the rotary switch (2) and simultaneously
turn the rotary switch (2) to setting C.
•
Important! In this setting the chisel does not
latch in place!
•
In this setting you can turn the chisel by hand
into the required position.
•
For chiseling, press the button (E) on the
rotary switch (2) and simultaneously turn the
rotary switch (2) to position D.
•
The chisel is locked in position D.
Important!
You need apply only slight contact pressure for
impact drilling. Excessive contact pressure will
place unnecessary strain on the motor. Check drill
bits at regular intervals. Sharpen or replace blunt
drill bits.
6.3 Changeover switch (Fig. 9)
Using the changeover switch (3) above the On/
Off switch (4) you can select the direction of rota-
tion of the equipment and lock the equipment so
that it cannot be switched on accidentally. You can
select between clockwise and counter-clockwise
rotation. To avoid causing damage to the gearing,
the direction of rotation must only be changed
when the equipment is at a standstill. When the
changeover switch (3) is in the middle position,
the On/Off switch (4) is blocked.
Danger!
To avoid danger, the machine must only be held
using the two handles.
Otherwise you may suff er an electric shock if you
drill into electric cables!
6.4 On/Off switch (Fig. 9)
Infi nitely variable speed control is possible with
the On/Off switch (4). The further you push the
switch, the higher the speed of the equipment.
Switching on:
Press the On/Off switch (4).
Switching off :
Release the On/Off switch (4).
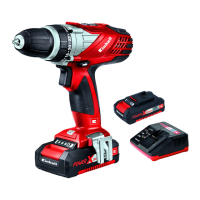
6.5 Battery capacity indicator (Fig. 1.1)
Press the button for the battery capacity indicator
(d). The battery capacity indicator (7) shows the
charge status of the battery using 3 LEDs.
All 3 LEDs are lit:
The battery is fully charged.
2 or 1 LED(s) are lit:
The battery has an adequate remaining charge.
1 LED fl ashes:
The battery is empty, recharge the battery.
All LEDs blink:
The battery temperature is too low. Remove the
battery from the equipment, keep it at room tem-
perature for one day. If the fault reoccurs, this me-
ans that the rechargeable battery has undergone
exhaustive discharge and is defective. Remove
the battery from the equipment. Never use or
charge a defective battery.
6.6 LED light (Fig. 1)
The LED light (9) can be used in poor lighting
conditions to illuminate the area where you want
to drill or screw. The LED light (9) will come on
automatically as soon as you press the On/Off
switch (4).
Anl_TE_HD_18_20_Li_SPK13_4257242.indb 18 06.07.2023 13:03:19