EasyManua.ls Logo

Elation MAGIC-260 User Manual

Elation MAGIC-260
34 pages
To Next Page IconTo Next Page
Page #1 background imageLoading...
Page #1 background image
Elation Professional · Los Angeles, Ca 90058 · www.elationlighting.com
MAGIC-260
U S E R M A N U A L
Version 04-06 Rev 1.0
Question and Answer IconNeed help?

Do you have a question about the Elation MAGIC-260 and is the answer not in the manual?

Elation MAGIC-260 Specifications

General IconGeneral
BrandElation
ModelMAGIC-260
CategoryLighting Equipment
LanguageEnglish

Summary

General Introduction to Magic 260 Controller

Safety Information and Maintenance Guidelines

Product Information and Warnings

Product Modification Warning

Warns against modifying the product, which could affect safety and compliance.

Manual Updates and Changes Notice

States that information and specifications may change without notice.

Copyright Information

States copyright ownership and reproduction restrictions.

Product Registration and Warranty

Magic 260 Features and Specifications

Front Panel Controls Overview

Function Buttons Usage

Describes the multipurpose function buttons and their behavior with FIXTURE, SCENE, SHOW modes.

Fixture Button Functionality

Explains the role of the FIXTURE button in selecting fixtures for programming.

Auxiliary Buttons Control

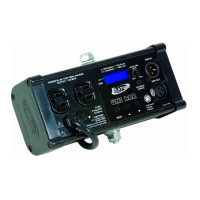
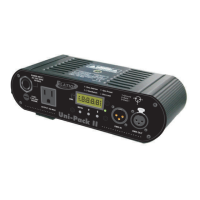
Details how auxiliary buttons control non-DMX fixtures via a DMX power pack.

LCD Display Information

Describes the LCD display's function for setup, programming, and playback feedback.

Front Panel Controls and Functions (Continued)

Menu Button for System Options

Explains the MENU button's use for accessing setup and sub-menus.

Record Button for Scenes and Shows

Describes the RECORD button for recording scenes, shows, and editing settings.

Enter Button for Confirmation

Details the ENTER button's function for confirming selections and accessing hidden menus.

Delete Button for Data Removal

Explains the DELETE button for removing scenes, shows, and accessing hidden menus.

Help Button for Instructions

Describes the HELP button for accessing step-by-step programming instructions.

USB Light and Data Input

Explains the USB port for work lights, memory sticks, and data transfer.

Front Panel Controls and Functions (Continued)

Fade Fader for Playback Adjustment

Describes the FADE fader for temporarily changing fade time during playback.

Speed Fader for Playback Adjustment

Describes the SPEED fader for temporarily changing speed during playback.

Master Fader for Output Control

Explains the MASTER fader's role in adjusting fixture output levels.

Fine Adjustment Button

Details the FINE button for making small, incremental adjustments with controls.

GO Button for Show Step Triggering

Explains the GO button for manually triggering show steps.

Scene Button for Playback/Recording

Describes the SCENE button for recording or playing back scenes.

Joystick for Fixture Movement

Explains the JOYSTICK's function for controlling fixture X/Y channels.

Show Button for Playback/Recording

Describes the SHOW button for recording or playing back shows.

Data Wheels for Fixture Control

Details the use of data wheels for adjusting fixture attributes and presets.

Front Panel Controls and Functions (Continued)

Small Data Wheel for Channel Navigation

Explains the small data wheel (#5) for viewing additional fixture channels in the LCD.

Audio Button for Sound Mode

Describes the AUDIO button for activating sound-reactive show playback.

Tapsync Button for Tempo Control

Explains the TAPSYNC button for manually setting show tempo.

Blackout Button for Output Control

Describes the BLACKOUT button for bringing all fixture output to zero.

Rear Panel Connections Overview

LCD Backlight Brightness Adjustment

Explains the knob for adjusting the LCD display's brightness.

Audio RCA Input Port

Describes the RCA input for synchronizing shows to an audio source.

MIDI THRU Connection

Details the MIDI THRU socket for connecting to other MIDI devices.

MIDI IN Connection

Explains the MIDI IN socket for receiving MIDI signals for remote control.

DMX OUT Connection

Describes how to connect the DMX OUT port to the first DMX device.

Power Switch Operation

Explains the function of the power switch to turn the unit ON or OFF.

DC IN Power Connector

Details the DC IN connector for the power supply.

Technical Specifications of Magic 260

Setup and Programming Flow Chart

DMX Data Cable Setup and Connections

Selecting and Patching Fixtures

Selecting and Patching Fixtures (Continued)

Fixture DMX Address Patching

Fixture DMX Address Patching (Continued)

Auxiliary Button Functionality

Using the Help Button

Locking and Unlocking Controller Memory

Recording Scenes on Magic 260

Recording Scenes on Magic 260 (Continued)

Using and Recording Presets

Play and Record Preset Movements as Scenes

Guides on playing preset movements and saving them as scenes.

Editing Preset Movement Settings

Recording Shows on Magic 260

Recording Shows on Magic 260 (Continued)

Playing Back Recorded Scenes

Playing Back Recorded Shows

Playing Back Recorded Shows (Continued)

Editing Recorded Scenes

Editing Recorded Scenes (Continued)

Editing Recorded Shows

Saving Memory Files via ULink to PC

Loading Memory Files via ULink from PC

Loading Memory Files via ULink from PC (Continued)

Saving Memory Files to USB Stick

Saving Memory Files to USB Stick (Continued)

Storing USB Memory Files to Computer

Reloading Memory Files to USB Stick from Computer

Deleting and Formatting USB Memory Stick

Loading Memory Files from USB Stick to Magic 260

Erasing All Programmed Memory

MIDI Chart and Control Mapping

Related product manuals