31
REPLACING THE OVEN LAMP/S (MODELS WITH INCANDESCENT LAMP/S)
WARNING: Ensure the appliance is switched off before replacing the lamp to avoid
the possibility of electric shock.
• Let the oven cavity and the heating elements to cool down.
• Switch off the electrical supply.
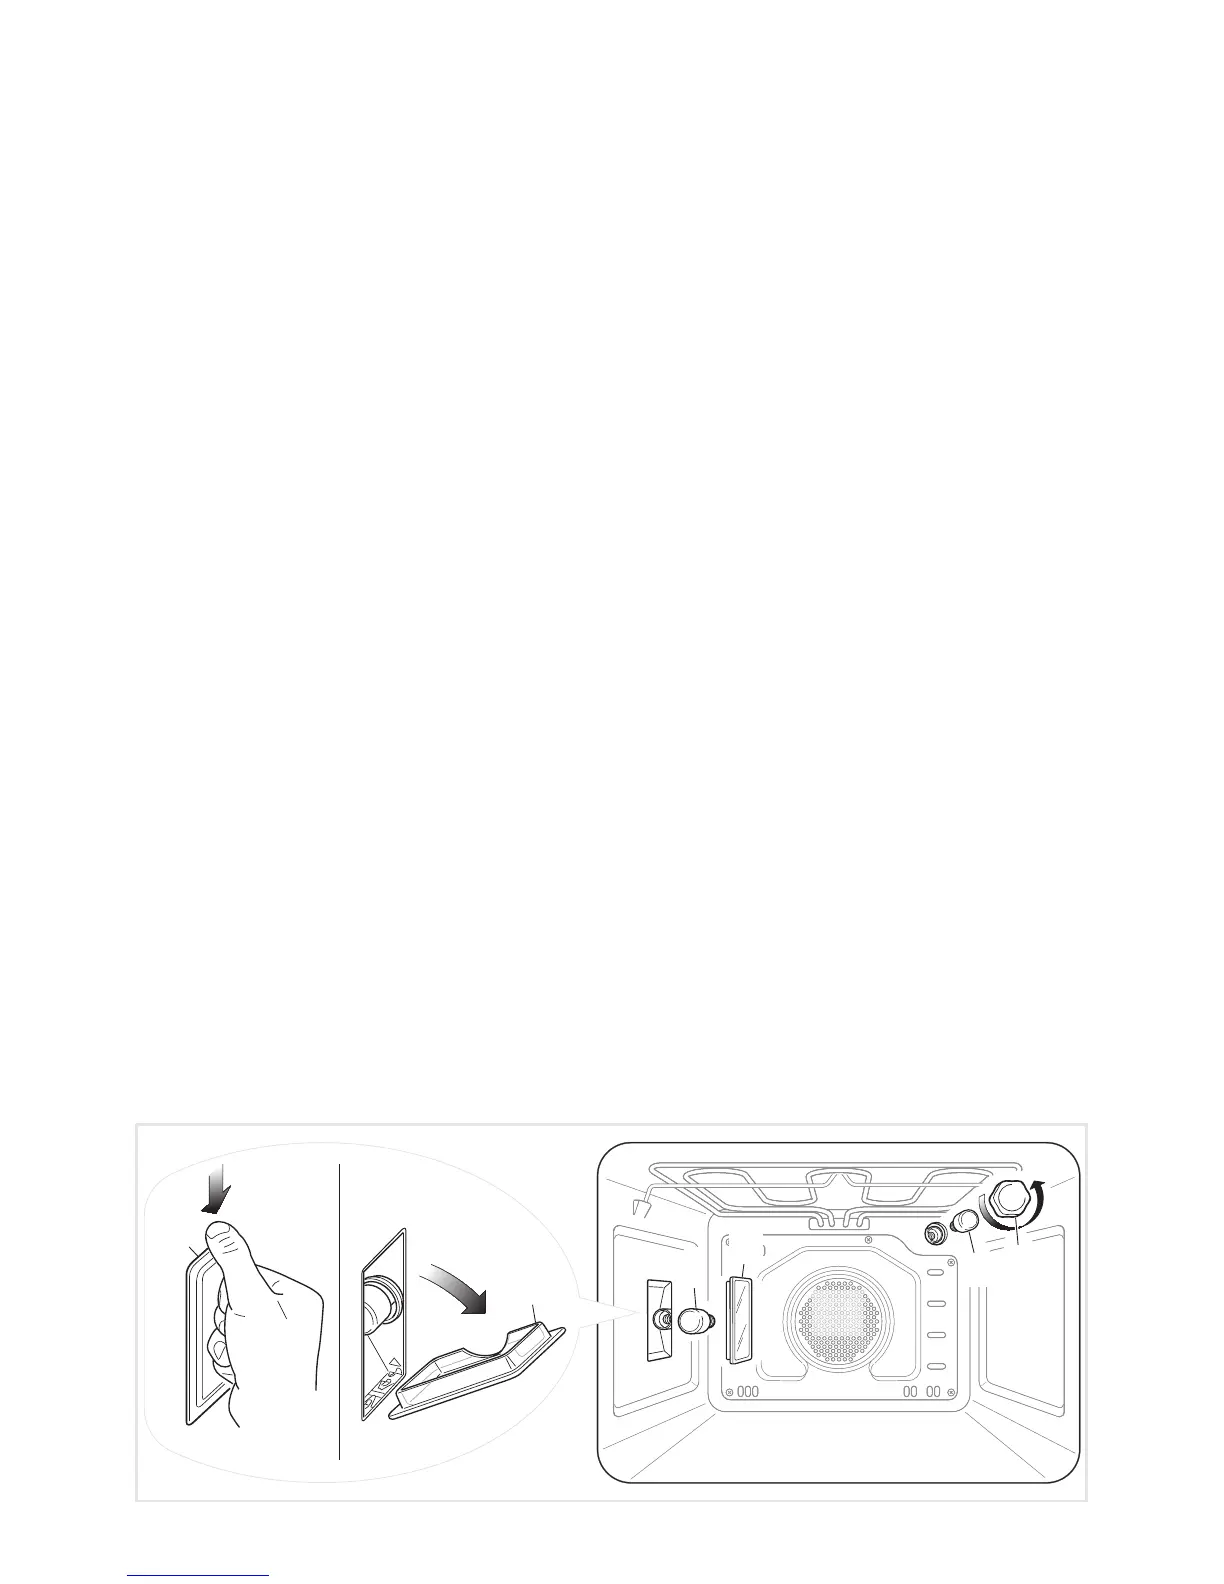
TOP RIGHT LAMP:
• Remove the protective cover “C” (g. 2.10a).
• Unscrew and replace the bulb “B” with a new one suitable for high temperatures
(300°C) having the following specications: 220-240V, 50/60Hz, E14 and same power
(check watt power as stamped in the bulb itself) of the replaced bulb.
• Ret the protective cover.
LEFT LAMP (SOME MODELS ONLY):
• Remove the left wire rack (and the side catalytic panel for the models with side catalytic
panels) by unscrewing the xing screws.
• Press down from the top the protective cover “A” (g. 2.10a) and remove it by rotating
on the lower side.
IMPORTANT: never use screwdrivers or other utensils to remove the cover “A”. This
could damage the enamel of the oven or the lampholder.
Operate only by hands.
• Unscrew and replace the bulb “B” with a new one suitable for high temperatures
(300°C) having the following specications: 220-240V, 50/60Hz, E14 and same power
(check watt power as stamped in the bulb itself) of the replaced bulb.
• Ret the protective cover “A” operating in reverse order.
ATTENTION: the notch in the inner edge of the cover must be oriented toward the
lamp.
• Assemble the left wire rack (and the side catalytic panel with the arrow up for the
models with side catalytic panels).
Note: Oven bulb replacement is not covered by your guarantee.
A
A
A
B
B
C
1
2
Fig. 2.10a
 Loading...