36
D
G
Fig. 2.25
Fig. 2.21
Fig. 2.24
H
Fig. 2.23
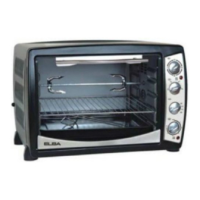
REASSEMBLING THE INNER PANE:
1. Make sure the door is locked open
(see fig. 2.18).
2. Replace the inner pane:
• Check that the four rubber pads are in
place (“D” in g. 2.21).
IMPORTANT: It is advisable, while
retting the glass, to keep pressed in
position the four rubber pads “D”, by a
nger, to avoid breakage or slippage of
the rubber pads themselves (g. 2.22).
• Check that you are holding the pane
the correct way. You should be able to
read the wording on it as it faces you.
• Insert the inner pane in the left “E” and
right “F” side guides (fig. 2.22) and
gently let it slide up to the retainers
“H” (fig. 2.23).
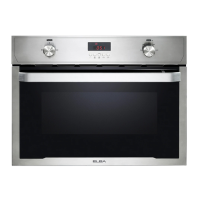
• Reassemble the seal “G” in the
correct way (fig. 2.24) by hooking
the no. 3 fixing hooks in the proper
holes (fig. 2.25).
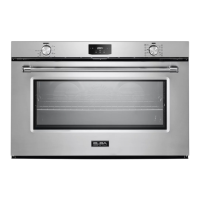
• Open completely the oven door and
close the lever “A” on the left and
right hinges (fig. 2.26).
A
Fig. 2.26
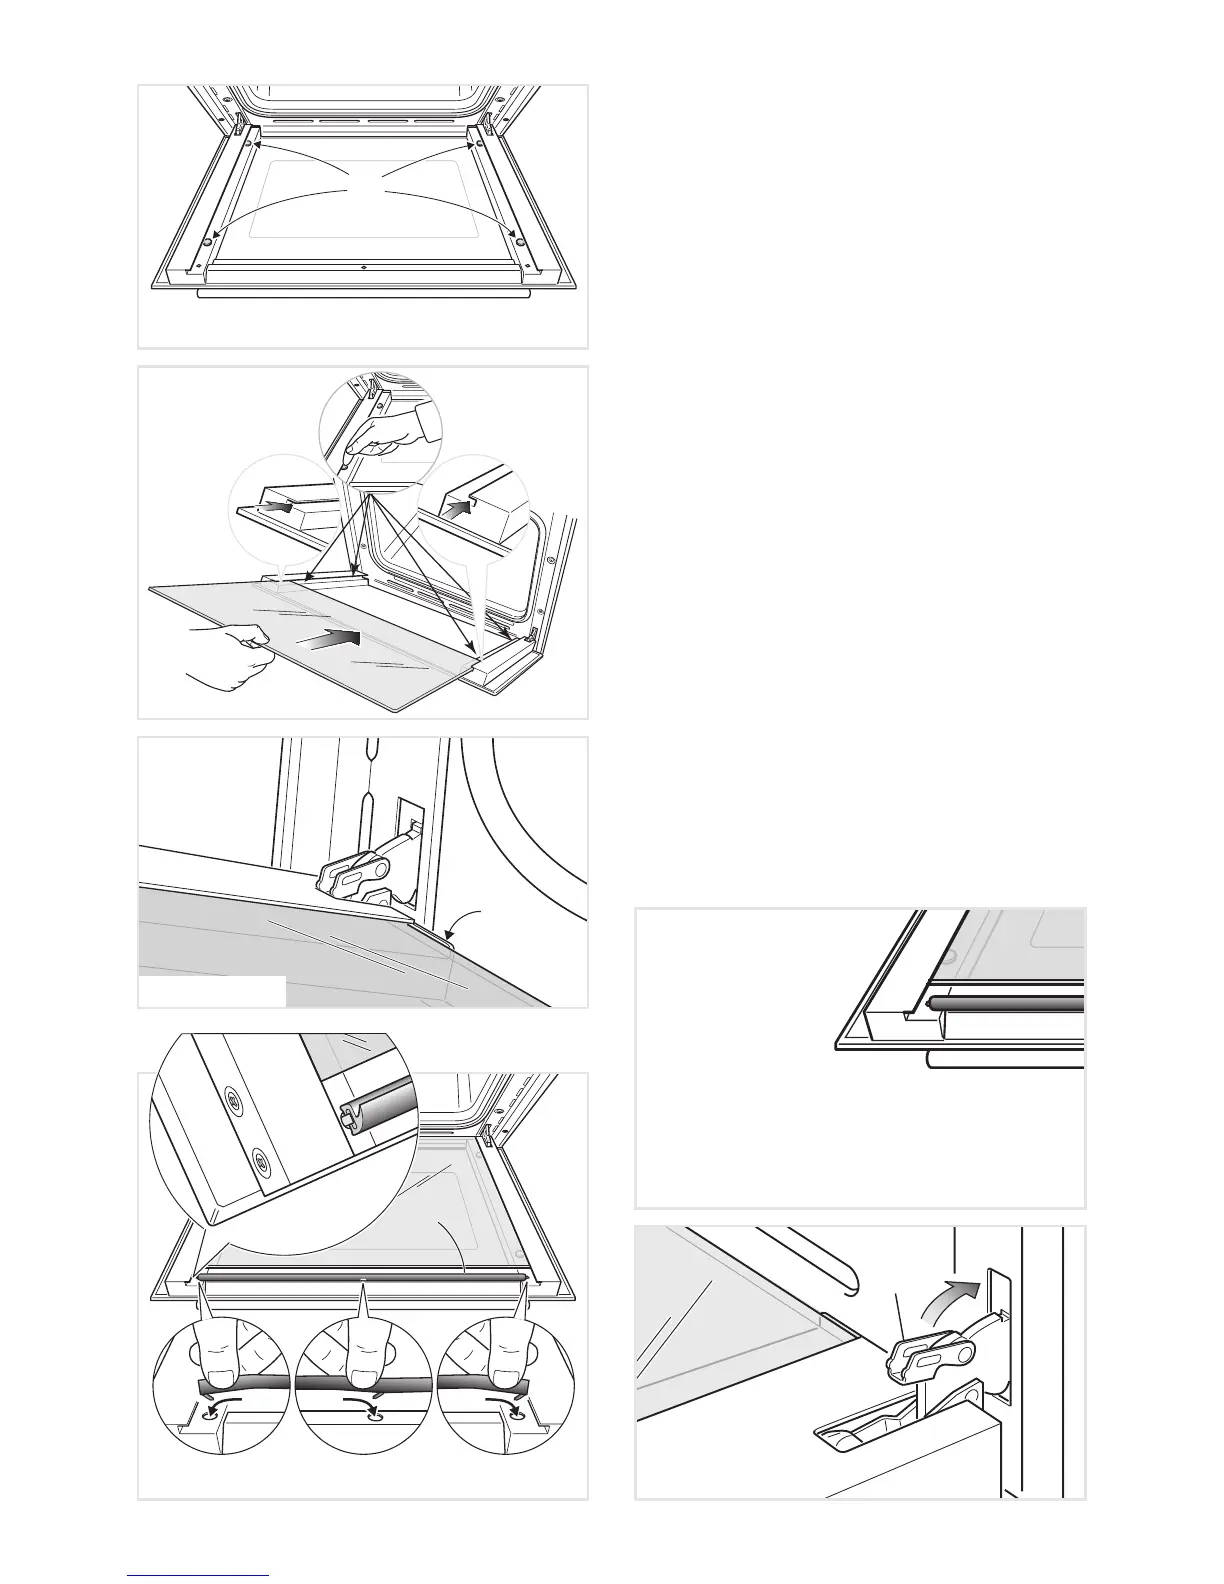
It is normal the opened gap between
the top edge of the inner glass and the
sealed gasket. This allows the cooling air
circulation.
The oven door
has a sealed
gasket in the top
part.