R
6
2.2 ATTACH GAUGE TO DOLLY
1. Turn handle fully anti-clockwise to release any pressure in the instrument.
2. Use a thumb or finger to push pin fully upwards towards the coupling.
3. Pull coupling sleeve up and insert pin into centre of dolly.
4. Release coupling sleeve.
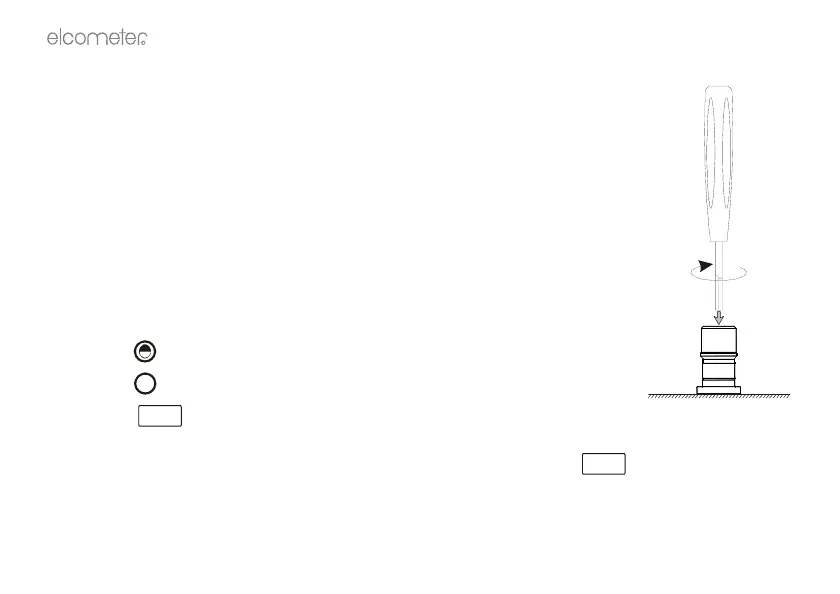
The instrument should grip the dolly firmly. If the coupling does not grip the
dolly firmly, there may be excess adhesive in the centre of the dolly.
Use the dolly tool to remove excess adhesive (Figure 2).
5. Zero pressure gauge as follows.
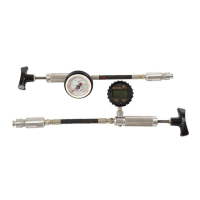
Dial pressure gauge:
Rotate knob on front of gauge to turn red drag indicator to ‘0’.
Digital pressure gauge:
• Press button to switch on gauge.
• Press button to zero gauge.
• Press button to set gauge to store the maximum force recorded
during the test.
The display indicates MAx and holds the maximum value until the
button is pressed for a second time. The Max feature is switched off when
the gauge is switched off.
Figure 2. Using
dolly tool to
remove excess
0
Max
Max