OPTIONAL ACCESSORIES
14-11SM PXD 1-E.3 GB
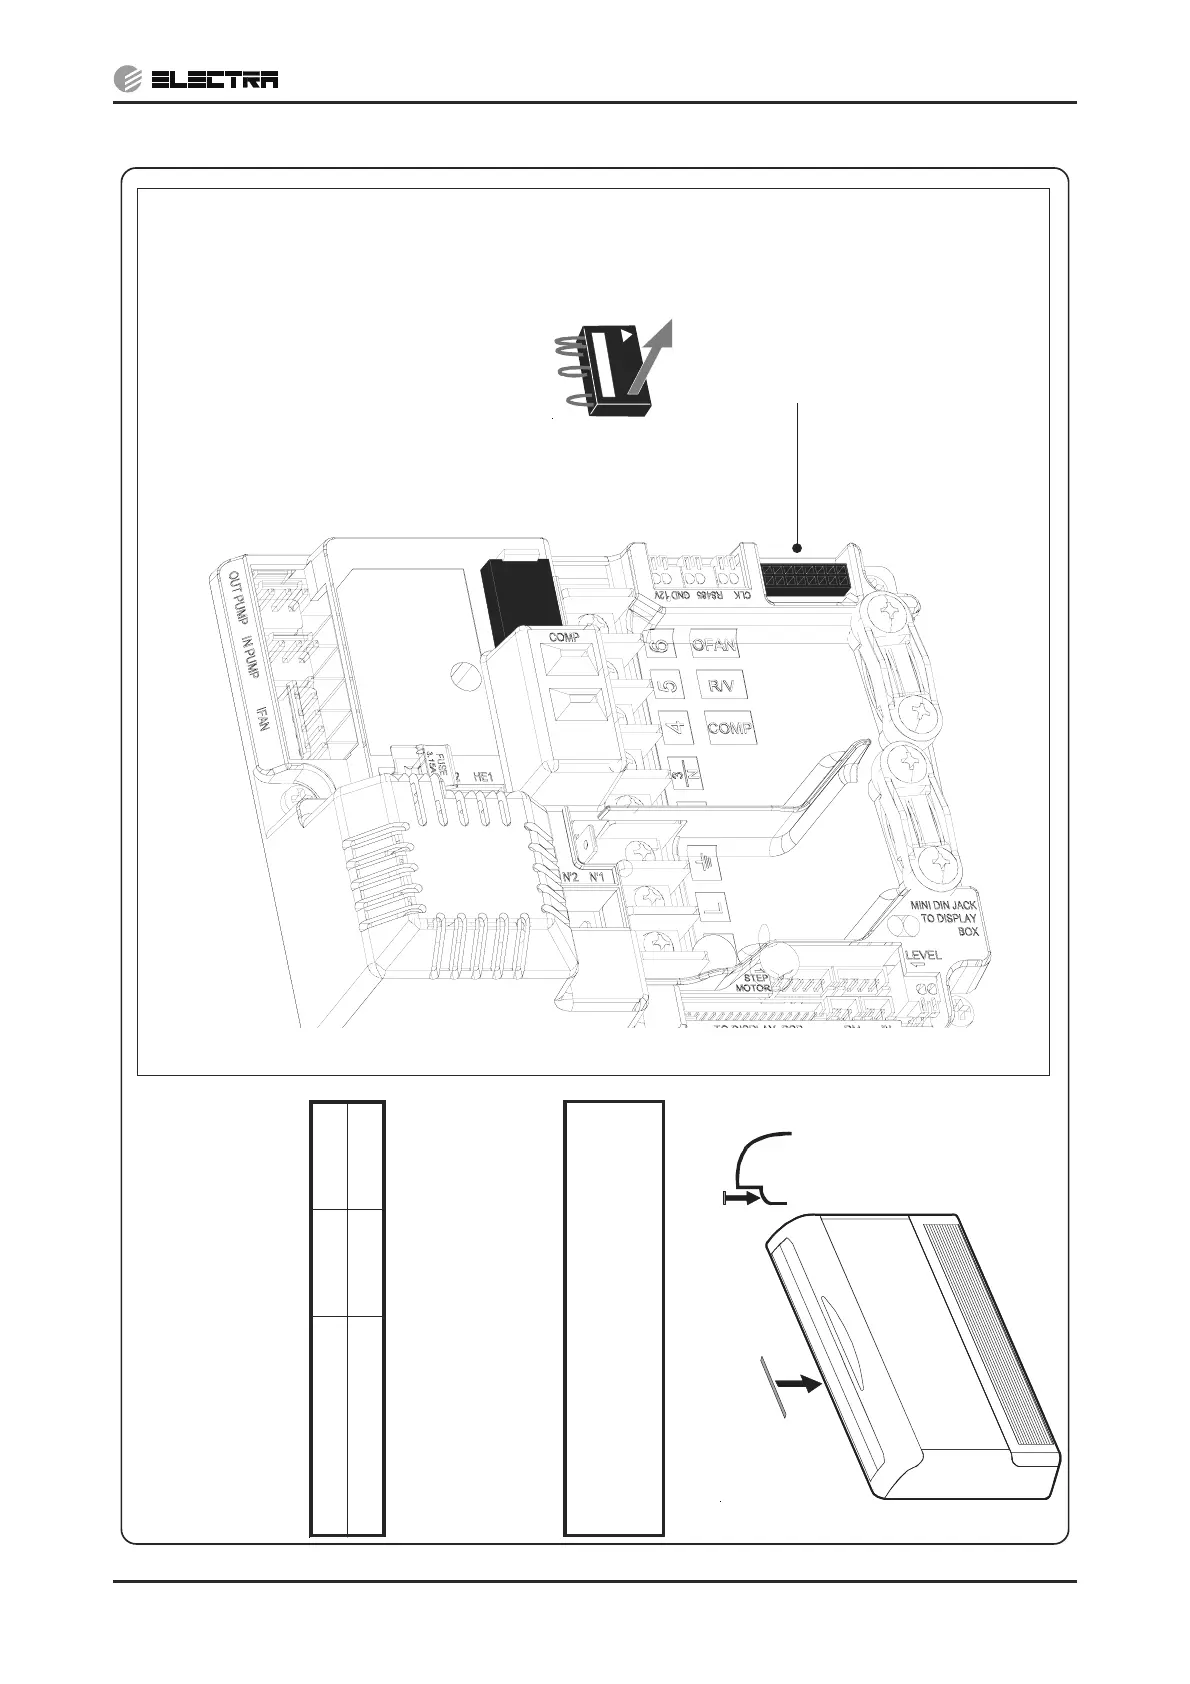
KIT INSTALLATION : (Fig.4)
PXD 12 - 15 - 18 - 24 - 28 - 32
- On the electric board
- Your unit is configured as HEATPUMP without electric heating
- To configure as HEATPUMP with electric heating
• Remove the plug marked PXD-RC (heapump) and replace it with the
plug marked PXD-SH (heatpump with supplementary heaters)
(fixed on the control board)
Fig.4
pmuptaeH tuohtiw sretaeh
112342CR-DXP
pmuptaeH htiw sretaeh
312342HS-DXP
WARNING:
The plug has a small arrow to indicate
the correct orientation. The side with the
arrow must be towards the back of the
unit.
Towards the
metal panel
(metal panel)
REASSEMBLY
- Reconnect the wiring between the PXD and the unit top
- Re install the unit top on the unit taking care to pass the wires in the
groove as shown below
- Stick the wiring diagram in the side panel above the existing wiring
diagram
- Replace the unit top screws then the sides and return air grille
CAUTION
THE DISCHARGE PORT OF THE APPLIANCE
MUST NEVER BE COVERED OR OBSTRUCTED
BY A CURTAIN, CLOTH, ETC...
- A label "DO NOT COVER" is supplied with the kit. Place it on the rear
of the discharge frame as shown below.
PXD 12 - 15 - 18 - 24 - 28 - 32