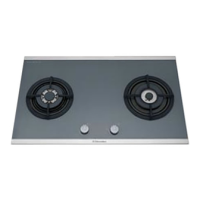
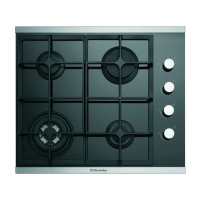
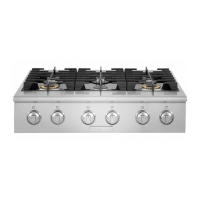
This document is a service manual for Electrolux gas cooktops, specifically models EGG7222SX, EGT7223SX, EHG7122X, and EHT7123X. It provides comprehensive information for operation, installation, and repair processes.
Function Description:
The Electrolux gas cooktops are designed for cooking using gas burners. Gas is supplied from a tank (1) through a low-pressure regulator (2) and a flexible hose or copper tube (3) to an elbow coupling (4) and then to a 2-step safety valve (5). To ignite a burner (6), the safety valve (5) is pressed down and turned counter-clockwise, opening the valve and allowing gas to flow to the burner nozzle. Simultaneously, an ignition switch (7) is activated. Electrical current from a 1.5V D-size battery (8) powers a spark generator (9), which sends sparks to the pin heads (10), causing the gas to ignite and produce a flame (11).
Important Technical Specifications:
The manual details components and specifications for various models. Key components include:
- Glass 2B: Float glass, 8.0x500x760 mm.
- Bottom plate: EG forming.
- Knob: Phenolic PH31, heat and flame resistant.
- Washer: Fiber.
- Hose end: Brass (size 1/2").
- Rubber grommet (glass model): Silicone, heat resistant.
- Spark generator: 4-pin, 1.5Vdc + 90C + electrode 10KV.
- Battery: 1.5V size D (H3-0013/AA).
Burner Specifications (Models with Standard Valves - No Flame Failure Safety Devices):
- LPG (30.0 mbar):
- Triple crown: Injector size 0.98, Rating 4.0 KW.
- Semi-rapid: Injector size 0.71, Rating 2.0 KW.
- Defendi: Injector size 1.05 x 0.37, Rating 4.8 KW.
- City-gas (8.0 mbar):
- Triple crown: Injector size 4.00, Rating 4.5 KW.
- Semi-rapid: Injector size 2.10, Rating 2.0 KW.
- Defendi: Injector size 3.5 X 1.2, Rating 4.8 KW.
- Natural Gas (20.0 mbar):
- Triple crown: Injector size 1.5, Rating 4.0 KW.
- Semi-rapid: Injector size 0.96, Rating 2.0 KW.
- Defendi: Injector size 1.4 x 0.63, Rating 4.8 KW.
Usage Features:
The cooktops are designed for ease of use with individual burner controls and an integrated ignition system. The manual emphasizes the importance of using a low-pressure regulator for LPG and warns against using a high-pressure regulator. It also highlights the need for proper installation and leak testing to ensure safe operation.
Maintenance Features:
The manual provides detailed repair processes and maintenance guidelines:
- Nozzle Cleaning: To remove dirty oil from the nozzle, clean the head with a cloth and use a nozzle cleaner or needle to clear the hole. Repeat until clean.
- Hob Removal for Internal Access:
- Isolate the appliance from battery power.
- Remove trivets and burners from the hob.
- Remove control knobs from valve shafts.
- Remove burner mount retaining screws (2 per burner, 4 on wok burner, requiring a 2.5mm Torque Screwdriver).
- For separate button ignition systems, remove the switch button and ignition pack retaining nut. Alternatively, lift the hob to access and release ignition leads and battery supply cable.
- The hob can then be lifted for access to burner mounting cups, burner supply tubes, manifold, and valves.
- Burner Supply Tube Installation: When fitting burner tubes, nuts should be fastened with a torque of 10-12Nm.
- Manifold and Valves: Removal requires isolating and disconnecting the appliance from the gas supply.
- Ignition System: The manual covers switch harness assembly, low voltage wiring, ignition spark plug and lead assemblies (fastened by retaining clips), and the ignition pack. It warns against connecting battery ignition models to mains supply.
- Conversion Details: The appliance is convertible between Natural Gas and LP. The procedure involves turning off gas, disconnecting electrical power, removing existing injectors and replacing them with appropriate ones, removing control knobs to access bypass screws, replacing the regulator, checking for leaks, adjusting test point pressure, manually lighting burners, adjusting minimum flame, and then reconnecting electrical power to check ignition.
- Glass Top Care: Persistent stains can be removed with nylon scourers or creamed power cleansers. Household enamel cleaners are also suitable. Harsh abrasive cleaners, powder cleaners, steel wool, or wax polishes should not be used. Users are advised not to use the glass as a working top.
Troubleshooting:
The manual includes a troubleshooting guide for common issues:
- Burner not lighting (spark plug working): Possible causes include gas supply valve off, control knob not on, wrong knob turned, or port blockage in the ignition area. Remedies include turning on gas, turning on the knob, ensuring the correct knob is used, and cleaning ignition area ports.
- No spark when control knob activated: Possible causes include flat battery, wrong battery polarity, or wet/dry ignition electrode. Remedies include replacing the battery, re-orienting the battery, or drying/cleaning the ignition electrode.
- Uneven flames or lifting: Possible causes include blocked/wet flame ports or incorrectly fitted burner cap/crown. Remedies include cleaning/drying ports and ensuring components are correctly fitted.
- Low heat, slow cooking: Possible cause is incorrect cooking utensil used. Remedy is to use pots/pans that fit the burner size.
- Flame won't turn down sufficiently: Possible causes are incorrect injector or incorrectly adjusted gas control valve. Remedy is to contact an installer.
The manual also provides detailed spare parts lists for each model, including part numbers and quantities, to facilitate repairs and replacements. It emphasizes the use of original spare parts and the correct dimensions and positions of all screws to prevent serious accidents.