Do you have a question about the Electrolux ELFE422CAW and is the answer not in the manual?
Defines safety alert symbols, words (DANGER, WARNING, CAUTION, IMPORTANT) and their meanings.
Advises reading all instructions and recognizing safety symbols before operating the washer.
Covers warnings related to fire hazards and suffocation risks from packaging.
Details electrical shock risks and the need for assistance when lifting due to weight.
Specifies requirements for the electrical circuit, power supply, and outlet receptacle.
Details the necessity of proper grounding to prevent electrical shock hazards.
Guides on flushing lines, identifying hot/cold, and connecting hoses to the washer.
Steps to ensure the washer is level and stable on all four legs for optimal performance.
Ensures power is off before plugging the cord into a grounded outlet.
This document provides comprehensive installation instructions and important safety information for a front-load washer. It is designed to guide users through the setup process, ensuring safe and efficient operation of the appliance. The manual emphasizes the importance of understanding safety symbols, words, and labels to prevent personal injury or property damage.
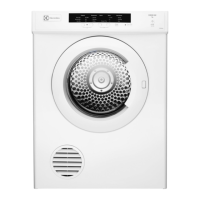
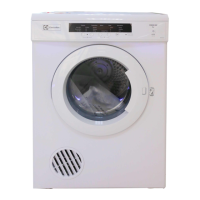
The Electrolux front-load washer is designed for domestic laundry tasks, offering efficient cleaning of clothes. Its primary function is to wash garments using water and detergent, with various cycles and settings to accommodate different fabric types and soil levels. The washer is designed to be installed in a specific environment, adhering to electrical, water supply, and drain system requirements to ensure optimal performance and safety.
The washer is operated by plugging it into a properly grounded electrical outlet and connecting it to hot and cold water supplies. Once installed, users can select wash cycles and settings according to their laundry needs. The appliance is designed for ease of use, with clear instructions for connecting water hoses and securing the drain hose.
The installation process begins with unpacking the washer and removing all shipping hardware, including foam supports, shipping bolts, plastic clamps, and spacers. These components are crucial for protecting the washer during transit and must be removed before operation. The manual explicitly states to save these shipping materials for future transportation of the appliance.
Leveling: Proper leveling is critical for preventing excessive noise and vibration during operation. The washer must be level from side-to-side and front-to-back, with all four legs sitting solidly on the floor. Adjustable pliers or a universal wrench are recommended for adjusting the leveling legs.
Water Supply Connection: The washer requires both hot and cold water connections. Users must use new hoses with rubber sealing washers and ensure they are properly connected to the corresponding HOT and COLD inlet connections on the washer and the household water supply. Before connecting, it's advised to flush the water lines to remove any particles that could clog the water valve screens. The water pressure should be between 10 and 110 psi, with a maximum difference of 10 psi between hot and cold supplies. Connections should be hand-tightened until snug, then tightened an additional 2/3 turn with pliers, being careful not to cross-thread or over-tighten.
Drain System Connection: The drain hose must be secured in a standpipe or laundry tub, ensuring it does not pull out due to the force of the water. A drain hose hanger, shipped with the washer, is used to secure the hose. The standpipe should have a minimum diameter of 1-1/4 inches (3.18 cm) and a height between 24 inches (61 cm) and 56.5 inches (144 cm) above the floor. The drain system must be capable of eliminating 6 gallons (22.5 L) per minute.
Electrical Connection: The washer requires an individual, properly polarized and grounded 15 amp branch circuit, fused with a 15 amp time delay fuse or circuit breaker. The power supply should be 2-wire, with ground, 120 volt single phase, 60 Hz, Alternating Current. A properly grounded 3-prong receptacle is necessary, and under no circumstances should the grounding prong be cut, removed, or bypassed. The power cord should only be plugged into the outlet after ensuring the power is off at the circuit breaker/fuse box.
Clearance Requirements: Specific clearances are provided for installation in alcoves or under counters. For alcove installations, a minimum of 0 inches (0 cm) is required on the sides, rear, and top. For under-counter installations, similar clearances apply. The dimensions for the washer itself are provided, including the space needed to clear the open door (43 inches or 109 cm) and the front of the closed door (24 inches or 61 cm).
The manual emphasizes the importance of proper installation for long-term maintenance and safe operation. While specific maintenance routines are not detailed in this section, the document highlights that understanding and practicing all Safety and Operating Instructions will maximize the benefits and enjoyment of the appliance.
The manual uses various safety symbols and words:
The washer should NOT be installed:
The electrical service must conform to local codes and ordinances and the latest edition of the National Electrical Code, ANSI/NFPA 70, or in Canada, the Canadian Electrical Code C22.1 part 1. The use of power from gas-powered, solar-powered, wind-powered, or any other non-utility generators is not recommended due to potentially inconsistent voltage capabilities.
The manual mentions that replacement parts can be obtained from the purchase source. It also lists optional accessories such as a dryer stacking kit (P/N STACKIT24), various inlet hose kits, and a Universal Appliance Wrench (P/N 137019200) for adjusting feet. The wiring diagram and technical data sheet are located under the washer's top panel, on top of the detergent dispenser housing.
By following these detailed instructions, users can ensure their Electrolux front-load washer is installed correctly, operates safely, and provides reliable performance for years to come.
| Brand | Electrolux |
|---|---|
| Model | ELFE422CAW |
| Appliance Category | Dryer |
| Type | Electric |
| Fuel Type | Electric |
| Color | White |
| Energy Star Certified | Yes |
| Dryer Vent Type | Vented |
| Voltage | 240 V |
| Amperage | 30 A |
| Load Type | Front Load |
| Width | 27 inches |
| Height | 38 inches |