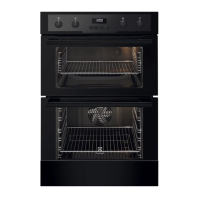
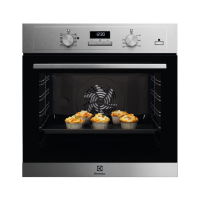
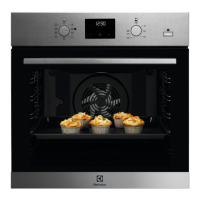
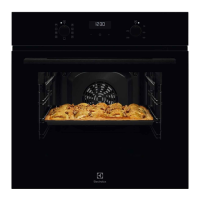
This document is a user manual for Electrolux ovens, specifically models EOD5H70BZ and KODEC70BZ. It provides comprehensive information on safety, installation, product description, daily use, clock functions, accessories, additional functions, hints and tips, care and cleaning, troubleshooting, energy efficiency, and environmental concerns.
Function Description
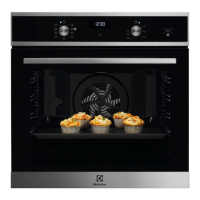
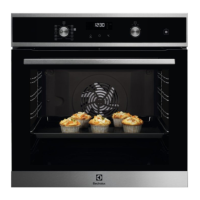
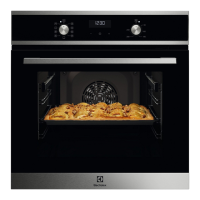
The Electrolux oven is designed for cooking purposes, suitable for single household domestic use in an indoor environment. It can also be used in offices, hotel guest rooms, bed & breakfast guest rooms, farm guest houses, and similar accommodations where usage does not exceed average domestic levels. The oven features various heating functions to cater to different cooking needs, including:
- True Fan Cooking PLUS / Aqua Clean: Adds humidity during cooking for improved color, crispy crust, and juiciness. Also used for reheating and as a cleaning function.
- True Fan Cooking: Bakes on up to two shelf positions simultaneously and dries food. Recommended temperature is 20-40 °C lower than Conventional Cooking.
- Moist Fan Baking: Energy-saving function for cooking. The cavity temperature may differ from the set temperature, and heating power may be reduced.
- Bottom Heat: For baking cakes with crispy bottoms and preserving food.
- Fan Cooking: Roasts and bakes food at the same cooking temperature on multiple shelf positions without flavor transfer.
- Turbo Grilling: Roasts large meat joints or poultry with bones on one shelf position, makes gratins, and browns food.
- Conventional Cooking: Bakes and roasts food on one shelf position.
- Fast Grilling: Grills thin pieces of food in large quantities and toasts bread.
- Light: Turns on the oven lamp.
The oven is equipped with an electric cooling system that operates automatically to keep the appliance surfaces cool. A safety thermostat is integrated to prevent dangerous overheating by interrupting the power supply and restarting the oven when the temperature drops.
Important Technical Specifications
Dimensions and Installation:
- Cabinet minimum height: 580 (600) mm (under worktop minimum height)
- Cabinet width: 560 mm
- Cabinet depth: 550 (550) mm
- Height of the front of the appliance: 589 mm
- Height of the back of the appliance: 570 mm
- Width of the front of the appliance: 594 mm
- Width of the back of the appliance: 558 mm
- Depth of the appliance: 561 mm
- Built-in depth of the appliance: 540 mm
- Depth with open door: 1007 mm
- Ventilation opening minimum size (bottom rear side): 560x20 mm
- Mains supply cable length: 1100 mm
- Mounting screws: 4x25 mm
Electrical Connection:
- All electrical connections must be made by a qualified electrician.
- The appliance must be earthed.
- Mains plug connection at the end of installation, with access after installation.
- Isolation device required for disconnection from mains at all poles, with a contact opening width of minimum 3 mm.
- Supplied with a main plug and cable.
- Cable types for Europe: H07 RN-F, H05 RN-F, H05 RRF, H05 VV-F, H05 V2V2-F (T90), H05 BB-F.
- Earth cord (green/yellow) must be 2 cm longer than blue phase and brown neutral cables.
Power Consumption (refer to rating plate for total power):
- Maximum 1380 W: 3x0.75 mm² cable section
- Maximum 2300 W: 3x1 mm² cable section
- Maximum 3680 W: 3x1.5 mm² cable section
Energy Efficiency (according to EU 65/2014 and EU 66/2014, IEC/EN 60350-1):
- Supplier's name: Electrolux
- Model identification: EOD5H70BZ 944068341, KODEC70BZ 944068340
- Energy Efficiency Index: 95.1
- Energy efficiency class: A
- Energy consumption (conventional mode): 0.89 kWh/cycle
- Energy consumption (fan-forced mode): 0.78 kWh/cycle
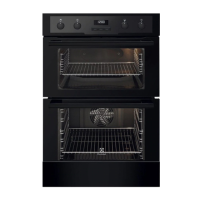
- Number of cavities: 1
- Heat source: Electricity
- Volume: 65 l
- Type of oven: Built-In Oven
- Mass: EOD5H70BZ 28.4 kg, KODEC70BZ 28.4 kg
- Light source: Energy efficiency class G.
Usage Features
Control Panel:
- Features retractable knobs for heating functions and temperature control.
- Display shows time and timer functions.
- Sensor fields/buttons for setting time and clock functions.
Before First Use:
- Ventilate the room during initial preheating to dissipate odor and smoke.
- Set the clock.
- Clean the oven and accessories with a microfibre cloth, warm water, and mild detergent.
- Preheat the empty oven: 1 hour at maximum temperature for the function, 15 minutes at maximum temperature for the function, and 15 minutes at maximum temperature for the function.
Daily Use:
- Select heating functions using the knob.
- Set temperature using the control knob.
- Turn knobs to off position to turn off the oven.
- True Fan Cooking PLUS: Fill cavity embossment with up to 250 ml of tap water. Do not refill during cooking or when hot. Preheat empty oven for 10 minutes to create humidity. Do not open oven door during cooking.
- Clock Functions:
- Time of Day: Set, change, or check the current time.
- Duration: Set how long the oven works; oven turns off automatically when time ends.
- Minute Minder: Set a countdown; does not affect oven operation.
Accessories:
- Wire shelf: For cookware, cake tins, roasts. Insert with feet pointing down.
- Baking tray: For cakes and biscuits.
- Grill- / Roasting pan: For baking, roasting, or collecting fat.
- Telescopic runners: Allow easier insertion and removal of shelves. Can be placed on any level, ensuring both runners are on the same level. Do not oil. Push fully back before closing the oven door.
Hints and Tips:
- The oven has four shelf positions, counted from the bottom.
- Do not open the oven door before 3/4 of the set cooking time for cakes.
- When using two baking trays, keep one empty level between them.
- Use a deep pan for fatty food to prevent permanent stains.
- Leave meat for 15 minutes before carving.
- Add water to the deep pan during roasting to prevent smoke.
- Cooking times vary by food type, consistency, and volume. Monitor performance initially to find best settings.
- Moist Fan Baking: Use dark, non-reflective tins and containers for better heat absorption. Recommended accessories include pizza pan (28 cm), baking dish (26 cm), ceramic ramekins (8 cm diameter, 5 cm height), and flan base tin (28 cm).
Maintenance Features
Care and Cleaning:
- Clean the front of the appliance with a microfibre cloth, warm water, and mild detergent.
- Check and clean the door gasket.
- Use a cleaning solution for metal surfaces.
- Clean stains with a mild detergent.
- Clean the cavity after each use to prevent fat accumulation.
- To reduce moisture condensation, let the appliance work for 10 minutes before cooking.
- Do not store food in the appliance for more than 20 minutes.
- Dry the cavity with a microfibre cloth after each use.
- Clean all accessories after each use with a microfibre cloth, warm water, and mild detergent. Do not clean accessories in a dishwasher.
- Do not use abrasive cleaners or sharp-edged objects on non-stick accessories.
Cavity Embossment (Aqua Clean):
- To remove limestone residue after steam cooking:
- Pour 250 ml of white vinegar (max 6% without additives) into the cavity embossment.
- Let the vinegar dissolve residue for 30 minutes at ambient temperature.
- Clean the cavity with warm water and a soft cloth.
- For True Fan Cooking PLUS, clean the oven every 5-10 cooking cycles.
Aqua Clean Procedure:
- Pour 200 ml of water into the cavity embossment.
- Set the function to True Fan Cooking PLUS.
- Set temperature to 90 °C.
- Let the oven work for 30 minutes.
- Turn off the oven.
- Wait until cold, then dry the cavity with a soft cloth.
Removing Shelf Supports:
- Turn off the oven and wait until cold.
- Pull the front of the shelf support away from the side wall, then the rear end.
- Install in the opposite sequence, ensuring retaining pins on telescopic runners point to the front.
Removing and Installing the Door:
- The oven door has two glass panels for cleaning.
- Open the door fully and hold both hinges.
- Lift and pull the latches until they click.
- Close the oven door halfway to the first opening position, then lift and pull to remove the door.
- Place the door on a soft cloth, release the locking system to remove the internal glass panel.
- Turn fasteners by 90° and remove them.
- Carefully lift and remove the glass panel.
- Clean glass panels with water and soap; dry carefully. Do not clean in a dishwasher.
- Install the glass panel and oven door after cleaning. Ensure correct installation (door trim clicks, internal glass panel in seats).
Replacing the Lamp:
- Turn off the oven and wait until cold.
- Disconnect the oven from the mains.
- Put a cloth on the bottom of the cavity.
- Remove the glass cover.
- Clean the glass cover.
- Replace the lamp with a suitable 300 °C heat-resistant lamp.
- Install the glass cover.
Disposal:
- Recycle packaging materials.
- Recycle waste electrical and electronic appliances (marked with the symbol) at local recycling facilities.
- Disconnect from mains, cut off electrical cable, and remove door catch to prevent trapping children or pets.