8
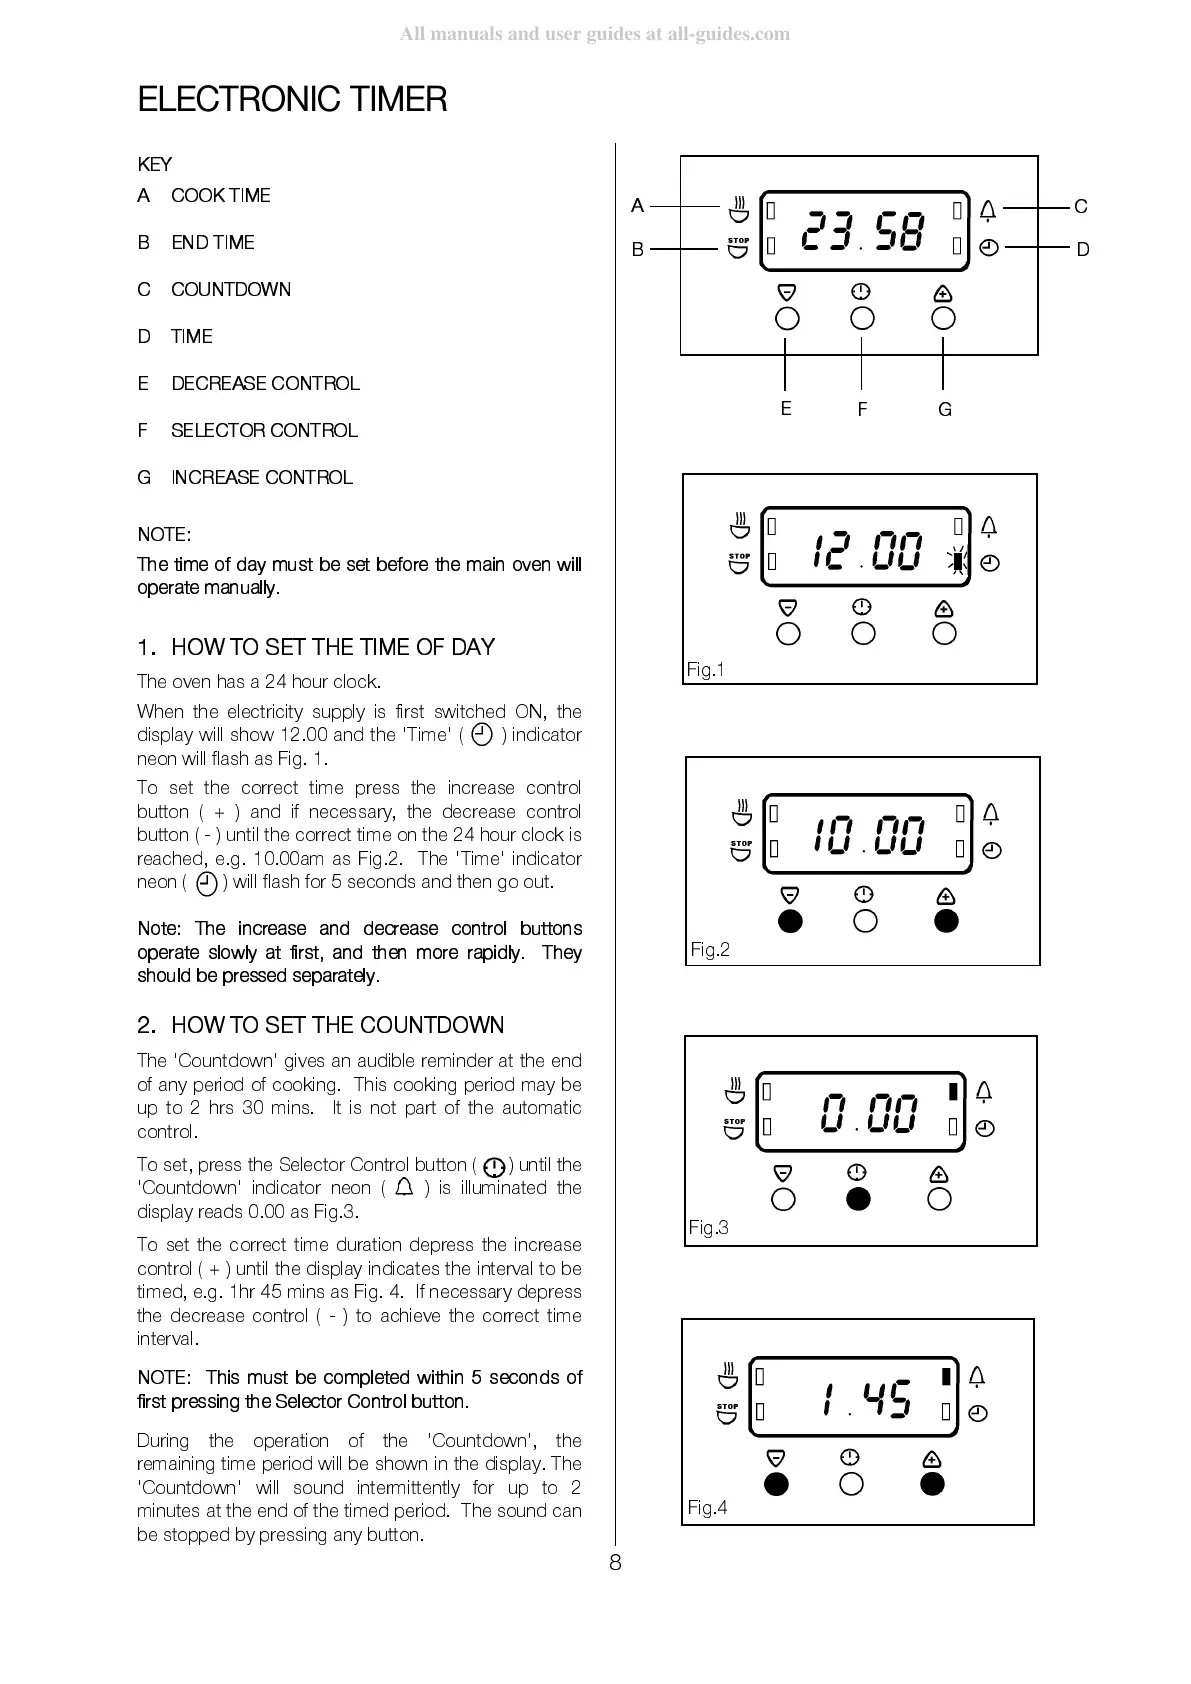
ELECTRONIC TIMER
KEY
A COOK TIME
B END TIME
C COUNTDOWN
D TIME
E DECREASE CONTROL
F SELECTOR CONTROL
G INCREASE CONTROL
NOTE:
The time of day must be set before the main oven will
operate ma nua lly.
1. HOW TO S E T TH E T I M E OF DAY
The oven has a 24 hour clock.
When the electricity supply is first switched ON, the
display will show 12.00 and the 'Time' ( ) indicator
neon will flash as Fig. 1.
To set the correct time press the increase control
button ( + ) and if necessary, the decrease control
button ( - ) until the correct time on the 24 hour clock is
reached, e.g. 10.00am as Fig.2. The 'Time' indicator
neon ( ) will flash for 5 seconds and then go out.
Note: The increase and decrease control buttons
operate slowly at first, and then more rapidly. They
should be presse d separ ately.
2. HOW TO S E T TH E CO UN T DO WN
The 'Countdown' gives an audible reminder at the end
of any period of cooking. This cooking period may be
up to 2 hrs 30 mins. It is not part of the automatic
control.
To set, press the Selector Control button ( ) until the
'Countdown' indicator neon ( ) is illuminated the
display reads 0.00 as Fig.3.
To set the correct time duration depress the increase
control ( + ) until the display indicates the interval to be
timed, e.g. 1hr 45 mins as Fig. 4. If necessary depress
the decrease control ( - ) to achieve the correct time
interval.
NOTE: This must be completed within 5 seconds of
first pressing the Selector C ontro l button.
During the operation of the 'Countdown', the
remaining time period will be shown in the display. The
'Countdown' will sound intermittently for up to 2
minutes at the end of the timed period. The sound can
be stopped by pressing any button.
G