-70-
Project 155 Mini Battery
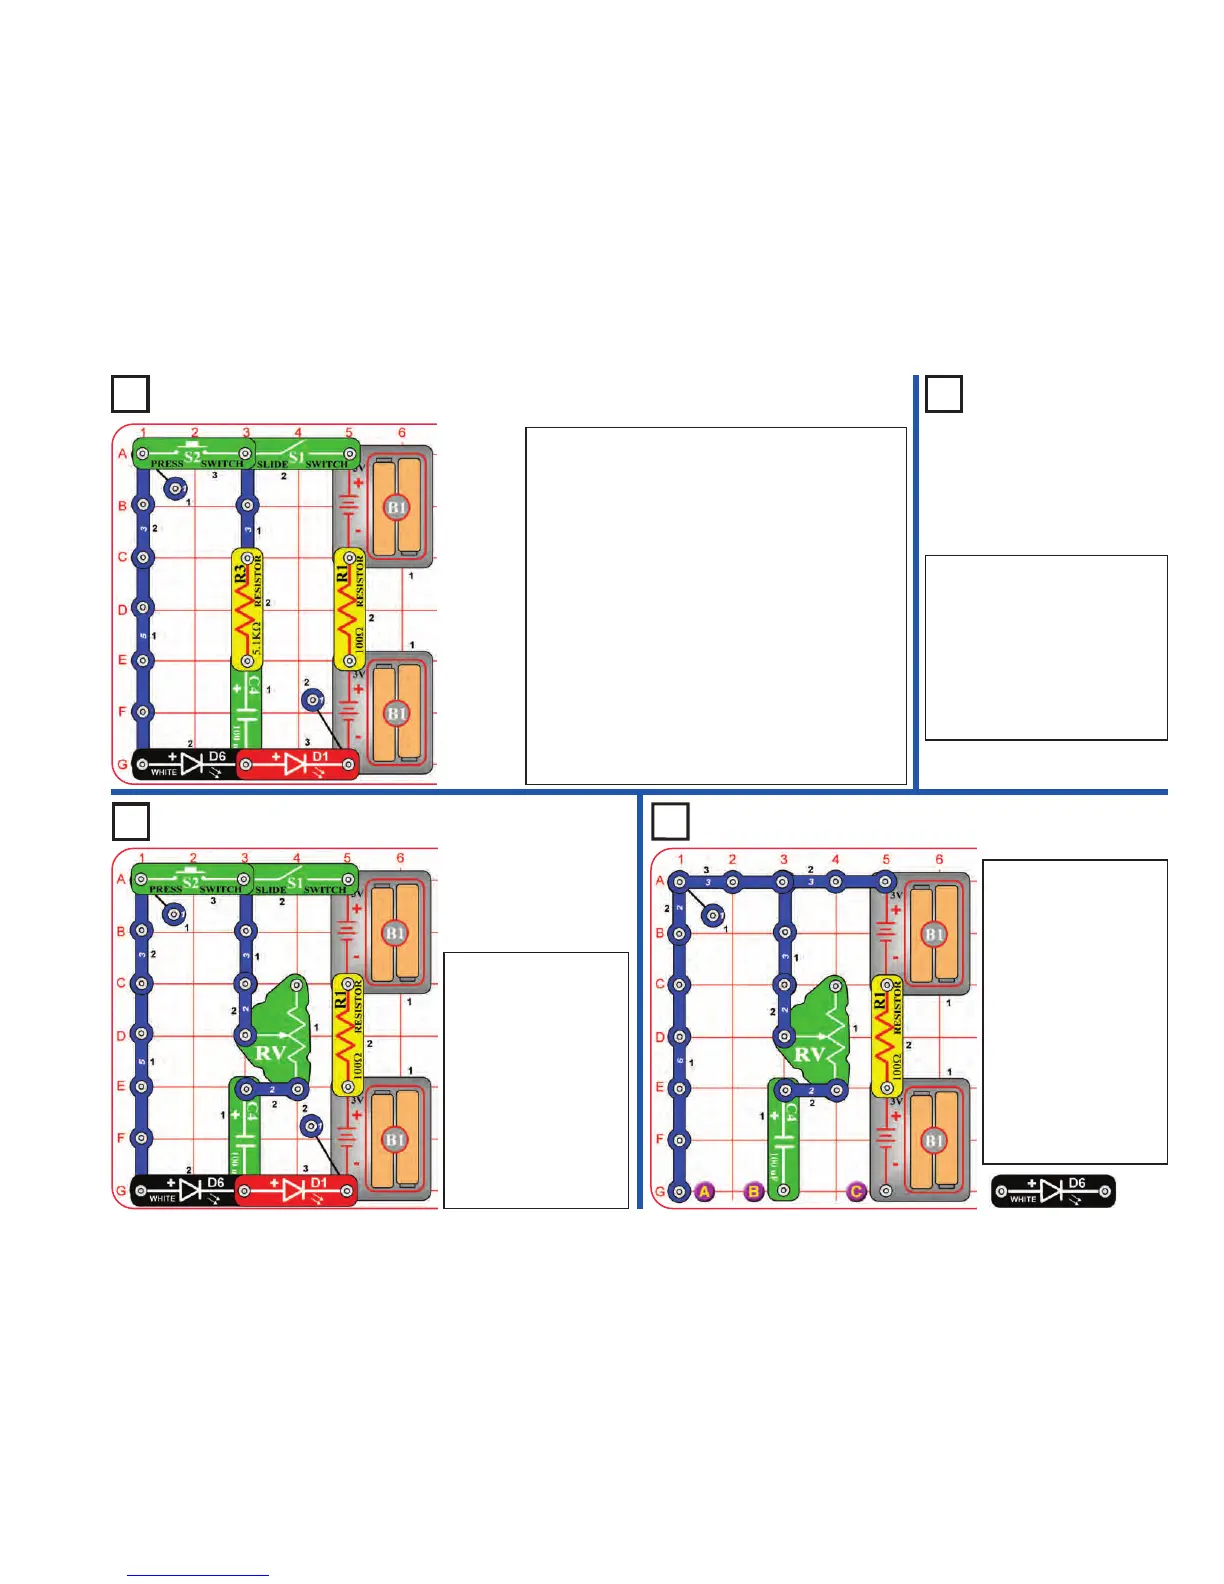
Project 154
Modify the project 152
circuit to be this one,
which has the
adjustable resistor (RV)
instead of the 5.1kΩ
resistor (R3). Use the
lever on RV to adjust the
capacitor charge &
discharge rate, setting it
towards the red LED
(D1) will make the LEDs
flash brighter but get
dim faster.
Charging & Discharging
Project 153
Mini
Capacitor
Use the project 152 circuit but
replace the 100µF capacitor
(C4) with the 0.1µF capacitor
(C2). The circuit works the same,
but the LEDs will only light very
briefly, because the smaller
0.1µF capacitor stores much
less electricity than the larger
100µF capacitor.
Project 152
Turn on the slide switch (S1) for a few seconds, then
turn it off. The red LED (D1) is dimly lit for a few
moments but goes completely dark as the batteries
(B1) charge up the 100µF capacitor (C4). The
capacitor is storing electrical charge.
Now press the press switch (S2) for a few seconds.
The white LED (D6) is initially bright but goes dim as
the capacitor discharges itself through it.
The C4 capacitor value (100µF) sets how much
charge can be stored in it, and the R3 resistor value
(5.1kΩ) sets how quickly that charge can be stored or
released.
Now swap the locations of the white & red LEDs, and
try the circuit again. Both LEDs have the same
electrical current flowing through them, but white LED
is much brighter than the red LED because it is a
super-bright LED while the red one isn’t.
Adjustable
Charging &
Discharging
This circuit is similar to the
preceding one, but may be
easier to understand. Set the
lever on the adjustable resistor
(RV) towards the 100µF
capacitor (C4). Place the white
LED (D6) across the points
marked B & C; the LED lights
as the capacitor charges.
Next, place the white LED
across points A & B instead;
now the LED lights as the
capacitor discharges. Move
the white LED back to B & C
and repeat. Use the lever on
RV to vary the charge /
discharge rate.
The capacitor is storing
energy like a mini battery.