-5-
Project #102
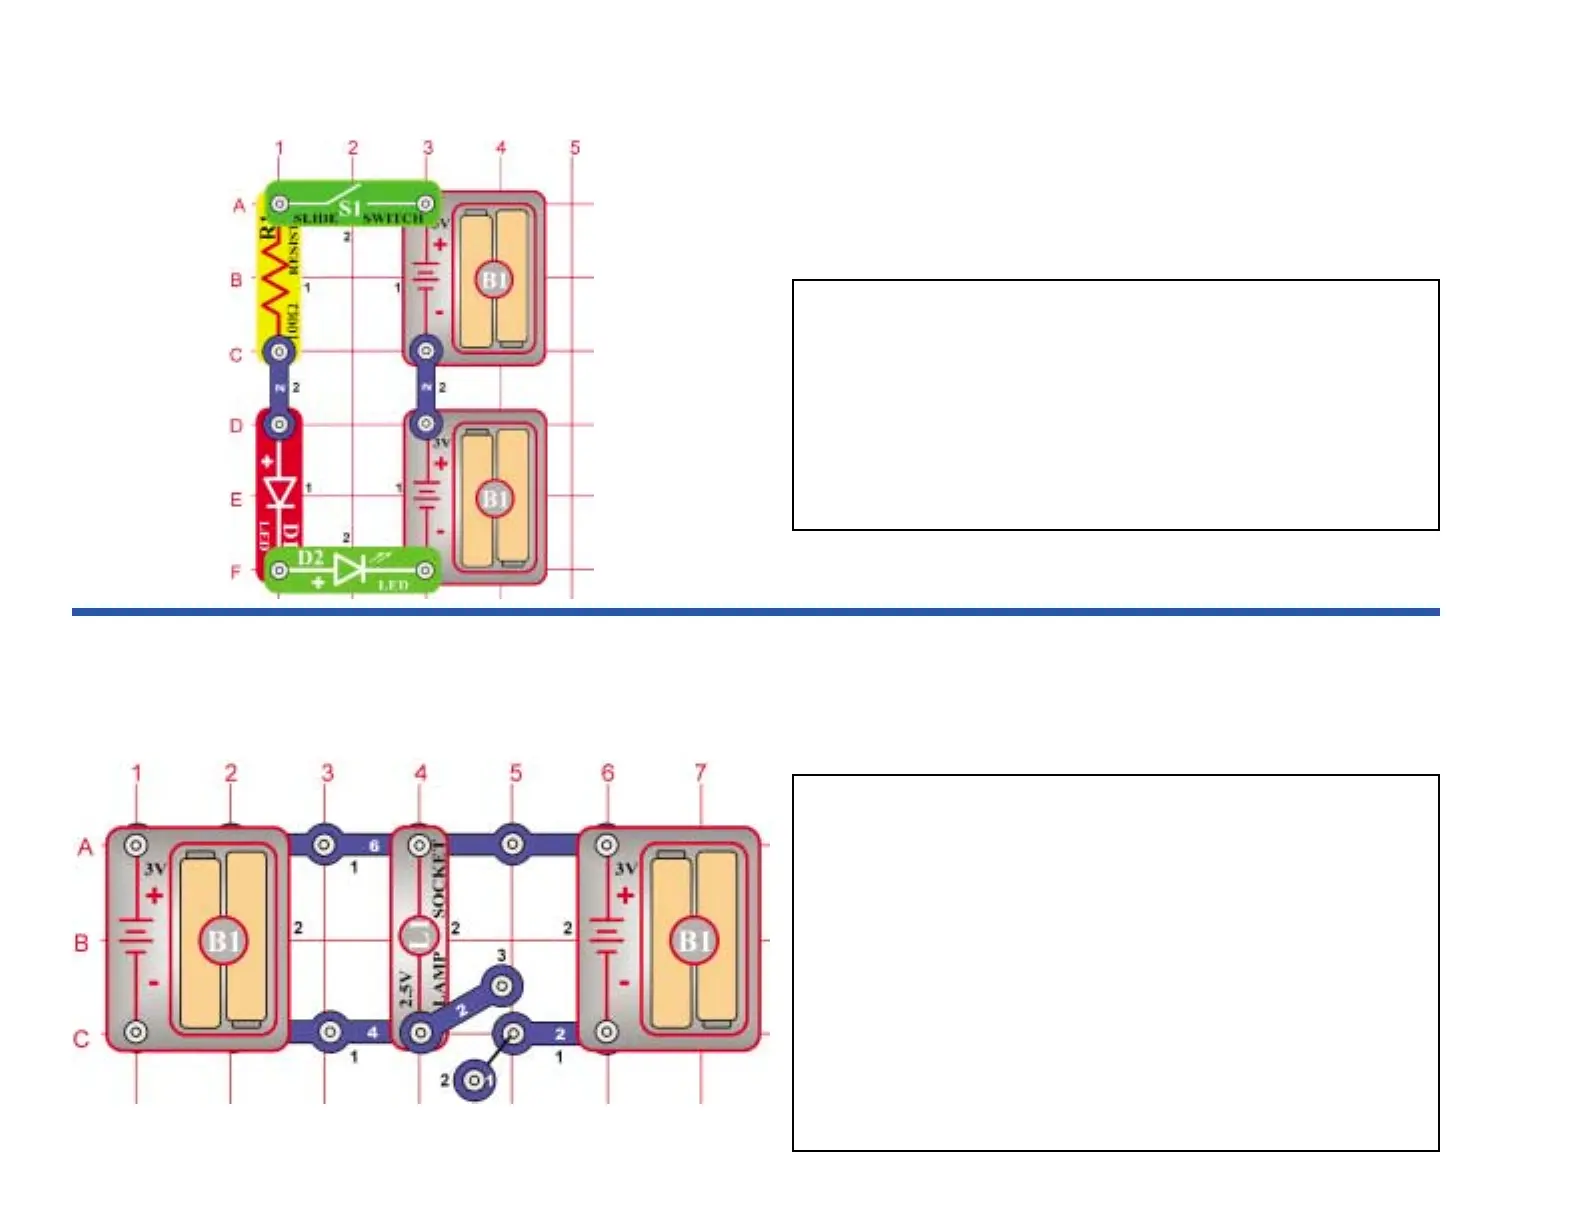
OBJECTIVE: To show the increase in voltage when
When you close the slide switch (S1), current flows from the batteries
through the slide switch (S1), the 1kΩ resistor (R1), the LED (D1),
through the LED (D2), and back to the second group of batteries (B1).
Notice how both LEDs are lit. The voltage is high enough to turn on
both LEDs when the batteries are connected in series. If only one set
of batteries is used, the LEDs will not light up.
Some devices use only one 1.5 volt battery, but they make hundreds
of volts electronically from this small source. A flash camera is an
example of this.
Batteries in Series
Project #103
OBJECTIVE: To show how batteries in parallel are
Build the circuit shown on the left by placing all of the parts with a black
1 next to them on the board first. Then, assemble the parts marked with
a 2 (including the 1-snap wire at base grid location C5). Finally, place a
2-snap wire at grid location C4, leaving the other end of it unconnected as
shown.
The light should be on and the brightness of the lamp will depend on the
quality of the batteries in the holder on the left. Put weak batteries in the
left holder and strong batteries in the right holder. Snap in the loose end
of the 2-snap wire to grid point C5. Now the lamp will get brighter as the
fresh batteries take over and supply the current to the light.
Batteries are placed in parallel when the voltage is adequate but the load
needs more current than one group of batteries can supply. Think of each
battery as a storage tank that supplies water. If you put two in parallel, you
can get more water (current), but the pressure (voltage) stays the same.
Batteries in Parallel
 Loading...