Do you have a question about the Elite Screens Insta-DE 2 Series and is the answer not in the manual?
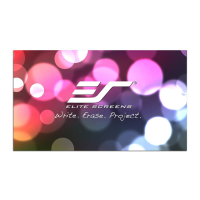
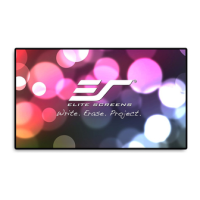
Features award winning and GREENGUARD certified VersaWhite material for quality and safety.
Offers a 1.1 gain and a wide 180-degree viewing angle for excellent visibility.
Includes a special anti-scratch layer for durable long-term use as a dry-erase/projection surface.
Features an anti-reflection diffusion surface to eliminate glare and hot-spots during projector use.
Instantly transforms flat surfaces or walls into a functional dry-erase whiteboard projection screen.
Includes an adhesive black velveteen border to improve contrast and overall aesthetic appearance.
Provides a perfect dry-erase and projection solution optimized for modern short-throw projectors.
Serves as an ideal and effective tool for instructional presentations in classrooms and boardrooms.
Specifies the color display as White.
The product thickness is 2.1mm.
Composed of high molecular weight copolymer of Terephthalic acid ethyl esters.
Weight is specified as 1m²/377g.
Designed for use at room temperature.
The gain factor is 1.1.
Provides a viewing angle of 160 degrees.
Details the components included in the package, such as screen material, tape, cradle, pens, eraser, cloth, border, and powder compound.
Lists various model numbers and their corresponding powder bag inclusions (No powder bag, 1 bag, 2 bags, 3 bags).
Recommends using only a high-density whiteboard eraser for best results and longevity.
Prepare flat surfaces by cleaning thoroughly and ensuring no imperfections like holes or residue; sanding is recommended.
Unroll the Insta-DE 2 film on a clean surface, laying it flat on its front side before installation.
Begin by marking the desired screen size on the wall or surface for installation.
Peel one side of the tape and apply it vertically every 4-6 inches, from top to bottom.
After application, peel off the first strip of tape completely and then about an inch of the rest.
Requires two people to carefully pick up and install the film, ensuring the back side faces the wall.
Gently align the film's edge to the installation area and press using an up/down sliding motion.
Continuously remove tape strips and repeat the process, ensuring no air bubbles or pockets are created.
Use a smoothing tool in an upward/downward motion to ensure a flat installation and remove any air bubbles.
Caution: The double-sided tape adhesive is permanent; attach carefully to avoid repositioning.
Begin by marking the area of the screen size to be installed on the wall or surface.
Mix one powder bag with 27 oz. of room temperature water in a spray bottle to create adhesive.
Once mixed, the liquid adhesive must be applied within 4 hours for a sealed installation.
Spray the adhesive evenly on the wall within the marked area where the screen will be applied.
Carefully pick up the film, ensuring the back side faces the wall, and avoid folding to prevent creasing.
Align the film edge to the adhesive-covered area and attach, proceeding in 3-4 feet increments.
Flatten the material along the way in 3-4 feet increments to avoid creating air bubbles/pockets.
Use a flexible wall covering smoothing tool to assure a flat installation and remove air bubbles.
Use a soft damp cloth to clean and remove any residue left from the adhesive compound.
Caution: The adhesive compound is permanent; attach carefully to avoid repositioning.
Measure the top/bottom and left/right sides of the screen to determine the required velvet border length.
Peel a small portion of the border, place it over the screen edge, and continue applying to the end.
For best results, it is recommended to cut the border edge at a 45° angle.
Repeat the application process for all sides until the screen is fully bordered.
Avoid using sharp objects directly on the screen to prevent permanent damage and voiding the warranty.
Creases or wrinkles caused by improper installation are not removable.
Xanthan gum is non-hazardous; excess can be diluted with water and discharged into the sewer.
| Brand | Elite Screens |
|---|---|
| Model | Insta-DE 2 Series |
| Category | Projection Screen |
| Language | English |