22
ENGLISH
GB
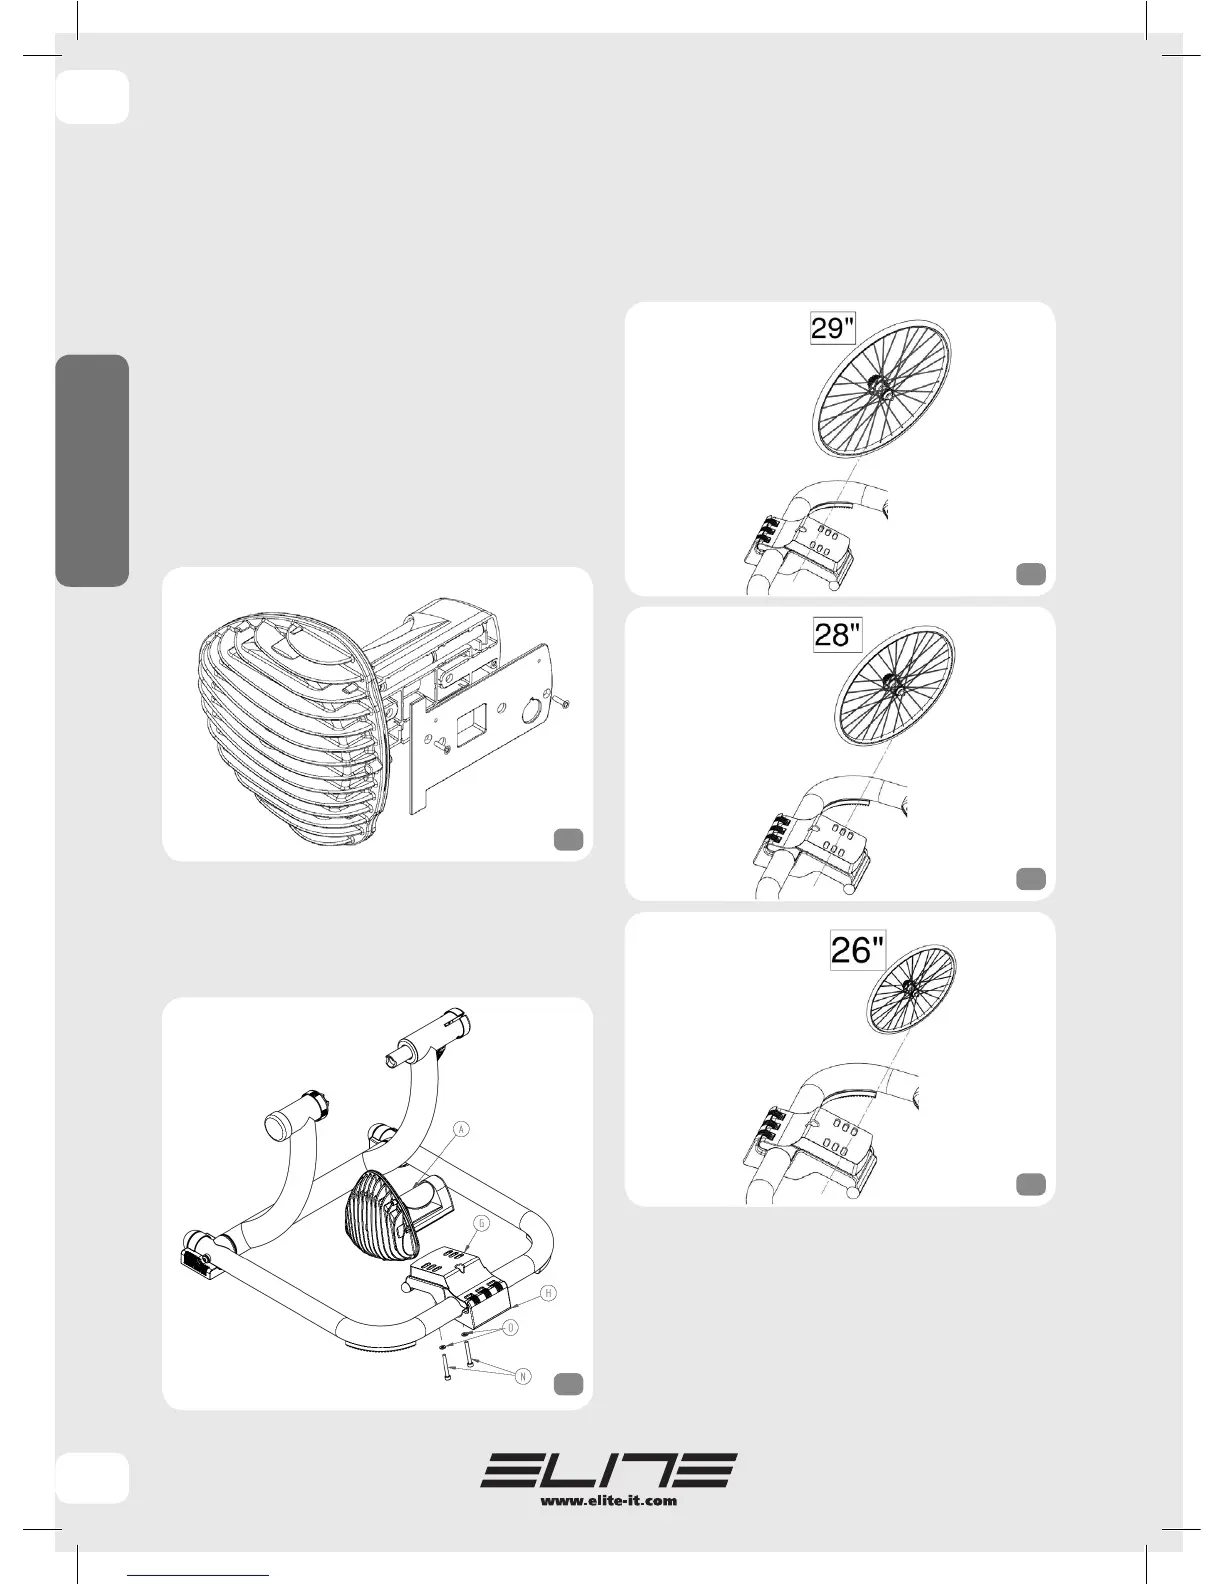
TRANSMITTER BATTERIES ASSEMBLY
1 Remove the resistance unit from its package
and place it turned upside down on a table or a
plain surface.
2 Remove the cover placed under the resistance
unit by unscrewing the two screws. Insert the two
AA type batteries taking care to note the polarity
indicated on the cover and on the sticker applied
on the rear side of the resistance unit.
3 Replace the cover and fasten it with the two self
– tapping screws Ø 3.5 (fig. 4).
UNIT INSTALLATION
• Fix the resistance unit on the base (G,H)
with screws (N) + washers (O) (fig.5).
• On the base (G) the are three pairs of holes; use
the various holes according to the diameter of the
bicycle wheel:
for 29” wheels, pair of rear holes (fig.6);
for 28” wheels, pair of middle holes (fig.7);
for 26” wheels, pair of front holes (fig.8).
4
6
7
8
5