EasyManua.ls Logo

ELNA Elinita EF72 User Manual

ELNA Elinita EF72
46 pages
To Next Page IconTo Next Page
Page #1 background imageLoading...
Page #1 background image
SERVICE MANUAL
MODEL: ef72
First Edition: 09 April 2020
Question and Answer IconNeed help?

Do you have a question about the ELNA Elinita EF72 and is the answer not in the manual?

ELNA Elinita EF72 Specifications

General IconGeneral
BrandELNA
ModelElinita EF72
CategorySewing Machine
LanguageEnglish

Summary

Changing external parts (1)

Face plate

Procedure to remove and attach the face plate.

Top cover

Procedure to remove and attach the top cover.

Changing external parts (2)

Belt cover

Procedure to remove and attach the belt cover.

Base

Procedure to remove and attach the base.

Changing external parts (3)

Power supply cover

Procedure to remove and attach the power supply cover.

Thread cutter cover

Procedure to remove and attach the thread cutter cover.

Changing external parts (4)

Front cover

Procedure to remove and attach the front cover.

Changing external parts (5)

Thread guide cover

Procedure to remove and attach the thread guide cover.

Changing external parts (6)

Arm thread guide unit

Procedure to remove and attach the arm thread guide unit.

Changing the printed circuit board A

Changing the printed circuit board K

Changing the printed circuit board F and slide volume

Printed circuit board F

Procedure to remove and attach printed circuit board F.

Slide volume

Procedure to remove and attach the slide volume.
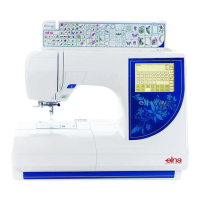
Changing LCD

Wiring diagram

Needle drop position

Backlash between hook drive gear and lower shaft gear

Hook timing

Adjustment of needle bar height

Clearance between needle and tip of the rotary hook (1)

Clearance between needle and tip of the rotary hook (2)

Adjustment of height and direction of presser bar

To adjust the feed dog height

To replace needle thread tension unit

To adjust the upper thread tension release (1)

To adjust the upper thread tension release (2)

Adjusting the needle thread tension

To adjust the bobbin winder stopper

Needle threader hook position

To adjust thread cutter switch

To adjust thread drawing lever

Replacing the thread take-up lever

To attach lower shaft

Synchro belt

To replace driving motor and adjust belt tension

Upper shaft shield plate position

Adjusting buttonhole lever position

Stretch stitch feed balance

Adjustment of presser bar lifter switch position

To adjust and replace needle plate sensor switch

To replace switching power supply

To replace and adjust drop feed micro switch

Feed dog troubleshooting

Self diagnosis

1. Function of buzzer, LCD and LED

2. Function of keys

3. Detecting switch

4. Foot control/speed control slider

5. Upper shaft phase sensor

6. Stepping motors

7. Thread cutter motor

8. Thread tension release motor

9. Driving motor/bobbin winding motor

Related product manuals