5
Coral E
The heaters must be controlled by two independent, protected and switched circuits. The bottom heater should be
switched to operate during the off-peak period(s) of the tariff only via a suitable controller, e.g. Maxistore. The
circuit to the upper heater must include a runback timer (one or two hours, preferably one hour) and not a simple
isolating switch. This timer has two purposes, firstly to prevent uneconomical use of full price electricity and secondly
it acts as a form of protection against long periods of boiling in the unlikely event of thermostat failure, therefore
preventing permanent damage to the unit.
Failure to fit a suitable timer will invalidate the guarantee.
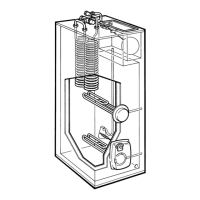
1. Remove the plastic covers from the immersion heaters - Four screws on the bottom heater, top heater cover
¼ turn anticlockwise.
2. Remove the plastic cover from the top immersion heater - one nut.
3. Connect the immersion heaters to the controllers using the correct cable as described above. Route the
cables through the RH side entry points as shown in Fig. 2.
4. Replace the wiring covers, ensuring all wiring is secured using the cable clamps provided.
Important Notes:
i. The unit must be earthed.
ii. Check that the immersion heater control thermostats are correctly set for maximum performance (top
at 75°C and bottom at 85°C). The bottom thermostat may be reduced slightly (not below 75°C) where it is
known that hot water demand will not be high.
iii. Do not switch on the electricity supply before the unit has been filled with water.
4.3.Fill the system
1. Having completed the system pipework, turn on the mains water supply and the thermal store will fill with
water via the internal feed and expansion tank.
2. Vent the hot water pipework by opening a hot tap.
3. Check the immersion heaters and all connections for water soundness, rectifying where necessary.
4. Check the water level in the feed and expansion tank is to the marked water line. If necessary adjust the float
operated ball valve. Fit the plastic lid on the tank.
5. COMMISSIONING
5.1 Appliance commissioning
1. Check that the electric circuits are tested in accordance with the IEE wiring regulations and that the system is
operating satisfactorily in terms of the proper functioning of all the components and their controls.
2. The unit should be fully heated to ensure the thermostats of both the immersion heaters are operating correctly.
5.2 Blending valve
The blending valve is factory set to approximately 50°C.
The blending valve has an output temperature range from 35° to 55°C. If it is necessary to adjust the temperature
proceed as follows:-
1. Locate the nearest outlet being supplied by
the valve.
2. Open the outlet to allow a flow rate of at least
4 litres/min.
3. Allow the water to run for at least one minute
to ensure the mixed water temperature has
settled.
4. Using a thermometer, check the mixed water
temperature.
Has the desired temperature been
achieved?
Yes - go to paragraph 7
No - go to paragraph 5
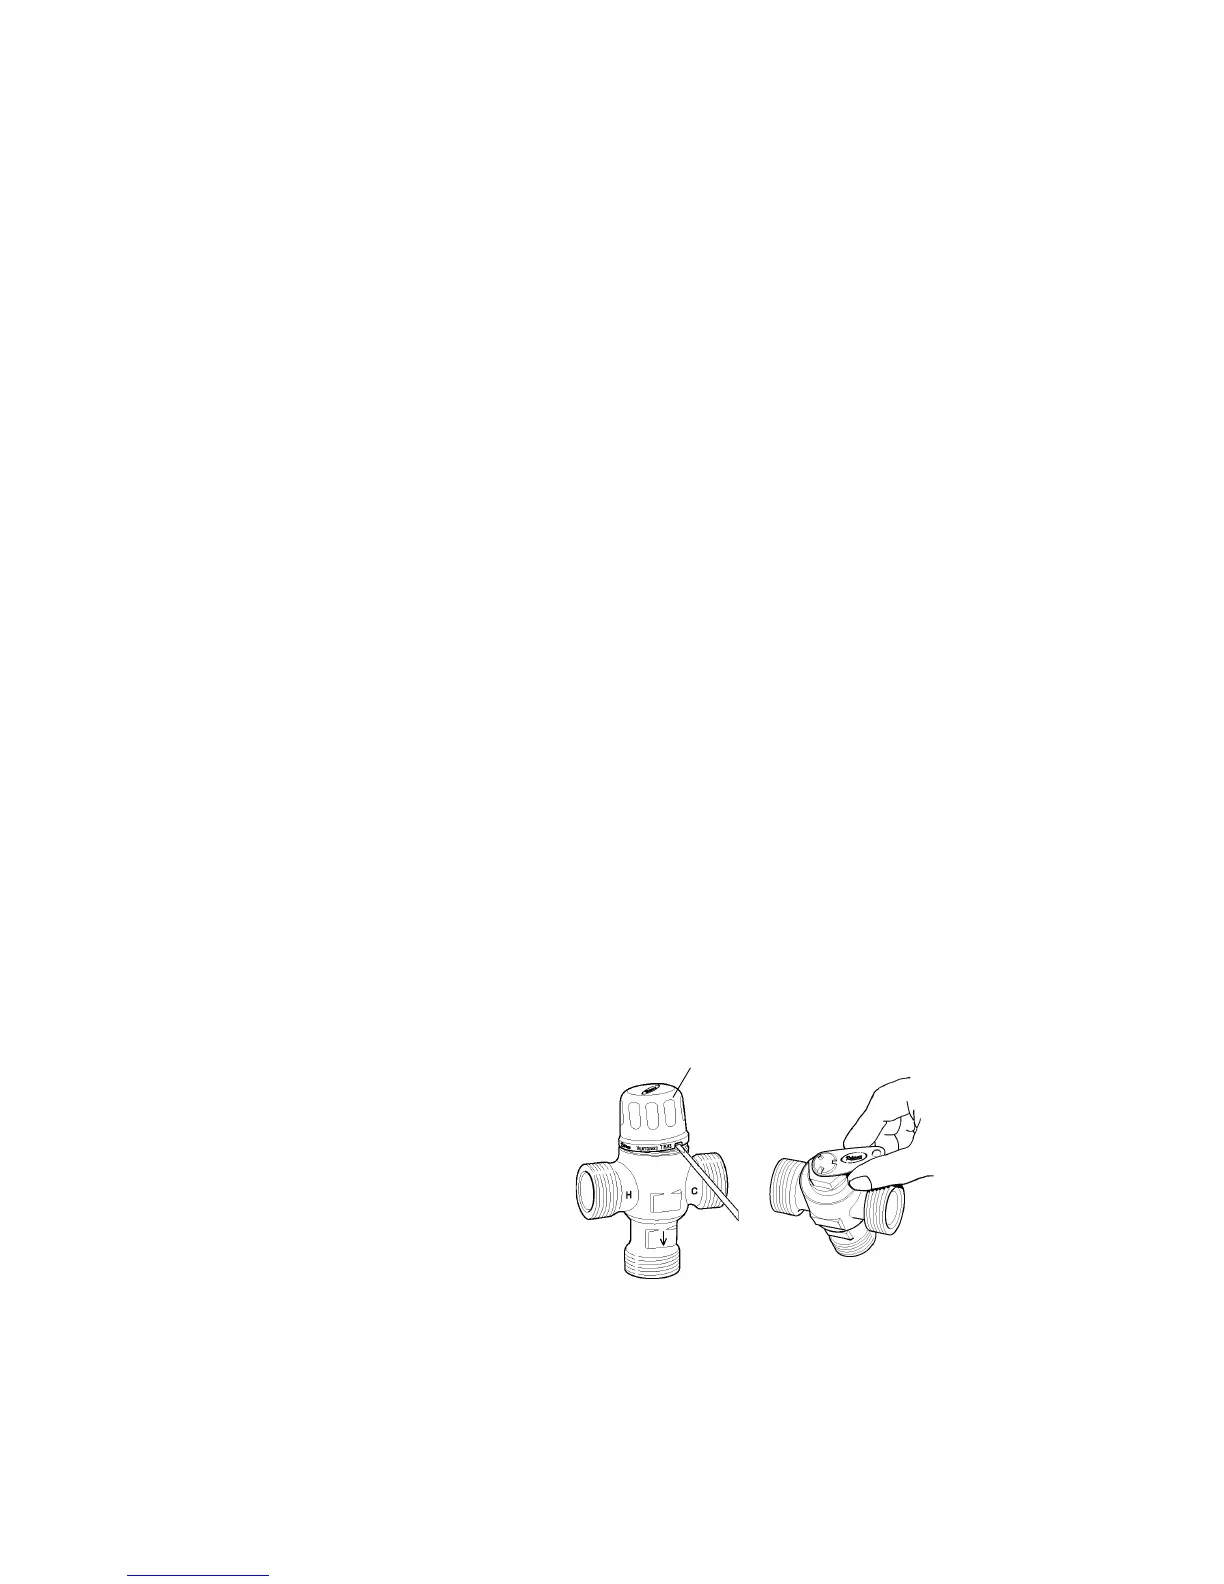
5. Adjust the valve as shown in Fig 3 (using the adjusting key supplied) until the desired mixed outlet temperature
is achieved.
6. Repeat paragraphs 1 - 4.
7. Replace the valve cap and close the outlet.
A record of the commissioning settings should be made for comparison with future maintenance checks.
Turn anti-clockwise to
increase temperature
Fig. 3
Turn clockwise to
reduce temperature
Cap