User Manual QT250 and QT800, ID 2021 2.0 July 2018
This procedure describes how to change the battery in Eltorque QT250 Failsafe
actuator.
Parts of this procedure also applies to first time installation the Failsafe actuator
as the battery cable must be connected - see steps 12 – 16.
Enable service mode either from the actuator control panel, or by rotating the handwheel of
the actuator.
Make sure that the actuator service indicator light is yellow on all actuators that the battery
change procedure is going to be performed on before proceeding to the next step.
Turn off the power going to all actuators that the battery change procedure is going to be
performed on.
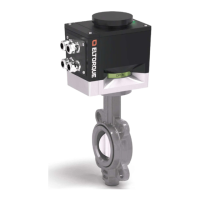
Remove the six hexagon socket cap
nuts holding the interface to the
actuator.
The nuts are circled in red in the
illustration.
Remove the nuts by turning them
counterclockwise. Place the nuts in a
secure location.
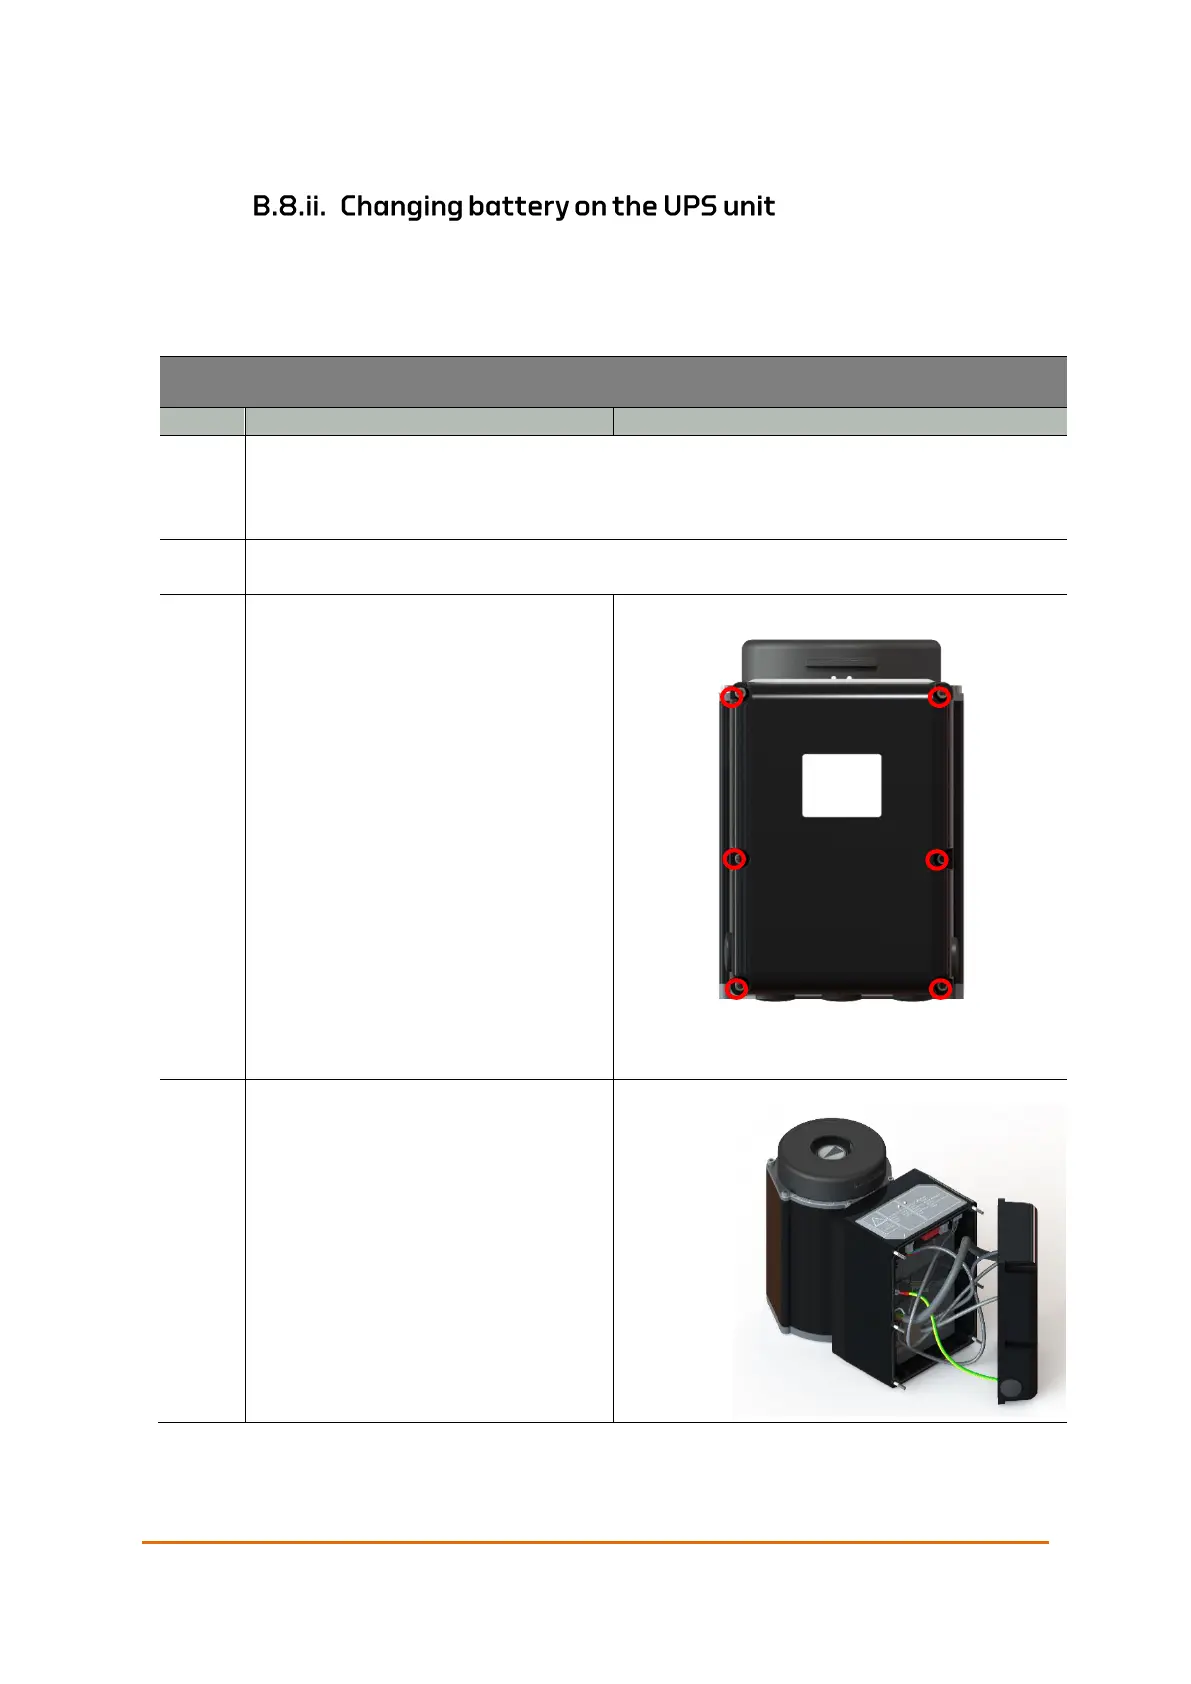
The interface and failsafe module are
loose when the nuts are removed: Make
sure that the interface and failsafe
module do not fall off.
Required equipment:
− 4mm Hexagon Key
Remove the interface as shown in the
illustration.
Make sure to not drop the interface, or
to let it hang by the cables.
 Loading...