INSTALLING THE eluminocity GridCharge
1. Use the supplied template to drill bolt holes
in the wall for the mounting bracket and the
optional cable hanger.
Note: Follow applicable accessibility
requirements for the mounting position. The
unit shall be mounted at a sufficient height
from grade such that the height of the storage
means is located between 600 mm (24
inches) and 1.2 m (4 feet) from grade per
NEC Article 625.
2. Secure the mounting bracket and the
optional cable hanger bracket to the wall
with appropriate bolts as follows:
■ For masonry walls use 1/4” expansion
bolts and torque to 78 lb•in (8.8 N•m).
■ For finished walls supported by wood
studs use #8 wood screws of 2” or above
screw length and torque to 26 lb•in
(3 N•m).
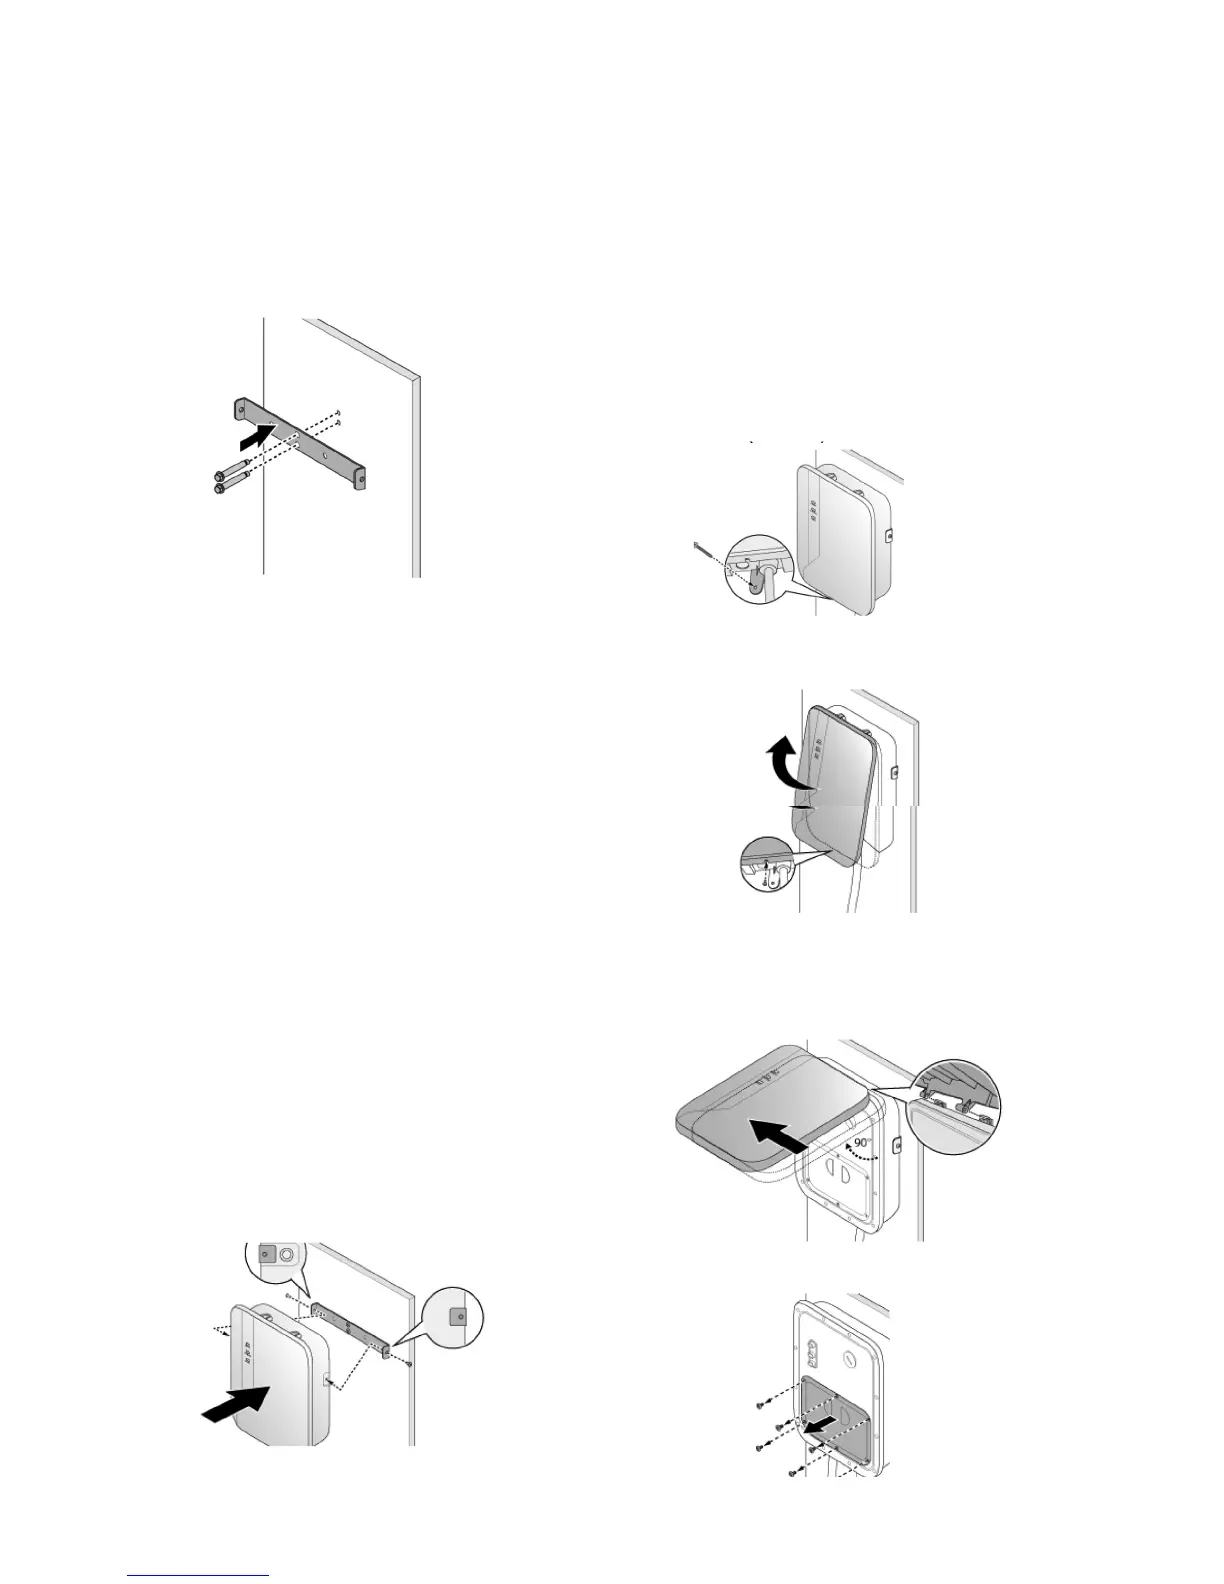
3. Align the screw holes of the mounting
bracket with the eluminosity GridCharge.
Install and secure the eluminosity
GridCharge on the mounting bracket with
the two (2) Torx T30 screws supplied.
Torque to 13 lb·in (1.5 N·m).
4. Secure the mounting bracket and the
optional cable hanger bracket to the wall
with appropriate bolts as follows:
■ For masonry walls use 1/4” expansion
bolts and torque to 78 lb•in (8.8 N•m).
■ For finished walls supported by wood
studs use #8 wood screws of 2” or above
screw length and torque to 26 lb•in
(3 N•m).
5. Remove the screw located at the bottom of
the front cover.
6. Hold the front cover. Flip upward and then
shift leftward to separate the front cover
from the charger.
7. Remove the compartment cover.
Installation-manual_CH-211
v1.0.4