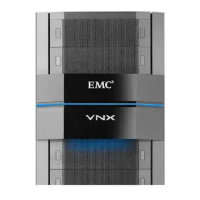
Overview of installing in a Overview of installing in a customer cabinetcustomer cabinet
If your system was If your system was shipped to be shipped to be installed in your own cabinet, the installed in your own cabinet, the installation procesinstallation process involvess involves
the following:the following:
1.1. ReaRead and compd and complete the plete the prerrerequiequisite tasite tasks listsks listed ined in “Before
“Before you begin” oyou begin” on pagen page 77..
2.2. Unpack Unpack the shipping the shipping boxes boxes and verand verify the shipify the shipping conping contents as tents as described described inin “Unpack your
“Unpack your
systesystem” on pm” on pageage 99..
3.3. Remove Remove shipping conshipping container ctainer contents and ontents and assemble assemble the componthe components in yents in your cabineour cabinet ast as
described indescribed in “Assemble comp
“Assemble components in your cabonents in your cabinet” on pageinet” on page 1313..
4.4. CabCable yle your our systsystem as em as descdescriberibed ind in “Cable y
“Cable your system” on our system” on pagepage 1919..
5.5. Power up Power up your systyour system by conem by connecting power cnecting power cables, and theables, and then verify that the syn verify that the system powerestem poweredd
up correctly by checking the LEDs of the DPE as up correctly by checking the LEDs of the DPE as described indescribed in “Pow
“Power up” on pager up” on pagee 2121..
6.6. OptionallyOptionally, you can , you can add a disk arradd a disk array enclosure ay enclosure (DAE), p(DAE), power it up anower it up and then verify that the d then verify that the DAEDAE
powered up correctly by checking the DAE LED status as described inpowered up correctly by checking the DAE LED status as described in “Add additional storage”
“Add additional storage”
on pon pageage 2323..
7.7. CoCompmpletlete the te the taskasks liss listed ited inn “Set
“Setup” on pup” on pageage 3939..

 Loading...