8
ANDERSON GREENWOOD SERIES 400 PISTON PILOT POPRV
InstallatIon and MaIntenance InstructIons
3.1.4 Pilot variations and accessories
For pilot equipped with a one-piece spool, Figure3
Style A, remove the spool seal (Item28) and the
outlet seat (Item 30) from the spool (Item31; then
remove the spool from the inlet nozzle.
For pilot equipped with a three-piece spool,
Figure 3 Style E, unscrew the spool nut (Item39)
from the inner spool (Item 41), remove the
outer spool (Item 40) from the inlet nozzle and
remove the inner spool from the outer spool.
For pilot equipped with a field test accessory,
Figure 4, remove this accessory with the shuttle
from the body (Item 1). Disassemble the dome
connector from the field test body and remove
the spring, plunger, and shuttle.
For pilot equipped with a backflow preventer
and pilot exhaust backflow check valve, Figure5,
remove these accessories from main valve
dome port (backflow preventer) and the pilot
exhaust port (backflow check valve). Unscrew
the backflow preventer bushing from the body
and remove the shuttle. Unscrew the fitting
from the backflow check valve body and remove
the flow washer and ball.
Remove and discard all old seats, seals, and
O-rings before beginning assembly.
3.2 Assembly
3.2.1 Standard pilot – gas or liquid service
Assembly is done in the reverse order of
disassembly. Lightly lubricate all O-rings, all
sliding surfaces, screw threads and spring
washer pivot points with Dow Corning No. 33
Silicone grease or equivalent. Do not lubricate
the inlet seat (Item 7) or the outlet seat (Item 30).
For pilot with lift lever, do not install lift lever
handle assembly (Item 42) until final pilot
adjustment is completed, see paragraph 4.6.
Pilot assembly and pretest
When assembling piston plate with attached
internal parts subassembly to body
subassembly, orient hole in plate to fit over the
length of damper bushing (Item 38) projecting
past the body face. Engage spool in outlet
nozzle and press gently until assembly drops
in place.
Pretest to verify proper feedback piston
function by depressing piston stack assembly
downward. The bias spring should return
the stack assembly to the upward position. If
the stack assembly does not return, identify
and correct source of malfunction before
completing assembly.
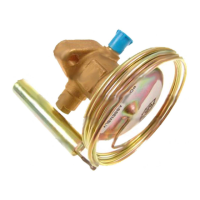
3.2.2 Iso-Dome pilot – gas service
All Iso-Dome pilots are gas service pilots
(seeNote paragraph 3.1.2).
Assemble pilot in accordance with procedures
described in paragraph 3.2.1. Support the
regulator when threading the adapter (Item48)
with regulator attached into the body (Item1).
With an
11
/
16” wrench used to back-up the
adapter, the regulator may be rotated ± ¼ turn
about the adapter axis to align the bracket
(Item 49) mounting surfaces on the body and
the regulator bracket (Item 56).
If alignment can not be achieved with ± ¼ turn,
unthread the regulator from the adapter. Clean
the ¼ NPT threads on the adapter and in the
regulator outlet port and wrap the adapter
threads with several wraps of PTFE thread seal
tape. Screw the regulator onto the adapter and
tighten sufficiently to effect a thread seal and
alignment of the bracket mounting surfaces.
Loosen the two #10-24 socket head cap screws
in the regulator bracket so that the bracket can
slide along the outside of the regulator. Install
the bracket and hand tighten two bracket
bolts (Item 52) into the body. Hand tighten
two bracket bolts (Item 53) into the regulator
bracket and securely tighten the two #10-24
socket head cap screws into the regulator
bracket.
Securely tighten the four bracket bolts. Do not
install the regulator cover spacer and regulator
cover cap until final adjustment is completed,
see paragraph 4.3.
 Loading...