EC3-812_65118_EN_R00.doc Replacement for R- 1 / 5 PCN: 864916 18.03.2009
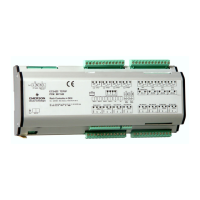
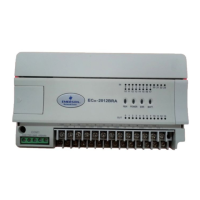
EC3-812 Dual Circuit Rack Controller
Operating Instructions
GB
Note: This document contains short form instructions for experienced users.
Use last column in List of Parameters to document your individual settlings.
More detailed information can be found in the User Manual.
The EC3-812 dual circuit rack controller is a digital controller for racks in
commercial refrigeration applications. The controller is designed for split suction
systems with a common discharge side. Typically the suction side consists of the
combination of a Low Temperature (LT) rack and a Medium Temperature (MT)
rack. The LT rack can consist of up to 3 single stage compressors and the MT rack
of up to 4 single stage compressors. For the two controllers, the control target is to
maintain the suction pressure at a defined value by varying the available
compressor capacity. For the measurement of the two suction pressures, two PT4
pressure sensors with 4 – 20 mA interface can be connected to the controller.
The rack controller has seven relays outputs to activate the compressors. Eight
digital inputs for 24V AC/DC or 230V AC and four digital inputs for 24V AC/DC
are available, seven for compressor serial alarm, two for low pressure alarm, one
for high pressure alarm, one for oil level alarm and one for refrigerant level alarm.
To control the discharge end temperature of compressor from LT rack, three
temperature inputs are available. Two analogue outputs 0 to 10 V are available to
control the first compressor of MT and LT rack with an inverter. The optional
display can show values with a decimal point in the range between -19.9 and +19.9
otherwise without decimal point. An IR receiver for the optional IR remote control
unit is build in. The supply voltage is 24 VAC. Transformers for 230V or 110V
mains supply are available as options.
!
Safety instructions:
• Read installation instructions thoroughly. Failure to comply can result in
device failure, system damage or personal injury.
• The product is intended for use by persons having the appropriate
knowledge and skills.
• Ensure electrical ratings per technical data are not exceeded.
• Disconnect all voltages from system before installation.
• Keep temperatures within nominal limits.
• Comply with local electrical regulations when wiring
•
Technical Data
EC3 Series Controller
Power supply 24VAC ±10%; 0.5A; 50/60Hz; Class II
6.3mm spade earth connector
Power consumption 20VA max.
Communication TCP/IP Ethernet 10MBit/s
Plug-in connector size Removable screw terminals
wire size 0.14 … 1.5 mm
2
Temperatures:
storage
operating
-20 … +65°C
0 … +60°C
Humidity 0…80% r.h. non condensing
Protection class IP20
Inputs Feedback failure contact for compressor B1 to B3 and
A1 to A4, low-pressure alarm contact A, low-pressure
alarm contact B, high-pressure alarm contact, oil level
alarm contact and refrigerant level alarm contact
Switch
8 x 24V AC / DC or 230V AC
4 x 24V AC/DC
Temperature sensor
inputs
NTC ( 1M at 25°C for temperature input 1 to 4:
discharge temperature; 10K at 25°C for temperature
input 5 and 6)
Pressure transmitter
inputs
2 x 24VDC, 4...20mA
Outputs
8 x Relays SPDT
I
max
= 8A res (2A), VAC max = 250V :
Compressor relays B1 to B3, A1 to A4
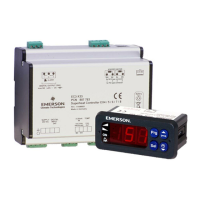
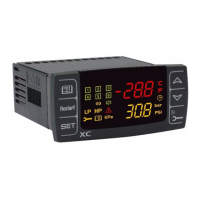
ECD-000 Display Unit
Power Supply From EC3 via connecting cable
Display 2½-digit red LED with decimal point
reversible between °C and °F
LED indicators Controller 1, Controller 2, p bar, Alarm, IR status
Temp. & Humidity Identical to EC3 specifications above
Protection class IP65 (front protection with gasket)
Connecting cable ECC-N10 (1m), ECC-N30 (3m), ECC-N50 (5m) or
CAT5 cable with RJ45 connectors
Mounting
The EC3 can be mounted onto a standard DIN rail.
The ECD-000 can be mounted in panels
with a 71x29 mm cutout. See dimensional
drawing below for space requirements
including rear connectors.
Push controller into panel cutout. (1)
Make sure that mounting lugs are flush with
outside of controller housing
Insert allen key into front panel holes and
turn clockwise. Mounting lugs will turn and
gradually move towards panel (2)
Turn allen key until mounting lug barely
touches panel. Then move other mounting
lug to the same position (3)
Tighten both sides very carefully until
display is secured. Do not over tighten as
mounting lugs will break easily.