Do you have a question about the Emerson E2 and is the answer not in the manual?
Details the RX-100, RX-300, and RX-400 models, focusing on refrigeration and defrost control for cases.
Covers HVAC systems for retail, industrial, and commercial buildings, emphasizing energy efficiency and environmental control.
Explains HVAC, lighting, and refrigeration control for convenience stores, focusing on energy efficiency.
Describes the I/O Network (RS485) and Echelon Network (LonWorks) used for E2 communication.
Details the RS485 three-wire connection for input/output devices, including peripherals.
Explains the Echelon Network for interconnecting E2s and peripherals like case controllers and RTUs.
Covers how E2s share information across Echelon or Ethernet networks in larger installations.
Lists Emerson Retail Solutions publications supporting E2 installation and operation.
Describes the E2's on-line help for quick access to information on properties, screens, and troubleshooting.
Explains how E2 applications are activated using unique license keys obtained from Emerson Retail Solutions.
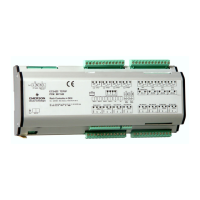
Provides an overview of the E2 controller's components and communication networks.
Details the E2 CPU or main processor board, including its components and functions.
Explains the PIB's role in interfacing power and communications, and housing wiring connections.
Describes the E2's QWERTY keyboard layout and function keys.
Details the LEDs on the PIB, main processor board, and keyboard for determining operating status.
Details various I/O network boards and peripherals used with the E2 controller.
Explains the Gateway board as an RS485 to RS485 converter and its basic functions.
Describes the MultiFlex line of boards offering input, output, and smart control solutions.
Details the MultiFlex 16 input board, its features, and compatibility.
Describes MultiFlex boards combining input, relay, digital, and analog output functionalities.
Details the MultiFlex Condensing Unit Board (CUB) for controlling single condensing units.
Describes the MultiFlex RTU board designed for package rooftop HVAC units.
Details the MultiFlex RCB, an improved RTU with enhanced features for rooftop HVAC control.
Explains the MultiFlex PAK board for controlling compressors and condenser fans.
Describes the MultiFlex ESR Valve Regulator board for controlling stepper motor valves.
Details the Hand-held Terminal (HHT) used for diagnosing and testing Emerson Retail Solutions products.
Explains the 8RO and 8ROSMT relay boards used for connecting E2 to standard control relay outputs.
Describes the 4AO Analog Output Board for controlling analog devices with variable voltage signals.
Details the 8DO Digital Output board and PMAC II panel for anti-sweat heater control.
Lists Echelon-based boards and peripherals for E2 control networks.
Describes the 16AIe Echelon-based input board, noting it is discontinued.
Details the 8ROe Echelon-based input board, noting it is discontinued.
Describes the EC-2 as an advanced refrigerated case controller and temperature/case status indicator.
Details CC-100 and CS-100 controllers for case functions like lights, fans, defrost, and anti-sweat.
Explains the TD3 digital display unit for showing case and product temperature.
Describes the FSD for reporting alarm information and providing centralized access to system status.
Provides instructions and dimensions for mounting the E2 controller against or inside a wall or panel.
Details the standard mounting method using four holes at the rear of the enclosure.
Explains the recessed mount method, requiring a rectangular hole cut into the mounting surface.
Describes options for mounting the E2 where previous generation controllers (Einstein/REFLECS) were located.
Details the blank face control for systems with multiple E2s, accessed remotely.
Provides guidance on mounting I/O boards, recommending locations adjacent to the E2.
Explains mounting dimensions for single and double enclosures for I/O boards.
Details the installation of boards without enclosures using a snap-track.
Covers mounting of Echelon devices like CC-100, CS-100, and MultiFlex ESR.
Provides mounting dimensions for CCB controllers, generally installed within the raceway or on top of the case.
Details mounting dimensions for the MultiFlex ESR board, supplied with a snap-track.
Explains TD3 mounting dimensions, typically flush-mounted on refrigerated cases.
Describes the COM3 Plug-In card mounting on the PIB for modem/communication expansion.
Provides mounting instructions and locations for various sensors and transducers.
Details mounting instructions for pressure transducers, recommending a vertical position.
Explains location and mounting for indoor temperature sensors, away from heat sources.
Provides location and mounting guidance for outdoor temperature sensors, preferably on the north side.
Details mounting for insertion temperature probes in AHU or RTU ducts.
Describes mounting for supply and return air sensors, directly in the air stream.
Covers mounting of various refrigeration system sensors, often installed by the equipment manufacturer.
Details mounting for product temperature probes, designed for easy attachment to refrigeration cases.
Provides mounting instructions for indoor and outdoor RH sensors.
Details mounting instructions for the indoor RH sensor, recommending a central location.
Provides mounting instructions for outdoor RH sensors, suggesting a north-facing location.
Explains mounting for duct-mounted relative humidity sensors, ensuring an airtight seal.
Details mounting for the Dewpoint Probe, recommending a location 4-6 feet from the floor.
Provides mounting instructions for the light level sensor, suggesting a location facing away from direct sunlight.
Covers installation of liquid level sensors, usually done by the refrigeration manufacturer.
Mentions the Refrigerant Leak Detector System and refers to its installation manual.
Guides through the initial setup of the E2 controller, including enclosure and board installation.
Details opening the enclosure and exposing the main processor board and PIB.
Describes the main processor board's mounting on the hinged door, behind the keyboard.
Explains the PIB's role in interfacing power and communications with the main board.
Covers powering the E2 controller, including the 24VAC input and transformer requirements.
Details the two RS485 network connector ports on the PIB for I/O board connections.
Explains the use of RS485 termination jumpers for the beginning and end of an RS485 network.
Describes the Echelon Network plug for input and output connections to peripherals.
Details the Echelon jumper located on the Echelon board that plugs into the main processor board.
Lists available plug-in card options for the E2 controller, such as Echelon cards and modems.
Explains the Echelon plug-in card for E2 communication on the Echelon network.
Details the COM3 RS232 plug-in card for interfacing with external modems.
Describes the COM3 internal modem plug-in card for E2 serial configuration.
Details the plug-in digital I/O network card for adding digital outputs and inputs.
Explains the four-channel repeater for boosting signal strength on Echelon networks.
Explains the centralized location for setting up communication ports (COM ports) in the E2 controller.
Details accessing Serial connections via General Setup to configure COM ports.
Covers setting up the associated COM port in the Serial Connection Manager after connecting a COM card.
Describes the I/O network used by Emerson Retail Solutions boards and controllers connected to the E2.
Explains the terminology for input, relay output, analog output, and combination I/O boards.
Details the MultiFlex-plus board, which offers improved RS485 transceiver performance.
Specifies the recommended wire types for RS485 I/O and MODBUS wiring used by the E2.
Explains the RS485 I/O network structure as a single open communications loop or daisy chain.
Provides guidelines for minimizing network noise when installing RS485 networks.
Details how to assign unique network ID numbers to boards for E2 communication.
Explains how to set the baud rate for I/O boards using dip switches.
Describes the purpose and settings of terminating jumpers for the I/O Network.
Covers power requirements and transformer compatibility for E2-compatible I/O boards.
Provides step-by-step graphical instructions for installing I/O Network devices.
Details E2 BX controller communication with IMC/Prodigy rooftop units.
Explains how E2 controllers can select MODBUS as a network type for device communication.
Describes communication with Control Techniques variable-speed drives using MODBUS.
Details E2 communication with Copeland ISD compressors via the ECT MODBUS network.
Explains E2 communication with XR and XEV case controllers for various control functions.
Describes the iPro DAC as a packaged HVAC control board for zone control applications.
Details the Energy Meter for measuring energy data, supporting multiple output options.
Explains the MRLDS for monitoring refrigerant leaks and its communication via MODBUS.
Covers Discus compressor monitoring using MODBUS for run history, fault history, and alarm status.
Explains CoreSense Communications for monitoring A/C scroll compressors and sending data to the controller.
Details thermostat communication with E2 via MODBUS for status information and setpoint adjustments.
Describes the RLDS for continuous monitoring of refrigerant gas levels in up to 16 zones.
Introduces BACnet as a communication protocol for building automation and control networks.
Defines BACnet's core concepts: Object, Object Property, and Services.
Explains BACnet communication supporting MS/TP or IP protocols.
Details the MS/TP protocol used over RS-485 for BACnet communication.
Covers E2's support for connecting to devices via IP (Internet Protocol).
Explains BACnet support for device discovery and interrogation.
Describes the roles of client and server in BACnet communication.
Guides setting up the E2 port for BACnet MS/TP connection.
Details the steps to add and commission BACnet devices within the E2 controller.
Provides guidance on configuring IP settings for open network configurations.
Outlines industry-accepted practices for Ethernet wiring and controller specifications.
Lists Ethernet equipment types and their specifications, including switches and hubs.
Details TCP/IP protocol and port usage for controller communication.
Describes two types of Ethernet network options: Closed and Open Networks.
Explains the setup where E2 devices are not connected to a store's LAN.
Details the setup where E2 devices are connected to the store's LAN.
Guides through setting up the TCP/IP and Peer Network tabs for Ethernet communication.
Advises consulting an IT Network Administrator for network troubleshooting issues.
Introduces the Echelon network for interconnecting E2s and associated devices.
Specifies the Echelon Network cable type and its properties.
Explains constructing Echelon Networks using daisy-chaining and subnets.
Details the maximum number of Echelon devices per segment and the need for routers.
Explains the importance of device termination at the ends of the Echelon network segment.
Describes using a termination block for Echelon devices that lack on-board termination.
Outlines wire restrictions, including maximum segment length and the use of routers/repeaters.
Covers the installation of E2 control system peripheral boards communicating via the Echelon Network.
Details power requirements for Echelon devices, emphasizing the need for Class 2 power.
Guides connecting sensors to input boards, setting input types, and providing power.
Details connecting sensors, setting input type dip switches, and power connections.
Explains wiring for MultiFlex, 16AI, and 8IO boards, including terminal descriptions.
Specifies required wiring types for different sensor types used with E2.
Guides setting input type dip switches to configure sensor input behavior.
Details connecting sensors to the 5V or 12V power terminals on input boards.
Covers telling E2 the types of sensors and devices connected to each I/O point.
Guides configuring a point by specifying its data type, application, and association.
Explains how to use the Input Definitions/Status screen to read input values.
Details setting up analog inputs, including sensor types, units, and default values.
Guides setting up digital inputs for point names, engineering units, and important parameters.
Covers setting up output devices connected to the 8RO, 8IO, and MultiFlex boards.
Explains how to wire Form C contacts for three-terminal relay connections.
Details setting up relay outputs on MultiFlex boards, including fail-safe decisions.
Explains how the fail-safe dip switch determines the relay state during communication loss.
Describes the Relay Output Test Mode for manually energizing/de-energizing relays on MultiFlex and 8ROSMT boards.
Provides guidance on wiring outputs to points for old and new 8ROs and 8RO-FCs.
Explains the output point LED status indication based on fail-safe dip switch position.
Guides setting up output devices by specifying their type (Digital, Pulse, One Shot, Analog).
Details configuring output points by specifying type, application, and association.
Guides setting up digital outputs, specifying their ON/OFF states and timing parameters.
Explains setting up analog outputs, including point name, output type, and engineering units.
Provides input connections and default assignments for CC-100 case controllers.
Details input connections for CC-100, including temperature, auxiliary, and HHT ports.
Covers CC-100 power module wiring, connecting to 120/240 VAC sources.
Explains CC-100 valve cable connections for pulse and stepper valves.
Guides users through logging into the E2 controller with default credentials.
Explains the process of performing a 'clean out' to erase memory and reset the controller.
Guides specifying the number of devices on Echelon and I/O networks.
Explains entering information about device types for E2 controller setup.
Describes the E2's Home screen, which displays real-time system status.
Explains how to customize the Home screen with eight different display options.
Identifies common screen elements like the header, function keys, and help line.
Describes the screen header, containing time, date, controller name, and alarm notifications.
Lists and describes icons in the header indicating system activity and status.
Explains the function keys located at the bottom of the screen and their varying usage.
Describes the help line providing field descriptions, ranges, and setup instructions.
Explains different screen types: Main Menu, Status Screens, Actions Menu, and Setup Screens.
Details accessing applications and system configuration via the Main Menu.
Describes status screens as real-time views of application functions and data.
Explains the Actions Menu available from status screens for tasks like graphing, logging, and setup.
Describes setup screens as the interface for changing settings, setpoints, and defining inputs/outputs.
Details the System Configuration Menu options for setting up the E2.
Explains the System Information Menu options for setting time, date, passwords, and general controller info.
Guides changing the E2's time, date, time format, and daylight savings settings.
Details setting the time format, active date, active time, time zone, and time server.
Guides setting up the modem for remote communication via phone.
Covers entering IP address information for Ethernet connection and controller communication.
Explains setting up baud rates for COM1 Serial (RS232) and I/O Network.
Details accessing and setting the baud rate for COM1 Serial (RS232) communication.
Explains setting the I/O Network baud rate for communication with input/output boards.
Guides setting up user accounts, passwords, and access levels for E2 security.
Explains customizing access levels required for performing actions within the E2 unit.
Details the process of creating new user accounts with usernames, passwords, and access levels.
Provides instructions on how to delete a user account from the system.
Guides setting up the I/O Network, accessing menus for network summary and connected devices.
Explains specifying the number of various I/O boards connected to the E2.
Details how to check the online status of boards on the Echelon and I/O Networks.
Guides specifying the number of devices on the Echelon Network and commissioning them.
Explains specifying unit numbers and names for Echelon devices.
Details the process of commissioning Echelon devices using service buttons or manual ID entry.
Explains commissioning devices using the service button method.
Details commissioning devices by manually entering their Neuron ID number.
Explains obtaining and activating license keys for E2 features.
Describes E2 Web Services for viewing and adjusting parameters through a web page.
Guides setting up alarms and specifying alarm reporting types.
Details the different ways E2 can report alarms: Display Line, Alarm Output, Dial-Out, Echelon Network.
Explains configuring an E2 as an alarm annunciator for networks with multiple E2s.
Guides setting up dial-out sites for remote alarm reporting via modem.
Describes the four sources for alarm reporting: Display Header, Advisory Output, Dial-Out, and Echelon Network.
Explains distributing commonly used input values between multiple E2s for shared access.
Details priority settings (Primary, Secondary) for global sensor inputs.
Guides adding, deleting, and configuring applications through setup screens.
Provides steps for adding new applications or deleting existing ones.
Explains navigating and using setup screens to configure applications.
Details the Edit menu options for changing field formatting, setting multiple outputs, and alarm setup.
Guides programming setpoints for applications from their respective setup screens.
Explains navigating setup screens using index tabs and function keys.
Describes using the Help key to access parameter-specific documentation.
Explains suction group applications for cycling compressors to maintain constant suction pressure or temperature.
Introduces the E2 RX controller's use of suction group applications for compressor management.
Details the standard suction group application, its PID control strategy, and variable-speed compressor support.
Describes the Enhanced Suction Group application, featuring learning mode and improved efficiency.
Provides an overview of input/output devices used in Suction Group applications.
Covers E2 RX control of air-cooled or evaporative condensers using various strategies.
Details air-cooled condenser control strategies: Air Cooled and Temperature Differential.
Explains evaporative condenser control, similar to air-cooled but with water spray.
Describes Condenser Control's ability to manage single-speed, two-speed, and variable-speed fans.
Explains the special split mode for reducing condenser capacity in cold climates or for reclaim heat.
Details the fast recovery feature to quickly reduce system pressure by turning on all condenser fans.
Provides an overview of input/output devices for typical Condenser Control applications.
Covers Standard Circuit applications for cases not using dedicated case controllers.
Explains four control methods for case circuits: Temperature Monitor, Temperature Control, Line Up(ESR)/Defrost, Line Up(MFESR)/Defrost.
Details defrost initiation methods: schedule, external trigger, or manual command.
Describes the three steps of a defrost cycle: Pump Down, Defrost, and Run-Off.
Lists five defrost strategies: Timed, Reverse Air, Hot Gas, Reversed Cycle Hot Gas, and Electric.
Explains defrost termination methods, including schedule-based and temperature-based termination.
Details initiating emergency defrost cycles, which override normal termination.
Covers Hot Gas Defrost with ESR8 and MultiFlex ESR, forcing valves OPEN for hot gas flow.
Explains Clean Switches for shutting down case circuits and Door Switches for disabling evaporators.
Details Clean Switch configuration (Switched or Timed) for entering clean mode.
Explains how door switches control refrigeration and fans, and turn lights ON.
Describes fan control for circuits, including states during refrigeration and defrost modes.
Details the TD3 display unit for monitoring case and product temperature, and its status light.
Describes the Control Link CD case display and its communication via RS485.
Provides guidelines for wiring case circuits to the E2 I/O Network, including sensors and relays.
Covers Case Control Circuit applications for CC-100, CS-100, EC-2s, or CCBs.
Introduces Case Control Circuits, relying on E2 for setpoints and defrost scheduling.
Details six versions of case control software for Emerson Retail Solutions case control family.
Explains CC-100 support for pulse and stepper valves, using PID control for aperture rates.
Covers refrigeration control in case controllers, including EEVs and EEPRs.
Details Electronic Expansion Valves (EEVs) for liquid pulse and liquid stepper control.
Explains EEPRs for suction-side control of case temperature.
Describes defrost control aspects for case circuits, including states and types.
Outlines the three steps of a defrost cycle: Pump Down, Defrost, and Run-Off.
Lists three defrost types for case controllers: Off Cycle (Timed), Hot Gas, and Reversed Cycle Hot Gas.
Explains defrost termination methods, including temperature and pulsed defrost.
Details demand defrost using optical sensors to skip cycles when frost is not high.
Describes initiating emergency defrost cycles that override normal termination.
Explains the WAIT state entered by case controllers after terminating defrost.
Covers anti-sweat heater control based on dewpoint monitoring.
Details dewpoint input sources for anti-sweat control, emphasizing E2 network connection.
Explains how dual temp control changes setpoints based on an external digital input.
Describes fan control for case circuits, including operation during refrigeration and defrost modes.
Covers case light control, typically ON during normal operation, with exceptions for overrides.
Details Clean/Wash Mode for case cleaning or maintenance, disabling refrigeration and fans.
Explains control of walk-in boxes using CC-100P or CCB, including door switch functionality.
Describes Fail-Safe Mode entered during major system malfunctions to maintain basic functionality.
Covers how CC-100 and CS-100 cope with some sensor failures without entering Fail-Safe Mode.
Refers to Section 4 for input/output wiring details and commissioning of case controllers.
Guides changing parameters in individual case controllers, such as input configuration or valve types.
Explains associating case controllers (CC-100, CS-100, EC-2s, CCBs) with Case Circuit Control applications.
Describes logging groups for recording input/output values with parameters like interval and duration.
Lists possible data errors that can occur in log data and their descriptions.
Explains how E2 converts analog sample values to lower resolutions for logging.
Describes the Base Log group as a permanent group for default logging of inputs and outputs.
Guides setting up logging parameters, including accessing the log group summary screen.
Explains accessing the status screen for logging groups to view configuration and usage information.
Lists available log reports indicating system resource usage and logged data details.
Describes the Logging Group Report, providing configuration summary and associated points.
Details the Application Log report summarizing logged points for the current application.
Explains the System Log report summarizing logged points for all applications.
Covers AHU control applications, governing heating, cooling, dehumidification, fans, and economizers.
Introduces E2 BX support for AHU control, directly managed by the E2 controller.
Details Temperature Control for AHUs, specifying input sources and operating characteristics.
Explains setting alternate heating/cooling setpoints for occupied/unoccupied and summer/winter modes.
Describes AHU fan control for single-speed, two-speed, and variable-speed fans in different modes.
Covers economizer damper control on AHUs based on favorable outdoor air conditions.
Lists six methods for AHU Control to determine favorable economization conditions.
Details lockout features: Max Outside Air Humidity and Minimum Supply Temp.
Explains simple control of digital economizers, opening dampers when cooling is needed.
Describes analog economizer control for variable-position dampers using PID control.
Covers dehumidification control using AHU cool stages or desiccant wheels.
Explains curtailment programs for disabling user-defined loads during peak power times.
Details OSS feature that optimizes heating/cooling start/stop times based on occupancy changes.
Allows setting separate Cut In/Cut Out setpoints for heat and cool stages.
Explains associating AHU applications with Zone applications for shared setpoints.
Lists wiring instructions for typical AHU setup inputs and outputs.
Manages rooftop units or AHUs working together to maintain space temperature and humidity.
Defines an HVAC Zone as a collection of units maintaining space conditions.
Explains creating Zone applications and associating HVAC units for information sharing.
Lists applications that can be associated with a Zone: MultiFlex RTU, RCB, and AHU.
Details the MultiFlex RTU board's role as an interface for rooftop unit control.
Describes the MultiFlex RCB board for rooftop HVAC control and zone applications.
Covers AHU control aspects and their association with Zone applications.
Explains how Zone applications pass setpoints to HVAC units for temperature control.
Describes how Zone Temperature is calculated and used for managing units within a Zone.
Covers Zone application responsibility for analyzing and signaling economization conditions.
Lists five methods for Zone applications to determine favorable economization conditions.
Explains how MultiFlex RTU and AHU applications support economizer control.
Details Zone application's role in reading humidity and commanding dehumidification.
Explains how MultiFlex RTUs, RCBs, and AHUs manage dehumidification signals.
Details OSS feature for optimizing start/stop times for Zone applications.
Explains how units operate in Stand-Alone Mode when contact with the Zone application is lost.
Describes MultiFlex RTU operation in Stand-Alone Mode, using programmed setpoints and schedules.
Guides associating MultiFlex RTU/ARTC and AHU applications with Zone applications.
Details the MultiFlex Condensing Unit Board (CUB) for single condensing unit control.
Explains the MultiFlex PAK board for controlling compressors and condenser fans.
Explains the Lighting Schedule application for controlling lights based on time, light level, and solar input.
Introduces the Lighting Schedule application for cut-in/cut-out control and time scheduling.
Describes the flowchart and cells within the Lighting Schedule application.
Details how Control Select determines whether to use Multi-Logic Combiner or Light Level/Schedule Interface.
Covers standard control strategies: Light Level Interface and Schedule Interface.
Explains how the Light Level Interface cell translates light sensor values into ON/OFF commands.
Describes how the Schedule Interface cell logically combines light level and time schedule data.
Covers alternate control strategies: Multi-Logic Combiner and Offset Solar Control.
Details the Multi-Logic Combiner for alternate lighting control logic matrix.
Explains the Offset Solar Control cell for determining sunrise/sunset times for lighting control.
Describes the Basic Schedule cell's functions for passing time schedule data or configuring custom schedules.
Explains slave schedules as alterations of master schedules, used for relative event timing.
Details the Min ON/OFF cell's functions for applying minimum ON/OFF times and processing bypass commands.
Explains how the Proof cell verifies lights turn ON/OFF as commanded, using a digital input.
Covers Demand Control applications for keeping total power usage below a specific demand setpoint.
Explains demand limits set by power companies and the penalties for exceeding them.
Details how E2 monitors power using analog or digital transducers to calculate current KW usage.
Explains load shedding as curbing kilowatt usage by altering control setpoints to save energy.
Defines load shedding as reducing kilowatt usage by altering control setpoints to save energy.
Describes shedding levels and how applications are assigned priority for shedding.
Explains priority levels (First Shed, Rotational Shed, Last Shed) for load shedding.
Details the three modes of Demand Control operation for performing load shedding.
Covers generic modules for monitoring analog/digital sensors and controlling digital outputs.
Introduces Sensor Control modules for monitoring sensors and controlling outputs.
Explains Analog Sensor Control functions: Combiner, Cut In/Cut Out Control, and Alarming.
Details Cut In/Cut Out setpoints and how they differ based on whether Cut In is higher than Cut Out.
Describes Digital Sensor Control functions: Logical Combination, Bypass, and Alarming.
Explains logical combination strategies for Digital Sensor Control modules (FIRST, SELECT, AND, OR, XOR, VOTE).
Explains the Loop Sequence Control application for reading analog inputs and generating analog/digital outputs.
Details the structure of the Loop/Sequence Control Application, comprising control and output cells.
Describes the five control cells (Select, Setpt Float, PID Control, Filter, Override) in the Loop/Sequence Control application.
Explains the output cells (Sequencer, PWM) that convert PID percentage to staged digital or PWM outputs.
Provides descriptions for each cell within the Loop/Sequence Control application.
Details the Select cell's function in providing setpoints and switching between occupied/unoccupied states.
Explains how the Setpoint Float cell raises/lowers setpoints based on a float sensor value.
Describes the PID Control cell's function in calculating PID percentage for optimum output.
Explains the Filter cell's role in slowing the PID output change rate to dampen reactions.
Details the Override cell's function for overriding analog outputs to a user-specified value.
Describes the three control outputs: analog, staged, and PWM.
Explains the Sequencer cell's function in activating staged outputs based on percentage.
Details the PWM cell's function in converting PID percentage to ON/OFF pulses.
Covers Time Schedules for timed activation/deactivation of loads and occupancy states.
Explains how schedules consist of event pairs and how they are programmed.
Details how events command schedule outputs ON/OFF at specific times or days.
Distinguishes between absolute (specific times) and relative (offset from master) events.
Describes temporary schedule events as overrides that do not continue past specific dates.
Explains how overlapping events are prioritized within a schedule.
Details standard ranges for specifying which days of the year schedule events will be applied.
Explains Holiday Schedules for informing master/slave schedules of special dates.
Covers the Power Monitoring application for monitoring, recording, and controlling KW usage.
Explains power companies' demand limits and how Power Monitoring calculates demand.
Details anti-sweat application control of heaters based on dewpoint monitoring.
Explains how anti-sweat heaters are pulsed ON based on dewpoint comparison to setpoints.
Covers Heat/Cool Control applications using PID for heating and cooling based on temperature setpoints.
Details temperature control using PID to vary heating/cooling output based on setpoints.
Explains unoccupied hysteresis for ON/OFF control of heating/cooling outputs.
Details OSS feature for optimizing start/stop times for Heat/Cools based on occupancy changes.
Explains setpoint reset for varying heating/cooling setpoints based on analog sensor values.
Describes Lead/Lag arrangements for Heat/Cool applications to share control duties.
Explains using multiple inputs to combine values for application inputs.
Covers TD Control application for sequentially controlling fans based on condenser temperature differential.
Introduces TD Control for sequential fan control based on condenser temperature differential.
Explains TD strategy for maintaining a constant difference between refrigerant and ambient temperatures.
Details TD Control fail-safe modes for plenum and drop leg temperature availability.
Guides configuring TD Control to operate condensers at designed temperature differential.
Explains configuring TD setpoints for condenser control during ambient temperature swings.
Details inputs for TD Control: Drop Leg Temperature and Plenum Temperature.
Describes TD control alarms for Drop Leg High, TD High, and associated delays.
Covers Pulse Accumulation application for converting consumption pulses into rate values.
Introduces Pulse Accumulation for counting pulses and converting them to consumption values.
Guides setting the Input Type parameter for pulse counting applications.
Provides information on output status, average output, high trip, and total accumulation.
Details accumulator reset types: time of day, day of month, high-limit trip, or no reset.
Explains logging data in hourly, daily, and monthly formats for pulse accumulation.
Describes triggering a high-trip output when accumulator quantity exceeds a user-defined setpoint.
Covers Irrigation Control application for sprinkler systems, managing watering by time or water usage.
Introduces Irrigation Control for sprinkler systems, supporting up to two applications per CX controller.
Defines zones and cycles for irrigation, supporting up to 16 zones with six start times.
Details cycle control types: Timed, Volume, and Flow Sensor-related tests.
Explains cycle scheduling based on user-defined seasons and zone participation.
Describes Zone Inhibit functionality to terminate irrigation early or remove zones from cycles.
Explains zone inhibit behavior for timed control types, excluding the zone from the cycle.
Details zone inhibit behavior for volume control types, excluding the zone while inhibit is ON.
Covers rain inhibit input connected to a rain sensor to prevent irrigation during rain.
Explains freeze lockout to terminate irrigation if outside air temperature falls below a setpoint.
Details inhibit alarms generated when a zone is inhibited for too many days.
Describes zone bypass inputs allowing zones to be turned ON manually.
Explains bypass failsafe timing and how bypass input is reset.
Details flow sensor tests: Leak Test and Obstructed Zone Test.
Describes the Service Check cycle for visually inspecting valves and leaks.
Explains heat cut in/cut out setpoints based on space temperature relative to setpoints.
Details cool cut in/cut out setpoints based on space temperature relative to setpoints.
Covers dehumidification control implementation on AHUs based on PID control.
Explains determining fan speed based on heating/cooling stages and user settings.
Describes the Main Status or Home screen, divided into sections displaying system status.
Details the RX Home screen layout, showing suction groups, compressor stages, circuits, and condensers.
Describes the BX Home screen layout, including OAT, Demand Control, AHUs, and Zones.
Outlines the CX Home screen layout, showing HVAC, refrigeration, lighting, and sensor control status.
Explains logging in, user accounts, passwords, and the four access levels available.
Guides enabling full access to programming applications by toggling the Full Options feature.
Explains navigating the E2 interface, including menus, screens, keypad, and hot keys.
Details accessing applications and system configuration via the Main Menu and System Configuration Menu.
Describes screen types: Summary Screens and Status Screens for viewing application information.
Explains the function of the cursor, tab key, enter key, and directional arrow keys on the E2 keypad.
Guides customizing the Home screen display with eight different options.
Details placing a circuit in manual defrost or clean mode via the Home or Circuit Status screen.
Explains bypassing compressor stages or fan controls using the Override Update screen.
Guides checking board status (online/offline) on the Echelon and I/O Networks via the Network Summary screen.
Explains accessing status screens for AHUs, Zones, Lighting, Sensors, and other applications.
Describes viewing and using the Alarm Advisory Log for system alarms and notices.
Details accessing the Alarm Advisory Log via the alarm icon key on the controller.
Explains viewing controller advisory log entries, including date, time, state, and message.
Provides instructions for acknowledging, resetting, and clearing log entries in the Advisory Log.
Explains setting high/low case temperature alarm setpoints and report delay.
Details defrost types and how E2 assumes electric defrost by default.
Provides temperature/resistance data for Emerson Retail Solutions temperature sensors.
Presents voltage to pressure conversion data for Eclipse transducers.
Lists alarm names, their default priority, and definitions.
Details E2 advisory text, priority, display code, associated alarm property, and CoreSense display.
Lists CoreSense protection alarms for Discus compressors.
Lists other advisories related to device communication and compatibility.
Explains PID Control as a closed-loop method for maintaining equality between input and setpoint.
Details Proportional Mode's function in analyzing error difference and stabilizing input value.
Explains Integral Mode's role in bringing the input value to the setpoint.
Describes Derivative Mode's function in reducing lag time by predicting future error.
Compares condenser/HVAC PID control to other systems, focusing on setpoint adherence.
Explains Output at Setpoint value and its placement of the throttling range.
Lists other PID-related constants and structures accessible by service personnel.
Details how to change the range of possible output percentages for PID control.
Explains Minimum Accumulated Error for disabling error accumulation in 'I' Mode.
Describes filtering as a feature to dampen PID output change rate for less reactive loops.
Troubleshoots common issues with I/O network boards, including power and communication problems.
Addresses troubleshooting for Echelon network issues like faulty wiring and incorrect termination.
Troubleshoots issues related to case defrost and control.
Addresses issues with reading information from other E2 controllers via Global Data.
Troubleshoots issues with temperature or pressure sensors, including dip switch settings and wiring.
Guides troubleshooting when no heat or air is provided, checking board assignments and lockout temps.
Troubleshoots dehumidification issues related to stage setup and dehumidifier source.
Addresses issues with lighting control, including ensuring Time Schedules and outputs are assigned.
Troubleshoots issues where lights do not activate with the photocell, checking configuration.
Highlights new features in E2 Manual Rev 4, including multiple I/O Net ports and languages.
| Model | E2 |
|---|---|
| Manufacturer | Emerson |
| Category | Controller |
| Power Supply | 24 VAC/VDC |
| Communication Protocols | Ethernet |
| Output Type | Relay, Analog |
| Communication Protocol | Ethernet |
| Application | Refrigeration and HVAC system control |