Instruction Manual
D100394X012
EH (1-1/2x1 through 8x6)
July 2017
12
When all nuts are tightened to that torque value, increase the torque by one fourth of the specified nominal torque
and repeat the crisscross pattern. Repeat this procedure until all nuts are tightened to the specified nominal value.
Apply the final torque value again and, if any nut still turns, tighten every nut again.
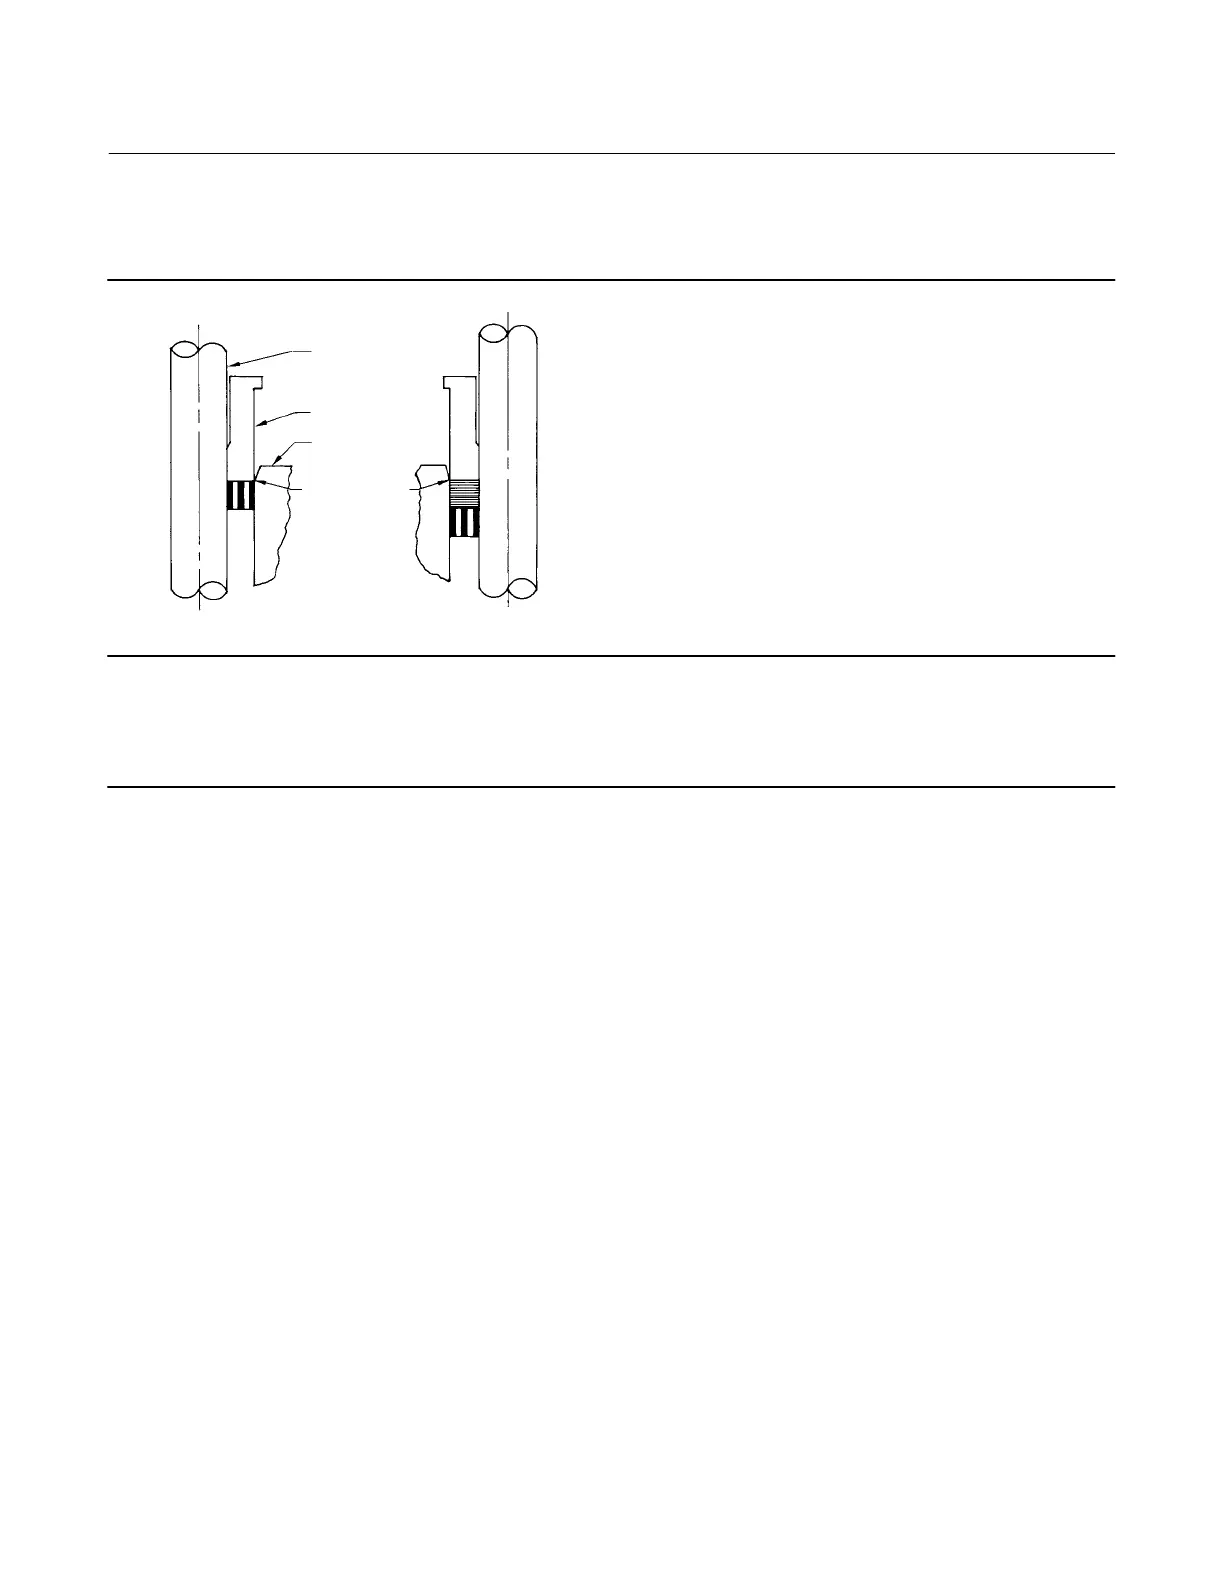
Figure 5. Installing Graphite Ribbon/Filament Packing Rings One at a Time
VALVE STEM
PACKING FOLLOWER
BONNET
TOP OF PACKING
RING EVEN WITH
BOTTOM OF
ENTRANCE
CHAMFER
INSTALLING
SECOND PACKING RING
A2207‐2
INSTALLING
FIRST PACKING RING
Note
If graphite ribbon/filament packing rings are used, special procedures must be observed to prevent entrapping air between the
rings. Add the rings one at a time without forcing them below the chamfer of the packing box entrance chamber. As each
successive ring is added, the stack should not be pushed down more than the thickness of the added ring (figure 5).
13. Install new packing and the metal packing box parts according to the appropriate arrangement in figure 4. If
desired, packing parts may be pre‐lubricated with a silicon base grease for easier installation. Slip a smooth‐edged
pipe over the valve stem, and gently tamp each soft packing part into the packing box, being sure that air is not
trapped between adjacent soft parts. For a valve with extension bonnet, also install the baffle and retaining rings
(keys 2 and 35).
14. Slide the packing follower, wiper, and packing flange into position. Lubricate the packing flange studs (key 4) and
the faces of the packing flange nuts (key 5). Replace the packing flange nuts.
For spring‐loaded PTFE V‐ring packing, tighten the packing flange nuts until the shoulder on the packing follower (key
13) contacts the bonnet.
For other packing types, tighten the packing flange nuts to the maximum recommended torque shown in table 7.
Then, loosen the packing flange nuts, and retighten them to the recommended minimum torque shown in table 7.
For ENVIRO‐SEAL or HIGH‐SEAL live‐loaded packing, refer to the note at the beginning of the Maintenance section.
15. Mount the actuator on the valve body assembly, and reconnect the actuator and valve plug stems according to
the procedures in the appropriate actuator instruction manual.
Trim Removal
For C‐seal construction, see the appropriate C‐seal sections in this instruction manual.
Trim removal and replacement requires the use of a seat ring retainer tool (key 25). If specifically ordered, a tool is
supplied with a valve; but, the tool can also be ordered separately by referencing the tool part number in the Parts List.
If desired, a tool can also be machined for a valve of specific size and valve class using the dimensions shown in figure
9. Machine the tool from a material listed in figure 9 or from a material with a yield strength of at least 827 MPa
(120,000 psi). Using a tool of lower strength material may result in damage to the seat ring retainer or valve body
threads.

 Loading...


