i2P-100 Transducer
Instruction Manual
Form 5777
September 2004
9
PCB/CUP
ASSEMBLY
SPAN
ADJUSTMENT
FIELD
WIRING
CONNECTION
SWITCH
SETTINGS
(1,2)
ZERO
ADJUSTMENT
4- 20 , 3-15
4- 12 , 3-15
4- 20 , 6-30
12- 20 , 3- 15
{
- +
GE03345
NOTES:
1. INPUT SIGNAL SPLIT RANGE IS SELECTABLE VIA DIP-SWITCH CONFIGURATION.
2. OUTPUT RANGE DIP-SWITCH SELECTION FOR 0.2 TO 2.0 BAR (3 TO 30 PSIG).
FOR OTHER RANGES, ZERO AND SPAN ADJUSTMENTS NEEDED.
OR
OR
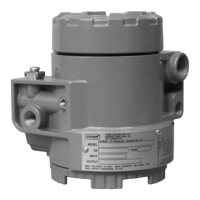
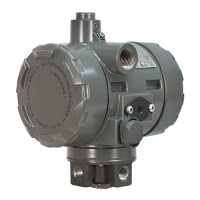
Figure 10. Zero and Span Adjustments and Switch Settings
Equipment Required
Choose a current or voltage source that is capable,
without switching ranges, of driving the transducer
through its entire input range. Switching ranges on a
current or voltage source will produce spikes or
mid-scale reverses in the input signal presented to
the transducer, causing errors. The current source
should be capable of delivering 30 mA with 30 V dc
maximum compliance voltage.
Calibration Procedure
WARNING
To avoid personal injury or property
damage due to an uncontrolled
process provide some temporary
means of process control before
beginning the calibration procedure.
Refer to figure 10 for adjustment locations.
Note
The following steps are for a 4-20 mA,
0.2 to 1.0 bar (3 to 15 psig) configured
unit. The same procedure is used for
other configurations.
1. Remove electronics module cover (cover
adjacent to conduit entry, see figure 3 and 4).
2. Input and output ranges are selectable by dip
switch selection. Refer to figure 10 for dip switch
settings. Adjust dip switch settings and zero and
span as necessary to achieve the desired
input/output range.
3. If a current source other than the control device is
used as the input source, disconnect the control
device and connect the current source positive
terminal to the transducer ‘‘+’’ terminal and the
current source negative terminal to the transducer
‘‘-’’ terminal.
If an external meter is used, connect the current
source positive terminal to the transducer ‘‘+’’
terminal. Connect the meter positive terminal to the
transducer ‘‘-’’ terminal and the meter negative
terminal to the current source negative terminal as
shown in figure 8.
4. Check the supply pressure to ensure it is at the
recommended pressure. Refer to table 1, the
Specifications table, for supply pressure
recommendations.
5. Adjust the input current to the low milliamperes
dc.
6. The output pressure should be 0.2 bar (3 psig). If
not, adjust the ZERO potentiometer until the output
pressure is 0.2 bar (3 psig).
7. Adjust the input current to the high milliamperes
dc.
8. The output pressure should be 1.0 bar (15 psig).
If not, adjust the SPAN potentiometer until the output
pressure is 0.8 bar (15 psig).
 Loading...