ER5000 —
138
The ERTune™ Program: Basic Features
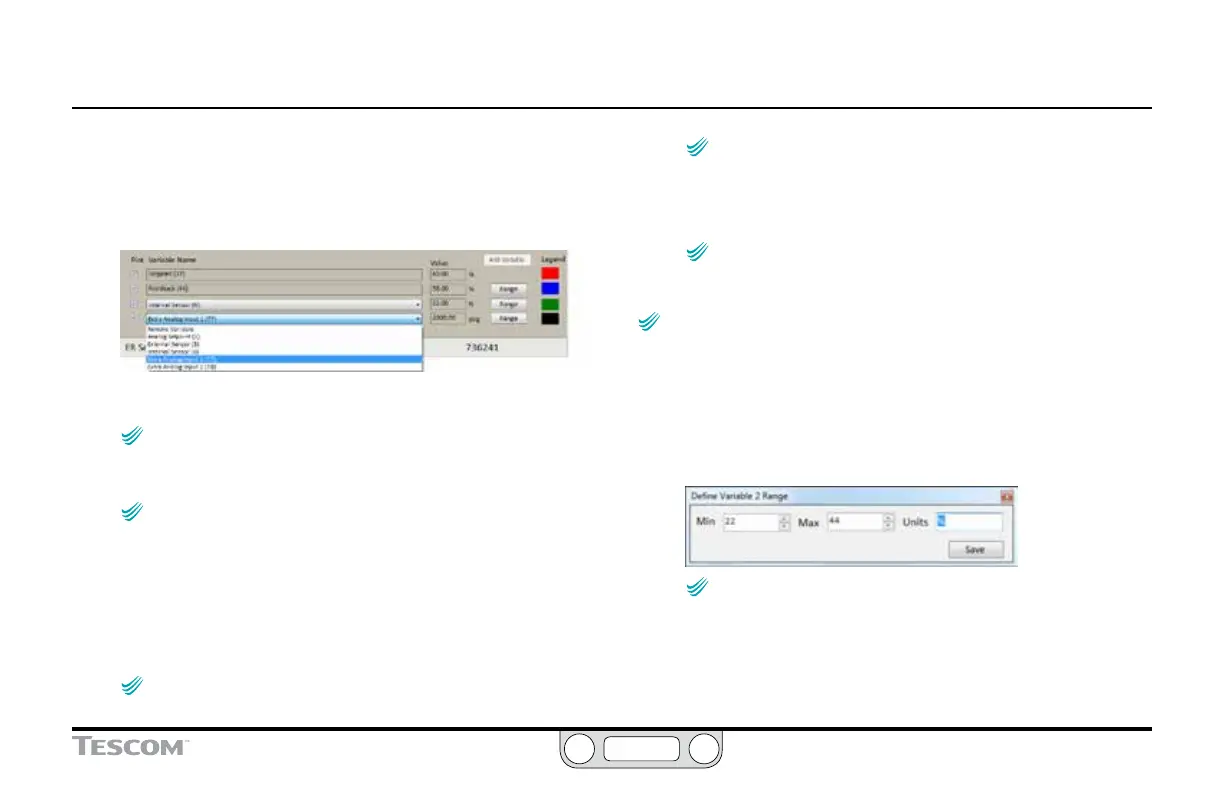
To track an additional variable
1. Click the Add Variable button.
2. A new line is added under Variable Name.
3. Click the Down Arrow (
▼
) to open the drop-down list.
4. Select the input source you wish to track.
NOTENOTE
CAUTIONCAUTION
WARNINGWARNING
Values for the variable begin displaying immediately in the
Value eld to the right of the variable. These values display whether
or not the variable is added to the Plot Screen display.
NOTENOTE
CAUTIONCAUTION
WARNINGWARNING
After you add the second additional variable, the
Add Variable button is grayed out.
To add a variable to the Plot Screen display
1. Click the Plot check box to the left of drop-down list.
2. If this is the rst added variable, the secondary axis appears
on the right side of the Plot Screen.
NOTENOTE
CAUTIONCAUTION
WARNINGWARNING
The rst added variable controls the range of the
secondary (right) axis.
NOTENOTE
CAUTIONCAUTION
WARNINGWARNING
The rst added variable appears as a green line. The
second added variable appears as a black line.
3. The variable displays as a new line in the Plot Screen the next
time the screen is active.
NOTENOTE
CAUTIONCAUTION
WARNINGWARNING
The variable is also added to data acquisition.
To set or change the range for an added variable
Changes made using the Range buttons in the Plot
Screen Variable Controls change the actual range of values tracked
by the ERTune™ program. Be sure the values you enter are correct for
your application so that the values the program tracks are an accurate
representation of system conditions.
1. Click the Range button to the right of drop-down list. The
Dene Variable Range window opens.
NOTENOTE
CAUTIONCAUTION
WARNINGWARNING
The window will be labeled as Variable 1 or Variable 2,
depending on which added variable range is being dened.
2. Enter values for minimum, maximum and/or units
of measure.
3. Click Save.
 Loading...