INSTALLATION INFORMATION
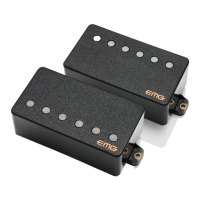
EMG MODELS: ALX SET, F-ALX SET
(ALEXI LAIHO SIGNATURE GUITAR INSTALLATION)
Warranty
All EMG Pickups and accessories are warranted for a period of two years. This warranty does not cover failure due to improper installation, abuse or damage. If
upon examination the pickup is determined to be defective, a replacement will be made. Warranty replacement products are covered by this same warranty. This
warranty covers only those pickups and accessories sold by authorized EMG Dealers. This warranty is not transferable.
© 2010 Copyright EMG INC. All Rights Reserved.
PO BOX 4394
SANTA ROSA, CA
95402 USA
P (707) 525-9941
F (707) 575-7046
EMGPICKUPS.COM
0230-0178A
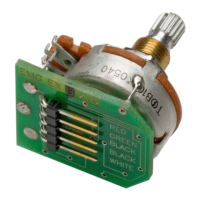
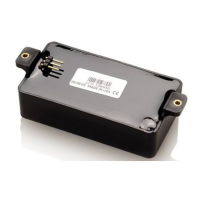
EMG-ABQ PRE-AMP (Frequency Selection)
The 3-position dip switch allows you to change the resonant frequency at the input to the pre-amp.
The frequencies will be different if you use a passive pickup other than the ALX.
If you use an Active EMG Pickup the switches will not make any change.
SPECIFICATIONS: MODEL:
ALX / F-ALX ABQ Pre-Amp
Logo Color Silver
Magnet Type * C/S
Inductance (Henries) (1) 4.53
DC Resistance (kOhm) 8.40
Resonant Frequency (KHz) See Below
.400
1.070
.700
1.070
8MM P.75
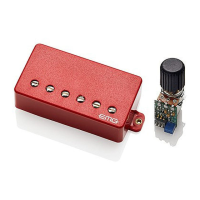
Gain Trimmer
for Boost
Resonant Frequency
Selection dip-switch
*C/S (Ceramic/Steel)
(1) Wired in Series
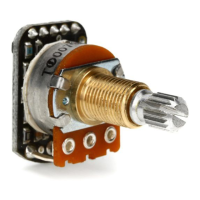
Volume Control, Push-Pull Pot
Boost “on” in down Position
Boost “off” in up Position
Installation notes: (Signature Model)
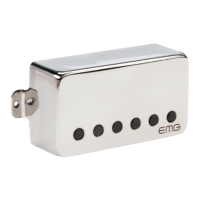
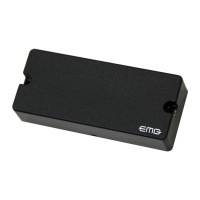
The EMG-ALX set includes either an ALX Pickup or the F-ALX (Floyd Rose Spacing) and the ABQ Preamp. The ALX/F-ALX Pickups are slightly overwound
humbucking pickups that feature a ceramic magnet for clarity. The ABQ Pre-amp has a Push-Pull Pot with an adjustable boost in the down position.
As an additonal feature the input of the ABQ Pre-amp has a 3-position dip switch that allows the resonance of the pickup to be altered to a variety
of fixed frequencies. There are two different instruction sets for the ALX Set. This set of instructions is for the Alexi Laiho Signature Model.
The alternate set of instructions is for guitars that are wired differently than the Signature Model or, that may have more than one pickup.
For further information go to http://www.emgpickups.com.
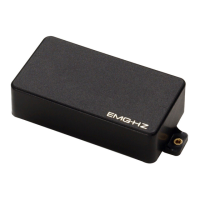
SPECIAL NOTE: The Red Wire of the HZ Pickup Cable is NOT for battery power, it is a coil wire.
OFF/OFF/OFF
ON/ON/ON
OFF/OFF/ON
OFF/ON/ON
OFF/ON/OFF
ON/OFF/OFF
ON/ON/OFF
3.33KHz
2.40KHz
2.44KHz
1.77KHz
1.22KHz
2.00KHz
1.29KHz
ON/OFF/ON
1.38KHz
Alexi’s setting
2.75
1.50
3.08
3/48 MOUNTING HOLES
.90
.42 TYP (F-ALX)
Input Impedance (Kohm) 500
Input Noise -148
Maximum Gain 20dB
Output Impedance (Kohm) 2.00
Current @9V (Microamps) 195
Battery Life (Hours) 1500
Maximum Supply (Volts DC) 27
.39 TYP (ALX)