Do you have a question about the Empava EMPV-JT367 and is the answer not in the manual?
Check for loose connections and leaks after water testing the bathtub.
Ensure the bathtub is level using feet to prevent noise and water issues.
Details on how to use the faucet, shower head, and water jets.
Common symptoms, problems, and solutions for the bathtub.
This document serves as an installation instruction and owner's manual for the EMPV-JT367 massage bathtub, providing comprehensive guidance for its safe and effective use, installation, and maintenance. Adhering to these instructions is crucial to prevent damage to the product and avoid additional repair costs. The manufacturer offers a lifetime warranty after-sale service, and users are encouraged to accurately fill out the warranty registration form. For any assistance, users can contact their local distributor or the company directly. The company reserves the right to modify models listed in this instruction without prior notice. This manual is applicable to the listed products, and users should refer to the relevant content based on the specific product and its chosen functions for correct installation and operation.
To ensure correct and safe installation by the installer, and for users to operate and maintain the product safely, particular attention should be paid to warning signs. The warning symbol indicates that improper handling, disregarding the symbol, could result in personal injury or property loss. It is imperative to read and fully understand this instruction to install, use, and maintain the product correctly and safely. This instruction is a valuable resource of product information, helping end-users operate the product safely and correctly. Users are advised to keep it carefully to prevent loss or damage.
Before installation, several preparations are necessary. The installation location must be strong enough to support the total weight of the bathtub, its maximum water volume, and the user. A waterproofing process is essential in the bathtub installation area to prevent water leaks that could damage the downstairs area. The installed location must be equipped with water supply, power supply, and drainage. This product operates on universal home power. External circuitry needs to be equipped with a high-sensitive and fast-type leakage protection switch, with an induced current rating below 15MA, a trip time less than 0.1 second, and a rated current above 30A. The product must be installed with proper grounding and an electric leakage switch by a qualified licensed electrician. A drainage hole of at least ø50mm should be reserved, ensuring the drainage pipes align with the water valve. Users need to reserve 1/2" external thread connectors for cold/hot water hoses, protruding 30mm from the wall. It is recommended to install a valve in each pipe, with the location designed by the user for convenient maintenance. Since each bathroom's power and drain setup may vary slightly, the bathtub should be placed according to the actual situation, using the provided illustration as a reference layout. The safe distance between the power supply and water supply should be no less than 30cm.
Precautions for installation include checking all parts for completeness upon receipt and reporting any discrepancies to the company promptly. After unpacking, dispose of unneeded packaging immediately to prevent personal injury from wooden frames, nails, cardboard, or sealing straps. Children should not be allowed to play with packing material to avoid injury. Parts containing live parts, except those supplied with safety extra-low voltage not exceeding 12V, must be inaccessible to a person in the bath. Earthed appliances must be permanently connected to fixed wiring. Parts incorporating electrical components, excluding remote control devices, must be located or fixed so they cannot fall into the bath. Only the specified power should be used; using other power sources may cause fire or electric shock. An electrical leakage protection switch should be installed outside the bathroom to prevent fire or electric shock. Avoid using broken power supplies, power plugs, or loose sockets, as this may cause fire or electric shock. Do not modify the power supply cord, use it with an extension cord, or combine it with other equipment using multiple plugs, as this could lead to shocks, overheating, or fire. Ensure the power plug has waterproof silicon protection to prevent fire or electric shock from water infiltration. Before completing the installation, protect the bathtub with cardboard to prevent damage. Do not place fire sources, such as lighted cigarettes, on the bathtub, as this may cause damage from high-temperature deformation. Do not stand on the bathtub while working, as this could cause slips, falls, or damage to the product. Install the bathtub securely according to the Installation Manual; improper installation can lead to water leaks and damage to household property. After installation, the product should undergo a full trial operation to verify proper installation.
Before initial use, an inspection of the bathtub is required. Although all massage bathtubs are water-tested at the factory, hose connections may loosen during transport. Therefore, a water test is necessary before installation. The steps are as follows: Place the tub on a flat surface where it can be drained after testing, and adjust the feet to level the bathtub. Check all connection systems for any looseness. Close the drain, fill the tub to the overflow level, and let it stand for 10 minutes to check for leaks. Insert the plug, activate all functions (massage, air bubble, waterfall, etc.) for a few minutes, and thoroughly inspect the tub. Any defects must be reported to the dealer/distributor before installation to be covered under warranty.
The bathtub features adjustable leveling feet to accommodate different sizes. Use a wrench or level ruler to ensure the bathtub is level. An unlevel bathtub can lead to increased noise, residual water in hoses or drainage, and shaking. To adjust, first adjust the height of the leveling feet, then adjust the screw nut to the level position.
Connecting the water involves using the provided stainless steel cold and hot water hoses (connector ø 1/2"). Connect these hoses to the bathroom's cold and hot water hoses accordingly. Before connecting the bathtub's water inlet pipe, open the main water pipe for a period to flush out any debris, then install the filter screen to prevent debris from entering the bathtub pipe, thereby extending the life of the fitting. Insert the drain-pipe into the floor's drain-hole, then cover it with a water-retaining cover to prevent wastewater spilling. The red hose is for hot water, and the blue hose is for cold water. The drain-pipe should be installed with a slope above 1:50. When moving the bathtub, avoid holding the drain-pipe and cold/hot water hoses, and do not crash it with hard objects.
For electricity connection, install a proper dedicated plug with a ground electrode to the power line and insert it firmly. Ensure the ground is connected: one side of the ground should be connected to the ground terminal of the motor and the stainless steel frame; the other side should be connected to the ground wires of the plug. The bathtub must be connected to the ground, the power outlet must be well-sealed, and the surface of each wire must be intact.
Precautions for use are critical for safety. This instruction applies to the massage bathtub series, not just a specific model; users should refer to the model and configuration they choose. Use this unit only for its intended purpose as described in the manual, and do not use attachments not recommended by the manufacturer. Children should not play with the appliance, and cleaning and user maintenance should not be performed by children without supervision. Children should not use this unit unless closely supervised by an adult. Supervision is also required when an elderly or handicapped individual uses the whirlpool bath. Pregnant or possibly pregnant women should limit whirlpool water temperature to 100°F (38°C) during the early months of pregnancy, as excessive water temperatures can cause fetal damage. Individuals with a medical history of heart disease, low or high blood pressure, circulatory system problems, or diabetes should consult a physician before using a whirlpool. The use of drugs or alcoholic beverages before or during whirlpool use can lead to unconsciousness and drowning. The water in a whirlpool should never exceed 104°F (40°C). Water temperatures between 100°F (38°C) and 104°F (40°C) are considered safe for healthy adults, with usage limited to approximately 30 minutes, followed by a shower to cool down. Lower water temperatures are recommended for extended use (exceeding 10-15 minutes) and are definitely recommended for younger children. If nausea, dizziness, or headaches occur, exit the bath immediately and cool down. Seek medical attention if symptoms persist and consult a physician before using the whirlpool again. Persons on medication should consult a physician before using a whirlpool, as medication may induce drowsiness or affect heart rate, blood pressure, and circulation. The thermostatic mixer can maintain the water input temperature; use it carefully according to operating instructions to avoid scalding or catching a cold. Do not operate this unit without the suction cover over the suction fitting, as this is a safety device that reduces the potential hazard of hair or body entrapment. Keep hair and body away from the suction cover when the pump is running. Never drop or insert any object into any opening within the whirlpool. Never operate electrically connected devices in or near the bath. No electric appliances (such as hair dryers, lamps, telephones, radios, televisions, etc.) should be within 5 feet/1.5 meters of this bathtub.
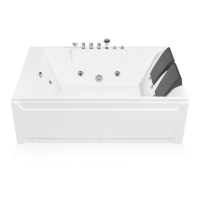
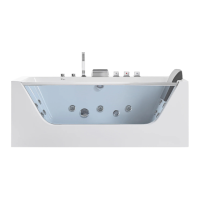
The bathtub features a waist drum shape three-piece set faucet. This includes a cold water switch (marked with letter C), a hot water switch (marked with letter H), and a waterfall/sprinkling style transferable switch (marked with an icon). The multi-function handheld shower includes a backflow protector. Rotating the shower head shell allows adjustment of the water pattern to inner water column, middle water column, or external water column. The water jets can be adjusted by rotating their heads clockwise/anticlockwise to control water force. Turning the head of the water jets up, down, left, or right adjusts the angle of inflow for both big and small water jets.
The pneumatic switch activates the massage function and 7-color LED light simultaneously when pressed. Pressing it again turns them off. This feature is only available on models with a pneumatic switch. The hydro massage flow rate control switch allows users to adjust the water column strength. Rotating it clockwise decreases strength, while rotating it anticlockwise increases it. This feature is only available on models with a hydro massage flow rate control switch.
For drainage, the bathtub has a manual drainage system. To close the drain, rotate the drain cover clockwise. To open the drain, rotate the cover anticlockwise. When the water level exceeds the maximum, excess water will be drained by the overflow.
Care and maintenance are essential for the longevity and optimal performance of the bathtub. Always implement countermeasures to prevent freezing, such as emptying the bathtub and pipes during winter use, as freezing can rupture pipes or equipment. Use only standard tap water; well water can cause corrosion and leaks. Protect the bathtub from ultraviolet or bright light, which can accelerate aging and damage. Keep it away from cigarette butts, hair dryers, and other heat sources to prevent damage from high-temperature deformation. When not in use, keep the bathtub ventilated and dry, avoid contact with corrosive substances, and ensure no electricity or water is present. To prevent damage when the appliance is left empty for an extended period, do not drop or strike the bathtub with hard objects, as this could crack or scratch the surface or cause leaks. When the product is in operation, do not cut off any connection lines or split the bus master and control panel, as this may cause product leakage, electric shock, or other accidents. The ground fault circuit interrupter (GFCI) should be tested regularly, preferably before each use.
For cleaning, use water or mild detergent. Avoid acids, alkalis, organic solvents, or acidic/alkaline cleaning agents, as they can damage the product surface. If water or neutral detergent cannot remove stains, use a clean cloth impregnated with a little alcohol. For plating parts, use cotton fabric to scrub. Light scratches and dulled areas can be restored by using NO. 1200 waterproof sandpaper dipped in water for coarse grinding, followed by NO. 2000 waterproof sandpaper dipped in water for fine grinding, and finally polishing with a soft cloth and polishing agent.
Regular care of the bathtub keeps it clean and functioning optimally. The pump and pipe circulation systems should be flushed before first use and monthly during normal use. The recommended cleaning procedures are: Do not run the jet massage system dry. Fill the tub with hot water (about 40°C) 2-3 cm above the jets and add 2-3 teaspoons of low-foaming detergent (e.g., dishwashing machine detergent). Turn on all functions and run for 10 minutes. Drain the tub completely. Fill the tub with cold water above the jets. Turn on all functions and run for 15 minutes. Drain the tub completely. Clean the "suction cover" by removing any hair or lint. Monthly, unscrew the suction cover and clean away hair, lint, or debris from the cover and housing, then remount the cover. Note that some suctions are not designed to be removed; only those with visible screws on the cover from inside the tub can be removed. Never operate the unit with the safety suction cover off.
A troubleshooting guide is provided for common issues. If the water pump does not start, check if the air hose connected to the pneumatic switch is loose, if the pneumatic switch is not flexible, if it's disconnected from power or has defective wiring, if debris is stuck in the pump impeller, or if the water level has not reached the minimum. Solutions include tightening connections, adjusting the pneumatic switch, inserting the plug, cleaning debris, and ensuring adequate water level. If the hydro massage flow rate cannot be controlled, check if the power is abnormal (low voltage), if the pneumatic switch is not working, or if the air hose is not connected tightly. Solutions include inserting the plug tightly, adjusting the pneumatic switch, and connecting the air hose tightly. If water hoses leak, check if the rubber ring is faulty or if the screw nut is not tightened. Solutions include changing the rubber ring and tightening the screw nut to ensure a good connection.
| Material | Acrylic |
|---|---|
| Style | Modern |
| Drain Location | Center |
| Color | White |
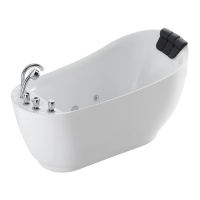
| Installation Type | Freestanding |
| Shape | Rectangular |
| Dimensions | 67" L x 27.6" W x 28.4" H |
| Item Weight | 110 lbs |
| Weight | 110 Pounds |