Do you have a question about the Empava EMPV-JT351N and is the answer not in the manual?
Perform water tests and check connections for leaks before final installation of the bathtub.
Ensure the bathtub is level using leveling feet and a wrench or level ruler for stability.
Connect cold and hot water hoses to the bathtub's inlet pipes, ensuring proper filter screen use.
Install a dedicated plug with ground electrode, ensuring proper connection by a qualified electrician.
Details on faucet, shower, and water jets for controlling water flow, pattern, and angle.
Instructions for adjusting hydro massage flow rate and performing manual drainage.
Guide to operating the OVS-371 control panel, including power, function selection, and lockout.
Guidelines for preventing freezing, avoiding damage, cleaning, and maintaining plating parts.
Recommended steps for flushing pump and pipe systems using detergent and water.
Solutions for common problems like water pump not starting, flow rate issues, and water hose leaks.
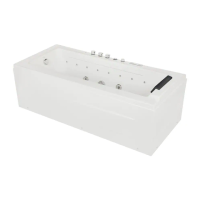
This document serves as an installation instruction and owner's manual for the EMPV-JT351N massage bathtub. It provides comprehensive guidance for safe and effective use, installation, operation, and maintenance of the product. The manual emphasizes the importance of proper handling to prevent damage and ensure user safety.
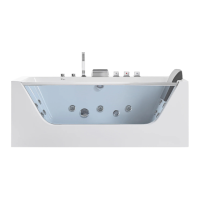
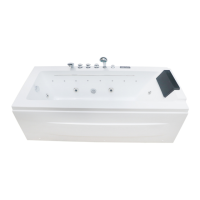
The bathtub is designed to offer a relaxing massage experience, featuring various functions such as water jets, air bubbles, a waterfall, and LED lighting, depending on the specific model and configuration chosen by the user. It is equipped with a control panel for easy operation of these features.
Before installation, it is crucial to ensure the chosen location is structurally sound to support the total weight of the bathtub, maximum water volume, and the user. Waterproofing of the installation area is mandatory to prevent water leaks. The installation site must also be equipped with water supply, power supply, and drainage. The product uses universal home power, but external circuitry requires a high-sensitive and fast-type leakage protection switch (induced current rating below 15MA, trip time less than 0.1 second, rated current above 30A). Grounding and an electric leakage switch must be installed by a qualified licensed electrician.
Drainage requires a hole of at least ø50mm, and drainage pipes must align with the water valve. Connectors for 1/2" external thread cold/hot water hoses, protruding 30mm from the wall, should be reserved. It is recommended to install a valve in each pipe for convenient maintenance. A reference layout is provided for placing the bathtub according to the actual bathroom and power/drain configurations. A safe distance of not less than 30cm must be maintained between power supply and water supply.
Prior to final installation, an inspection is required. Although bathtubs are water tested at the factory, hose connections may loosen during transport. The inspection steps include placing the tub on a flat surface, adjusting feet for level, checking for loose connections, filling the tub to the overflow for 10 minutes to check for leaks, and then inserting the plug to test all functions (massage, air bubble, waterfall, LED light, heater, etc.) for any defects. Any defects must be reported to the dealer/distributor before installation to ensure warranty coverage.
The bathtub features leveling feet that can be adjusted using a wrench or level ruler to ensure the tub is perfectly level. An unlevel bathtub can lead to increased noise, residual water in hoses or drainage, and shaking. The leveling process involves adjusting the height of the leveling feet and then tightening the screw nut to the level position.
Connecting the water supply involves using the provided stainless steel cold and hot water hoses (connector ø 1/2"). Before connecting, open the water pipe for a period to flush out debris and then install a filter screen to prevent debris from entering the bathtub pipe, thereby extending the life of the fitting. The drain-pipe should be inserted into the drain-hole on the floor and covered with a water-retaining cover. The red hose is for hot water, and the blue hose is for cold water. The drain-pipe should be installed with a slope above 1:50. Care must be taken not to hold the drain-pipe and cold/hot water hoses when moving the bathtub, and to avoid crashing them with hard objects.
For electrical connection, a proper dedicated plug with a ground electrode must be installed to the power line and inserted firmly. The ground must be connected to the ground terminal of the motor and the stainless steel frame, and the other side to the ground wires of the plug. The bathtub must be connected to the ground, the power outlet must be sealed well, and the surface of each wire must be intact. Installation must be performed by a professional electrician.
The bathtub features a three-jaw three-piece set faucet with a waterfall/sprinkling style transferable switch (marked with an icon), a hot water switch (marked with 'H'), and a cold water switch (marked with 'C').
A multi-function handheld shower with a backflow protector is included. The shower head shell can be rotated to adjust the water pattern, offering inner, middle, and external water columns.
Water jets allow for adjustment of water force and angle of inflow. Rotating the head of the water jets clockwise/anticlockwise adjusts the water force, while turning the head up, down, left, or right adjusts the angle of inflow.
For models with a hydro massage flow rate control switch, rotating it clockwise decreases water column strength, and anticlockwise increases it.
Drainage is manual. The drain cover with overflow can be rotated clockwise to close the drain and anticlockwise to open it. When the water level exceeds the maximum, excess water is drained by the overflow.
The OVS-371 control panel allows for easy operation of the bathtub's functions. To power on, press the power key; the system starts, and function icons appear on the display. Pressing the key again powers off the unit. Functions are selected by pressing the left or right arrow keys, which move a "symbol" pointer across the icons. The selected function can be activated or deactivated by pressing the "OK" key.
Key functions and their operations:
Regular care is essential to keep the bathtub clean and functioning optimally. The pump and pipe circulation systems should be flushed before first use and monthly thereafter. The cleaning procedure involves:
To prevent freezing during winter use, the bathtub and pipes must be emptied, as freezing can rupture them. Only standard tap water should be used; well water can cause corrosion and leaks. The bathtub should be protected from direct ultraviolet or bright light to prevent accelerated aging and damage. Keep it away from heat sources like cigarette butts and hair dryers to avoid high-temperature deformation. When not in use, keep the bathtub ventilated and dry, and avoid contact with corrosive substances, electricity, and water.
To avoid damage when the appliance is left empty for an extended period, do not drop or strike the bathtub with hard objects, as this can cause cracks, scratches, or leaks. During operation, do not cut off any connection lines or split the bus master and control panel, as this can lead to leakage, electric shock, or other accidents. The ground fault circuit interrupter (GFCI) should be tested regularly, preferably before each use.
For cleaning, use water or mild detergent. Avoid acids, alkalis, organic solvents, and acidic/alkaline cleaning agents, as these can damage the product surface. For stubborn stains, use a clean cloth impregnated with a little alcohol. Plating parts should be scrubbed with cotton fabric. Light scratches and dulled areas can be restored by using NO. 1200 waterproof sandpaper dipped in water for coarse grinding, followed by NO. 2000 waterproof sandpaper for fine grinding, and finally polishing with a soft cloth and polishing agent.
The manual also includes a troubleshooting guide for common issues like the water pump not starting, inability to control hydro massage flow rate, and water hose leaks, providing corresponding solutions.
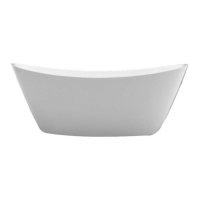
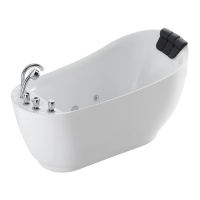
| Type | Freestanding |
|---|---|
| Material | Acrylic |
| Capacity | 55 gallons |
| Color | White |
| Shape | Rectangular |
| Installation Type | Freestanding |
| Drain Location | Center |