19
WWW.EMPIREPAINTBALL.COM
REMOVAL OF REGULATOR
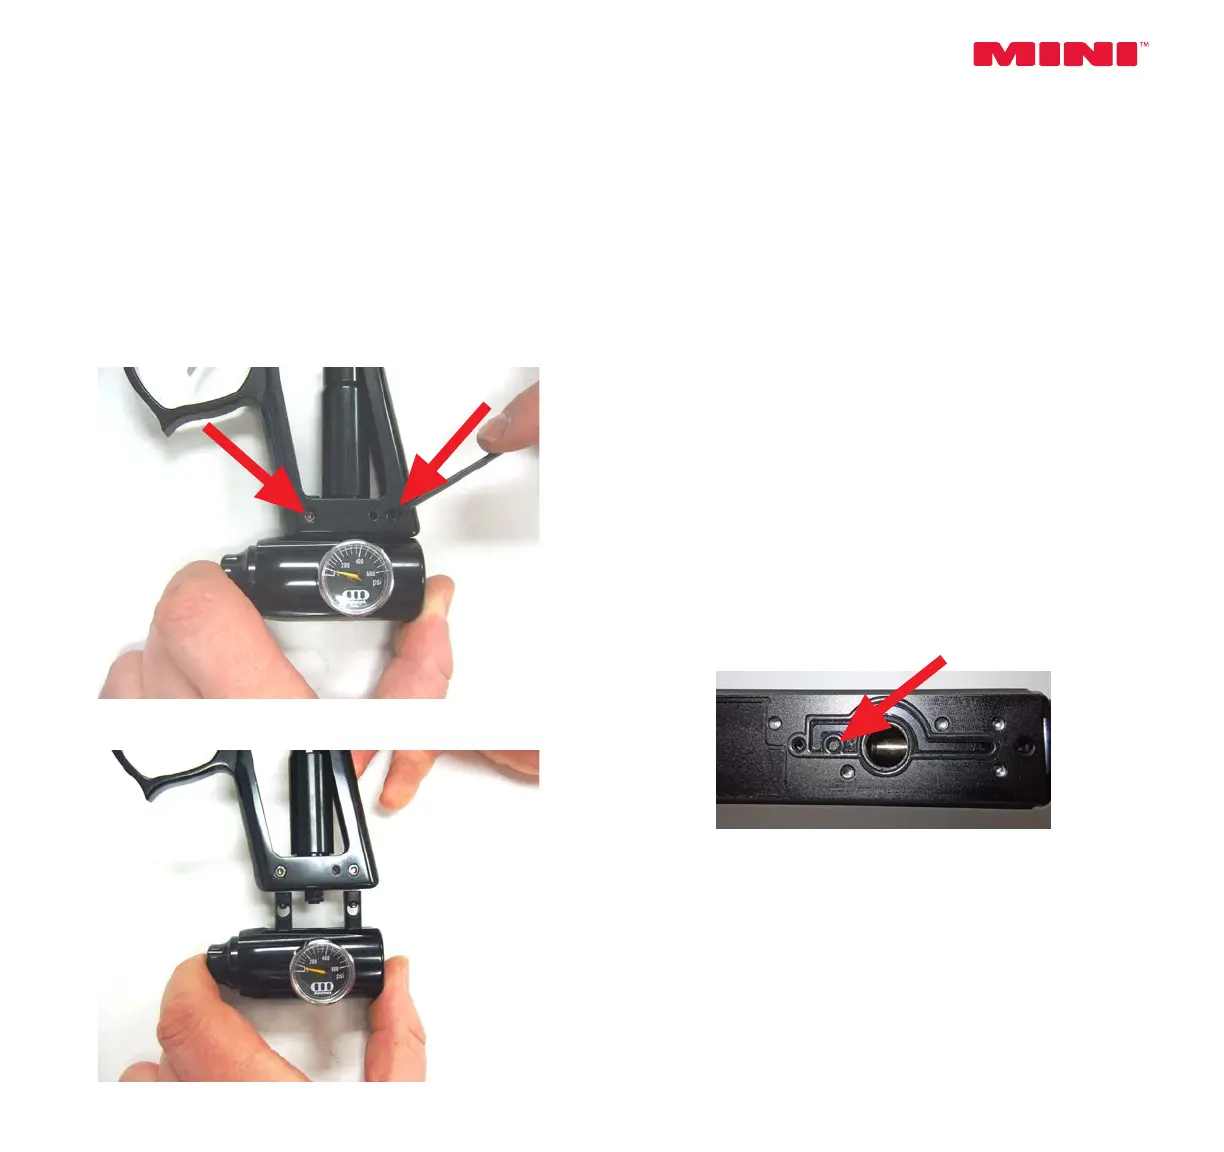
- Loosen the two Regulator Mount Set Screws located on the grip frame with
a 3/32" Allen key by turning them counter clockwise.
- The Regulator and Regulator Mount can now be pulled down and removed
from the grip frame. Be careful not to lose the Female Air transfer tube
bottom O-ring, which sits on the bottom of the Female air Transfer tube.
INSTALLATION OF REGULATOR ASSEMBLY
- Make sure the Female air transfer Tube O-ring is on the bottom of the Air
tube, Grease if necessary.
- Slide Regulator and Regulator rail back into the Grip frame and tighten the
Regulator mount set screws with a 3/32" Allen key.
Note: There are also 2 set screws in the Regulator Rail, they should only need to be adjusted if
the Regulator becomes loose.
REMOVAL OF AIR TRANSFER PLATE
- Remove Foregrip and Grip frame.
- Carefully unplug the solenoid from the Sensor board.
- Remove the solenoid and Male air transfer tube from the Air transfer plate by
unscrewing them counter-clockwise.
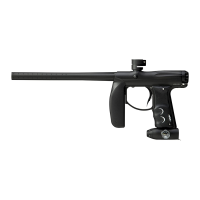
- Using a 5/64" Allen key remove all of the air transfer plate screws (7 total).
Once the screws are removed the Air transfer plate will then lift off.
Note: Be careful not to lose the check valve (air restrictor). The check valve is a small plastic
piece located between the body and air transfer plate. (Arrow indicates check valve).
INSTALLATION OF AIR TRANSFER PLATE
- It is recommended that a small amount of Dow 33 grease is applied to the air
transfer gasket before the air transfer plate is reattached.
- Also make sure the check valve is in the body, as seen in the picture above.
- Place transfer plate back on body and evenly tighten all 7 screws.
- Plug the solenoid back into the sensor board.