EMPIREPAINTBALL.COM
2
3. GETTING STARTED
Safety and safe marker handling are the most important aspects of paintball
sports. Please practice each of the following steps with an unloaded marker before
attempting to operate your marker with an air source and paintballs.
• Do not install an air source or load paintballs into your marker until you have
completely read and understood this manual and feel completely confident with
your ability to handle your marker safely.
• Alwaysuse ASTM approved paintballspecific eye protection. Alwayswear eye
protection when handling a paintball marker and in any areas where paintball
markers may be discharged.
• KeepyourfingeroutoftheTriggerguardandaway from the Trigger; point the
muzzle of the marker in a safe direction at all times. Keep the marker in Safe Mode
and use a barrel blocking device.
• Rememberthattheultimatesafetydeviceisyou,theoperator.
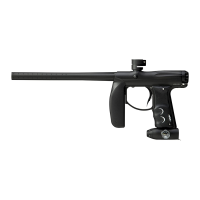
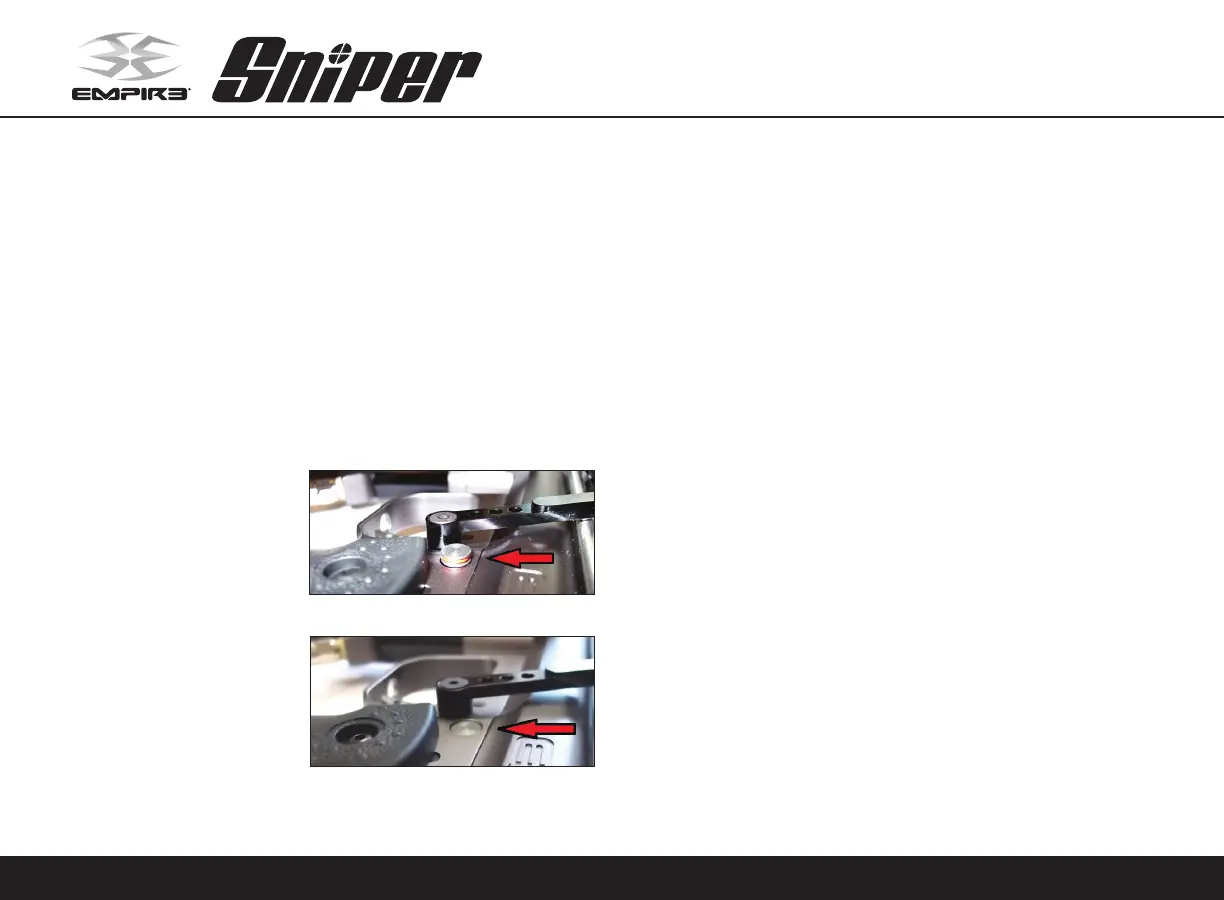
Safety and Safe Mode
The Safety is a small mechanical
push button on the left side of the
marker above the grips. When the
Safety is “OFF”, a red O-ring is visible
on the marker (fig. 3.1). When the
Safety is “ON”, the red O-ring will
be hidden and the marker will not
fire (fig. 3.2).
In this manual, you will see the term
“Safe Mode” used. In “Safe Mode”,
the Safety should be set to “ON”
(red marking on safety will not be
visible) and a barrel blocking device
should be installed. Make sure your
marker is in “Safe Mode” when the marker is not being fired or when indicated to do so.
Barrel Installation
• Makesuremarkerisdegassed,loaderremoved,nopaintballsinthefeedportor
breech and the marker is in “Safe Mode”.
• Slide the longer barrel tip into the desired barrel back, turning the barrel tip
clockwise until it stops (do not over tighten).
• Thebarrelbacksaresized(.675,.680,.685)tomatchthepaintballdiametertoget
the most efficient usage of your Sniper marker.
• Whilepointingmarkerinasafedirection,threadthebarrelintothefrontopeningof
the marker body.
• Turnthebarrelclockwise(whenlookingatthefrontopening)untilitstops(donot
over tighten).
• Installabarrelblockingdevice.Thiscanbeabarrelbagorothersuchdevicethat
prevents the accidental discharge of a paintball.
Loader Installation
• Toinstallaloader,checkthefeedneckandtheloadertomakesuretheyarefree
from debris and obstructions.
• Presstheloaderneckintotheopeningofthefeedneckuntilitstops.
• Aligntheloadersothatthelidispointingtotherearandtheloaderisparallelwith
the marker.
• Clamptheloader in place by tightening the clamp arm;itmaybenecessary to
adjust the feed neck clamp screw (see below). Do not over tighten the clamp
holding the loader, as this may damage it.
Feed Elbow Clamp Adjustment
Thefeedelbowclampmayneedadjustmentfordifferenttypes/brands of loaders.
Adjustthethumbnutclockwisetoincreasetheclampingforceorcounterclockwise
to decrease the clamping force of the lever. No tools are needed to make any
adjustments.
Before Pressurizing your Marker
Consult the place where you purchased your Empire marker, or a recognized and
competent air smith, for instruction in the safe handling of compressed-air cylinders
SAFE - SAFETY “ON” Fig. 3.2
FIRE - SAFETY “OFF” Fig. 3.1

 Loading...