EMS 5000 FIREPOINT
©2015 EMS Security Group Ltd. All rights reserved. TSD234 Iss 3 25/06/15 AJM
42 Press the “NO” key followed by the “” button and the screen will
display:
43 Press the “YES” key and the screen will display:
44 Press the “” button until the screen displays:
45 Press the “YES” key and the screen will display:
46 Press the “YES” key and the screen will display:
Note: Keep pressing the “YES” key until the desired Node Address is selected.
E.g: Master panel should have Address: 1. Slave Panels have address 2-30
available.
47 Press the “” button until the screen displays:
Note: The Site ID is factory set, and can only be altered by entering an EMS
engineering password.
Note: This must match on all control panels on the radio board network for
communication to take place.
48 Press the “” button once and the screen will display:
49 Press the “YES” key until the screen displays:
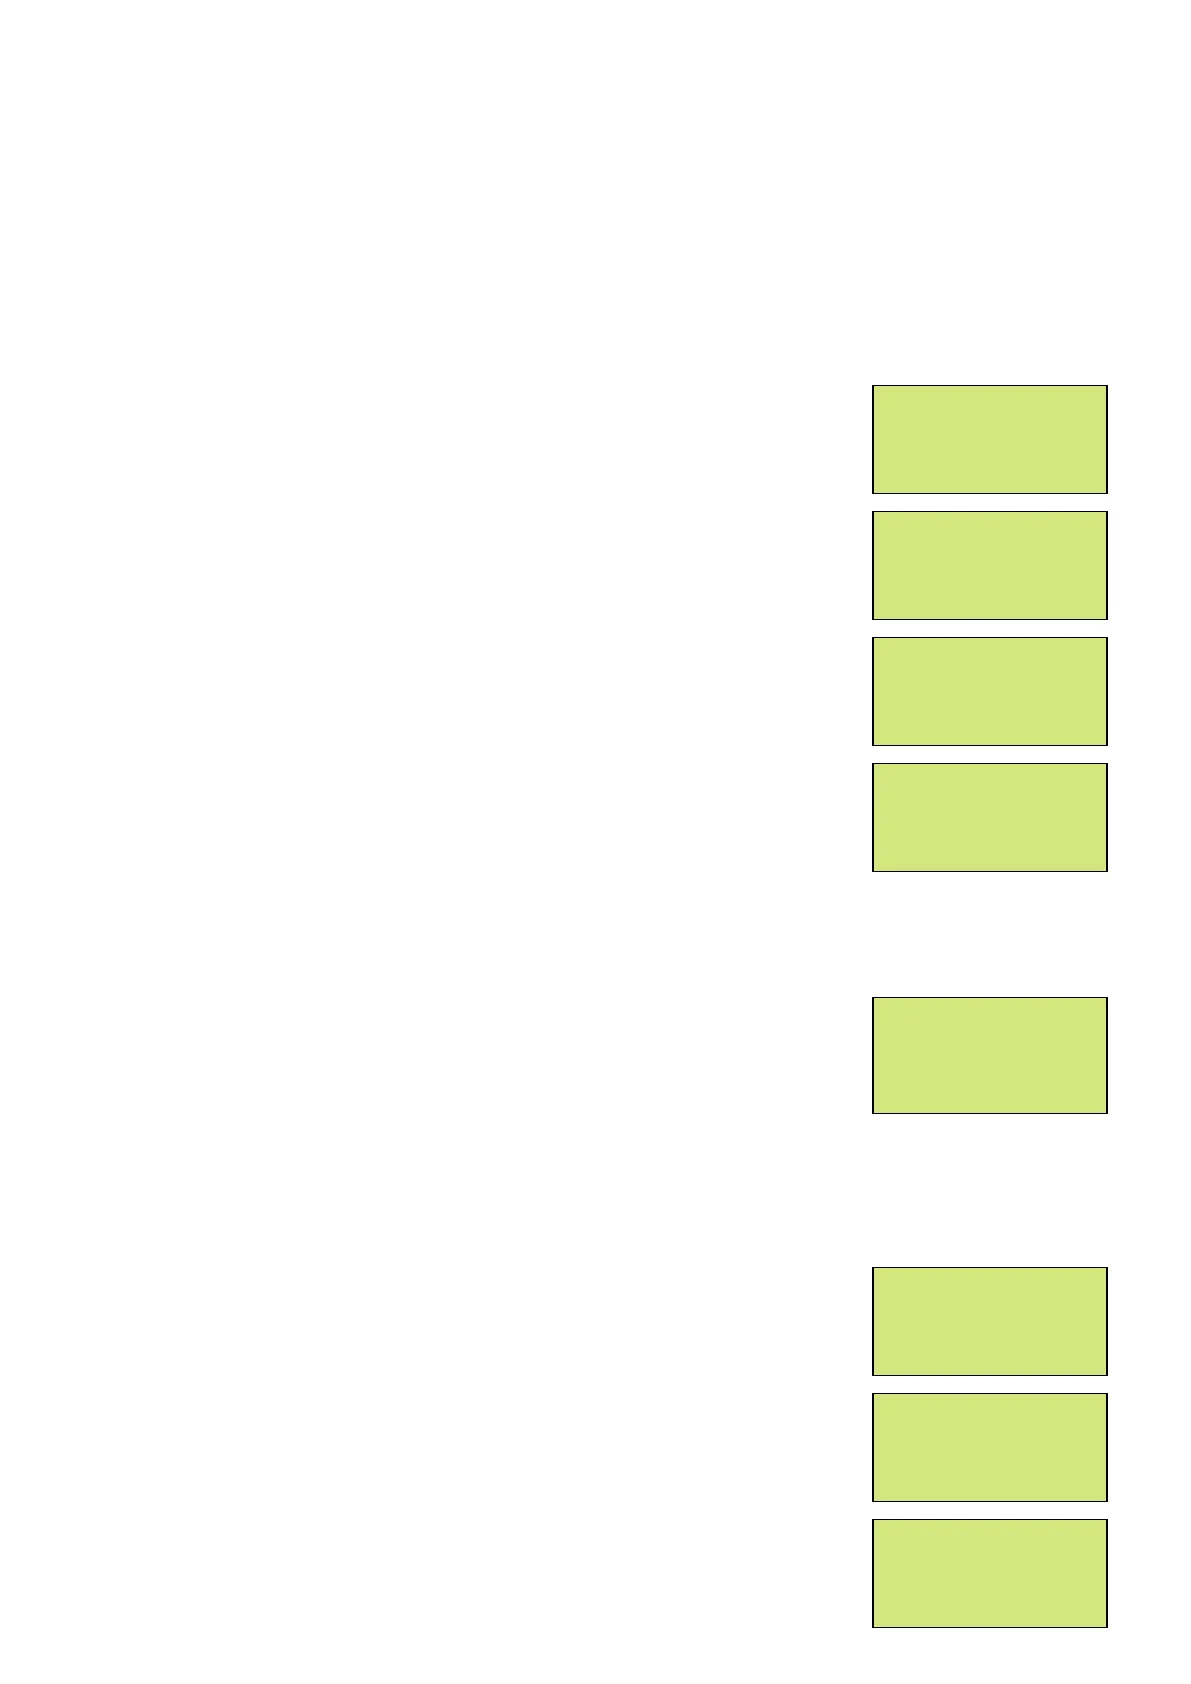
| *** Radio LAN *** |
> Node Table <
| Re-Start LAN |
Yes= Select Time
| Re-Online Node |
> Node Setup <
| Add/Delete Node |
Yes= Select Time
| *** Node Setup *** |
> Node Address : 0 <
| LAN disabled |
Yes= Select Time
| *** Node Setup *** |
> Node Address : 1 <
| Set as : Master |
Yes= Select Time
| Set as : Master |
>Site ID : 2047 <
|LAN Module Nua:00|
Yes= Select Time
| Site ID : 2047 |
>LAN Module Nua:00<
| Auto Log On : OFF |
Yes= Select Time
| Site ID : 2047 |
>LAN Module Nua:04<
| Auto Log On : OFF |
Yes= Select Time
| Re-Online Node |
> Node Setup <
| Add/Delete Node |
Yes= Select Time