Do you have a question about the ENCLO Wilmington Screen Kit and is the answer not in the manual?
Check packaging, use non-abrasive surface, ensure ample space, avoid force.
Contact customer service for missing/damaged parts, assembly help, or returns.
Identify and organize all components before starting assembly.
Assemble the main screen frame by connecting rails and posts.
Complete the screen assembly by attaching the bottom rail and anchors.
Position the assembled screen and secure it into the ground.
Loosen soil, add water, and use a block of wood to hammer posts into the ground.
Use an auger bit to drill holes, add water, and then push posts into the ground.
Ensure the screen is level and backfill any excavated dirt.
For very hard ground, dig larger holes to accommodate multiple posts.
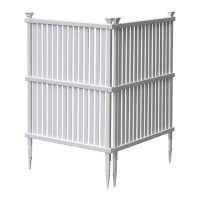
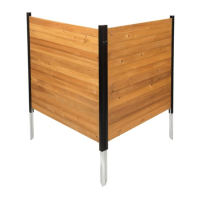
Use joiner clips and screws to connect screens at 45 or 90-degree angles.
Push the post caps down over the posts to secure them in place.
| Color Family | Black |
|---|---|
| Material | Composite |
| Color | Black |
| Common Panel Height (ft) | 6 ft |
| Common Panel Width (ft) | 8 ft |
| Height | 6 ft |
| Width | 96 |
| Use | Residential |