any questions regarding these channels or their placement,
please call Customer Service.
When possible, the walls of an Endless Pool
®
should be braced
laterally before filling with water to reduce outward deflection
when the pool is filled with water. The steel reinforcing chan-
nels supplied by Endless Pools Inc. are sufficient to withstand
the hydrostatic load but the pool walls will deflect slightly with-
out bracing. When a rigid coping such as tile is planned this
deflection is undesirable. For in-ground or partially in-ground
Endless Pools simply brace or shim laterally back to the walls
of the pit before filling. Be sure not to brace back to a load-bear-
ing wall unable to resist this lateral load. Please call Endless
Pools Customer Service with any questions.
8. Installation of the Liner Hanger
The aluminum liner hanger installs around the perimeter of the
pool panel enclosure. The liner literally hangs from this extru-
sion using a bead that is heat welded into the top edge of the
liner. The liner hanger system is packaged in the pool crate in a
long, triangular-shaped box. See Figure 8.1. The pieces are pre-
cut and pre-mitered to fit your pool. Only one long piece on
each side needs to be trimmed to length. Self-drilling fasteners
are included in the kit along with a nut driver attachment for
your drill.
If you have purchased the optional 8" Aluminum Coping, which
has a liner hanger built into it, please refer to Section 14 and
Technical Bulletin #4B prior to proceeding with your assembly.
If you have purchased the optional Bullnose Coping,
which has a liner hanger built into it, please refer to Section 12
prior to proceeding with your assembly.
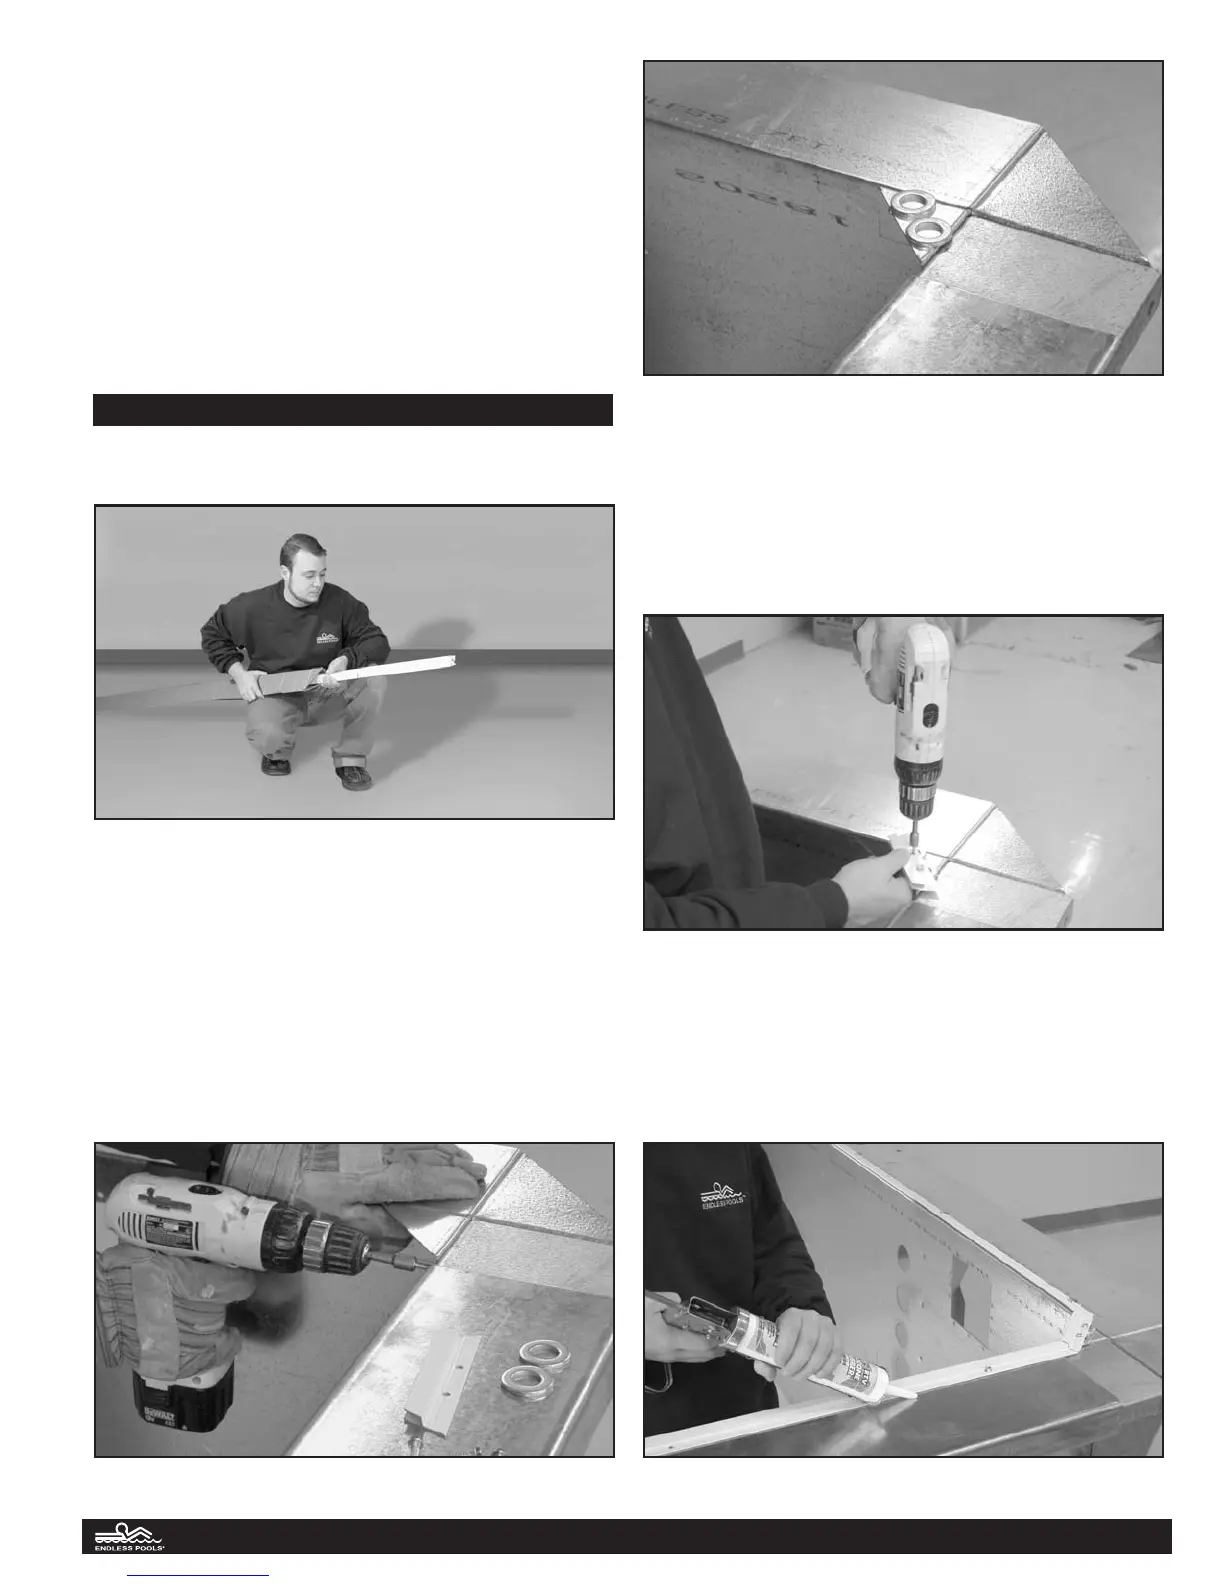
Install the 4 triangular inside corner supports, using the self-
drilling fasteners provided. See Figure 8.2. Then lay out the
entire system around the inside perimeter of the pool. The hang-
er pieces should be flush with the inside of the reinforcing chan-
nel and will protrude into the pool the thickness of the channel
everywhere else. This is shown particularly well on the
Installation Video. Because the height of the 2 reinforcing chan-
nels is slightly higher than the surrounding top flange, EPI pro-
vides 1/8" thick washers in the Pool Panel Hardware Kit to
place under the liner hanger and shim the pieces up to the level
Fig 8.1:Triangular liner hanger box.
Fig 8.3: 1/8" washer shims for leveling liner hanger.
Fig 8.4: Short mitered liner hanger attached to the triangular inside corner supports.
Fig 8.5: Caulking the liner hanger on the top.Fig 8.2: Installing the triangular inside corner supports.
9