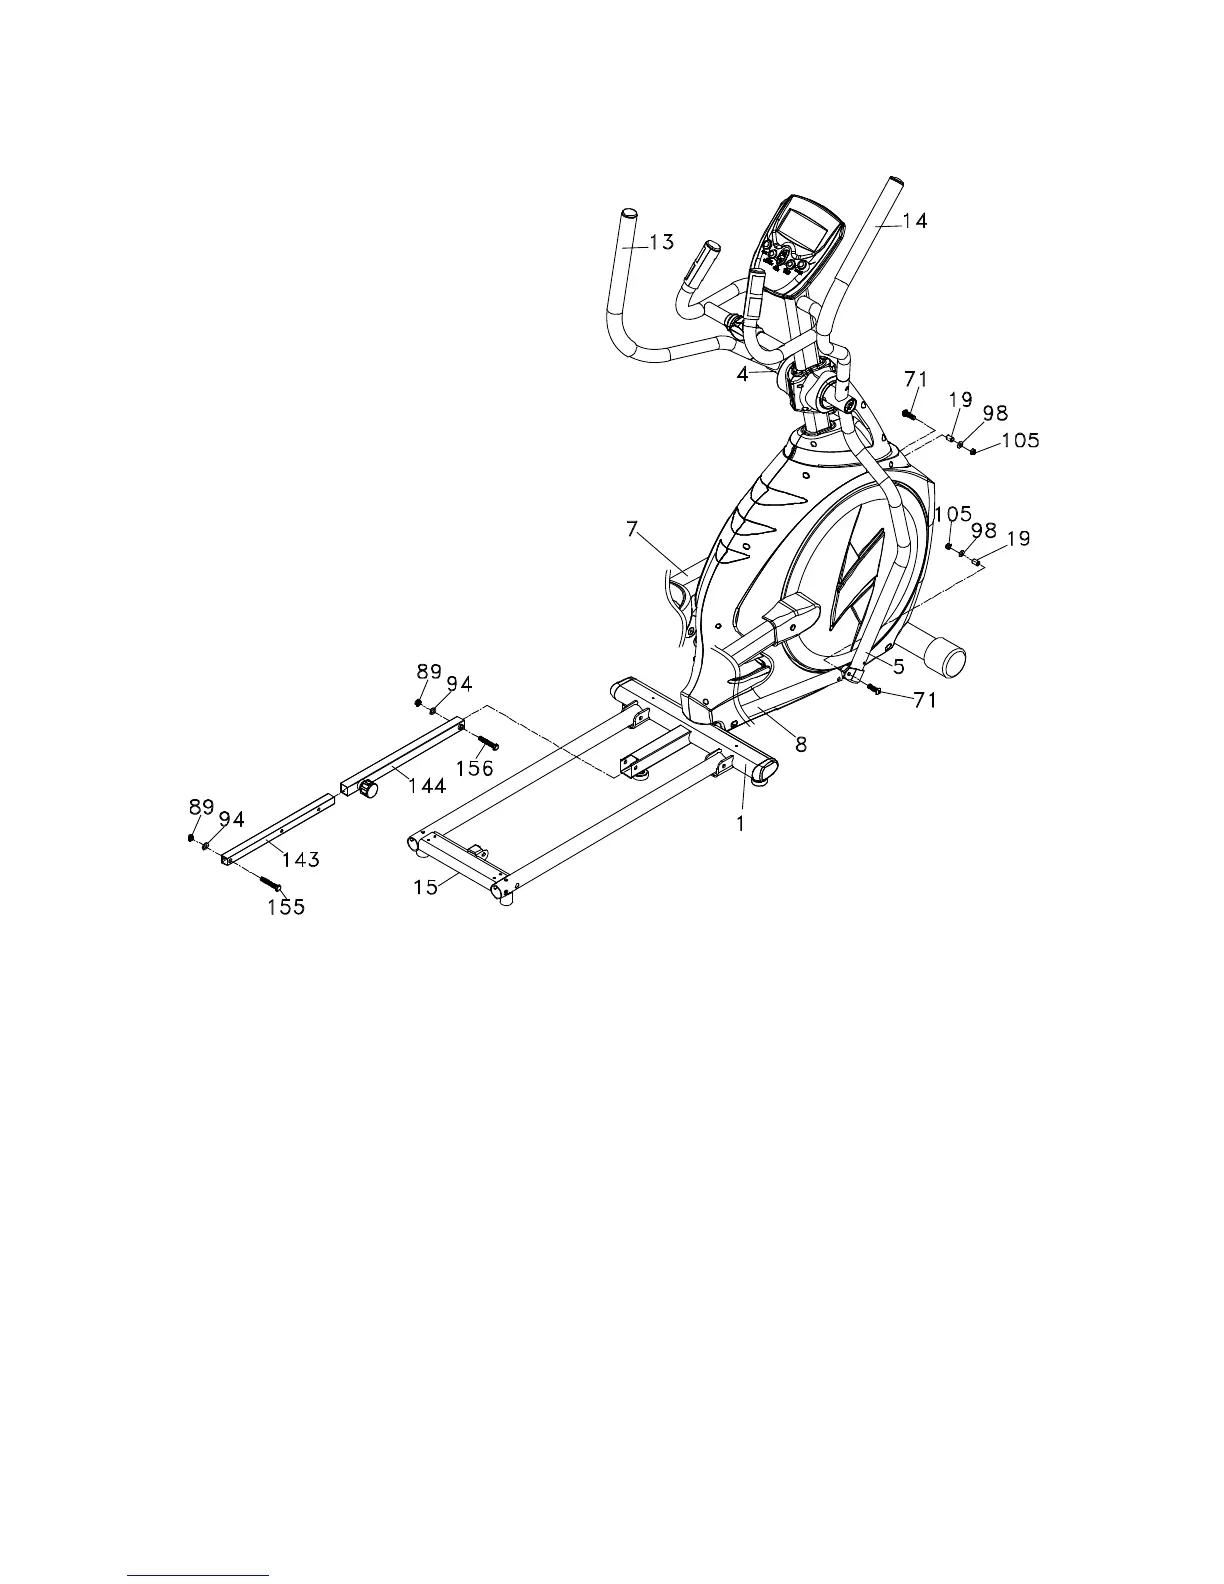
1. Use one 5/16" × 32m/m_Hex Head Bolt (71), 5/16" × 20 × 1.5T_Flat Washer (98) and 5/16" ×
7T_Nyloc Nut (105) to secure the Rod End Bearing(23), which is at the end of Lower Handle Bar
(L) (4), by using 13.14m/m_Wrench (111) and 12m/m_Wrench (110). Repeat the procedure for
the right side.
2. Loosen Locking Knob (145), then insert Inner Slide (143) into Outer Slide (144). Use 3/8" ×
2"_Button Head Socket Bolt (156), 3/8" × 19 × 1.5T_Flat Washer (94) and 3/8" × 7T_Nyloc Nut
(89) to secure Outer Slide (144) on the mainframe by using 13.14m/m_Wrench (111) and
Combination M5 Allen Wrench & Phillips Head Screw Driver (108). Then use 3/8" × 1-
1/2"_Button Head Socket Bolt (155), 3/8" × 19 × 1.5T_Flat Washer (94) and 3/8" × 7T_Nyloc Nut
(89) to secure Inner Slide (143) to Rail Assembly (15) by using 13.14m/m_Wrench (111) and
Combination M5 Allen Wrench & Phillips Head Screw Driver (108).