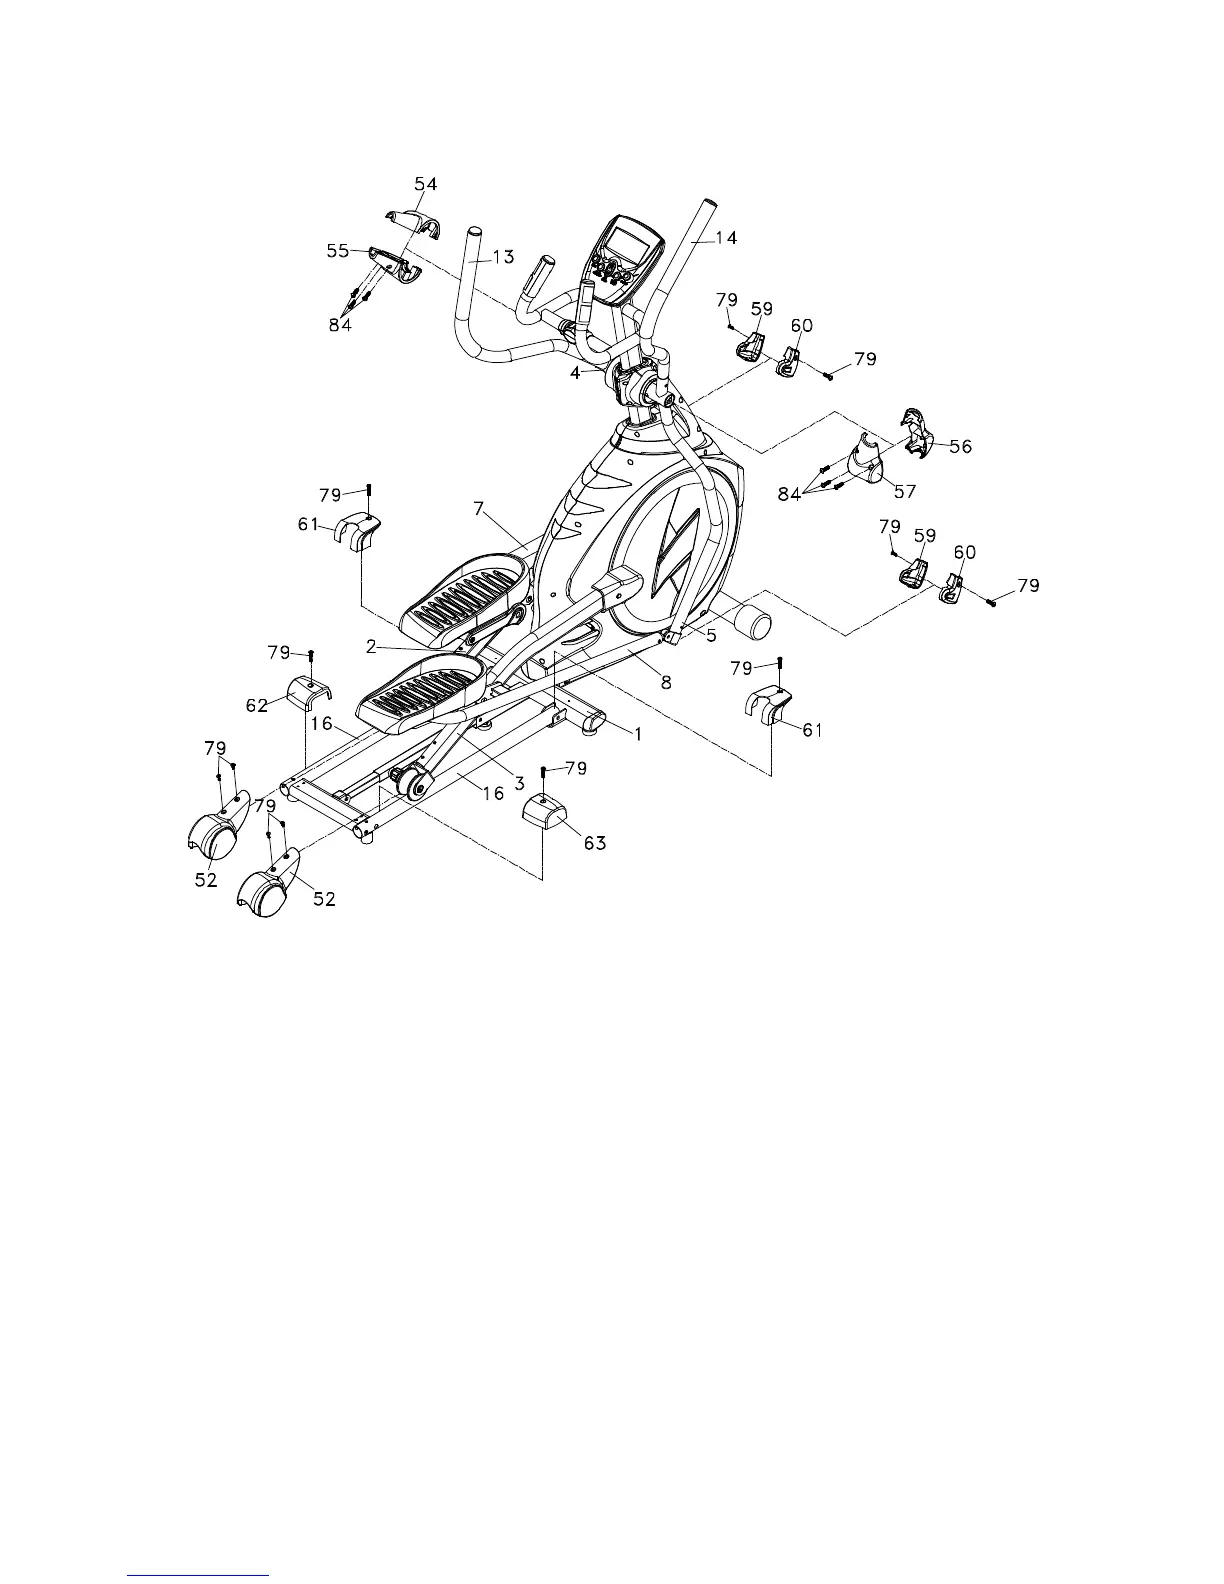
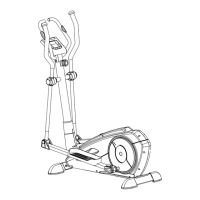
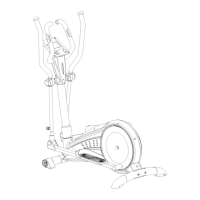
1. To assemble Connecting Arm Cover A (L) (59) and Connecting Arm Cover B (R) (60) onto Lower
Handle Bars (4, 5) at each side, use four M5 × 15m/m_Phillips Head Screws (79) to secure by
using Combination M5 Allen Wrench & Phillips Head Screw Driver (108).
2. To assemble Slide Wheel Covers (52) onto left and right Pedal Arms (2, 3), use four M5 ×
15m/m_Phillips Head Screws (79) to secure by using Combination M5 Allen Wrench & Phillips
Head Screw Driver (108).
3. Use three Ø3.5 × 12m/m_Sheet Metal Screws (84) to secure Front Handle Bar Cover (L) (54) and
Rear Handle Bar Cover (L) (55) with Combination M5 Allen Wrench & Phillips Head Screw Driver
(108) onto the bearing housing on Lower Handle Bar (L) (4). Repeat the procedure for Front
Handle Bar Cover (R) (56) and Rear Handle Bar Cover (R) (57) for the right side.
4. Use two M5 × 15m/m_Phillips Head Screws (79) to secure Middle Stabilizer Covers (61) on rear
stabilizer and at each side of the mainframe (1) with Combination M5 Allen Wrench & Phillips
Head Screw Driver (108).
5. Use one M5 × 15m/m_Phillips Head Screw (79) to secure Rear Stabilizer Cover (L) (62) on the
Rail Tube (16) with Combination M5 Allen Wrench & Phillips Head Screw Driver (108). Repeat
the procedure for Rear Stabilizer Cover (R) (63) for the other side.