1212
Operating Instructions (cont.)
OPERATING INSTRUCTIONS
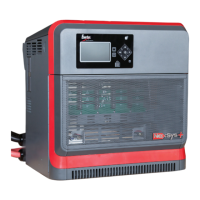
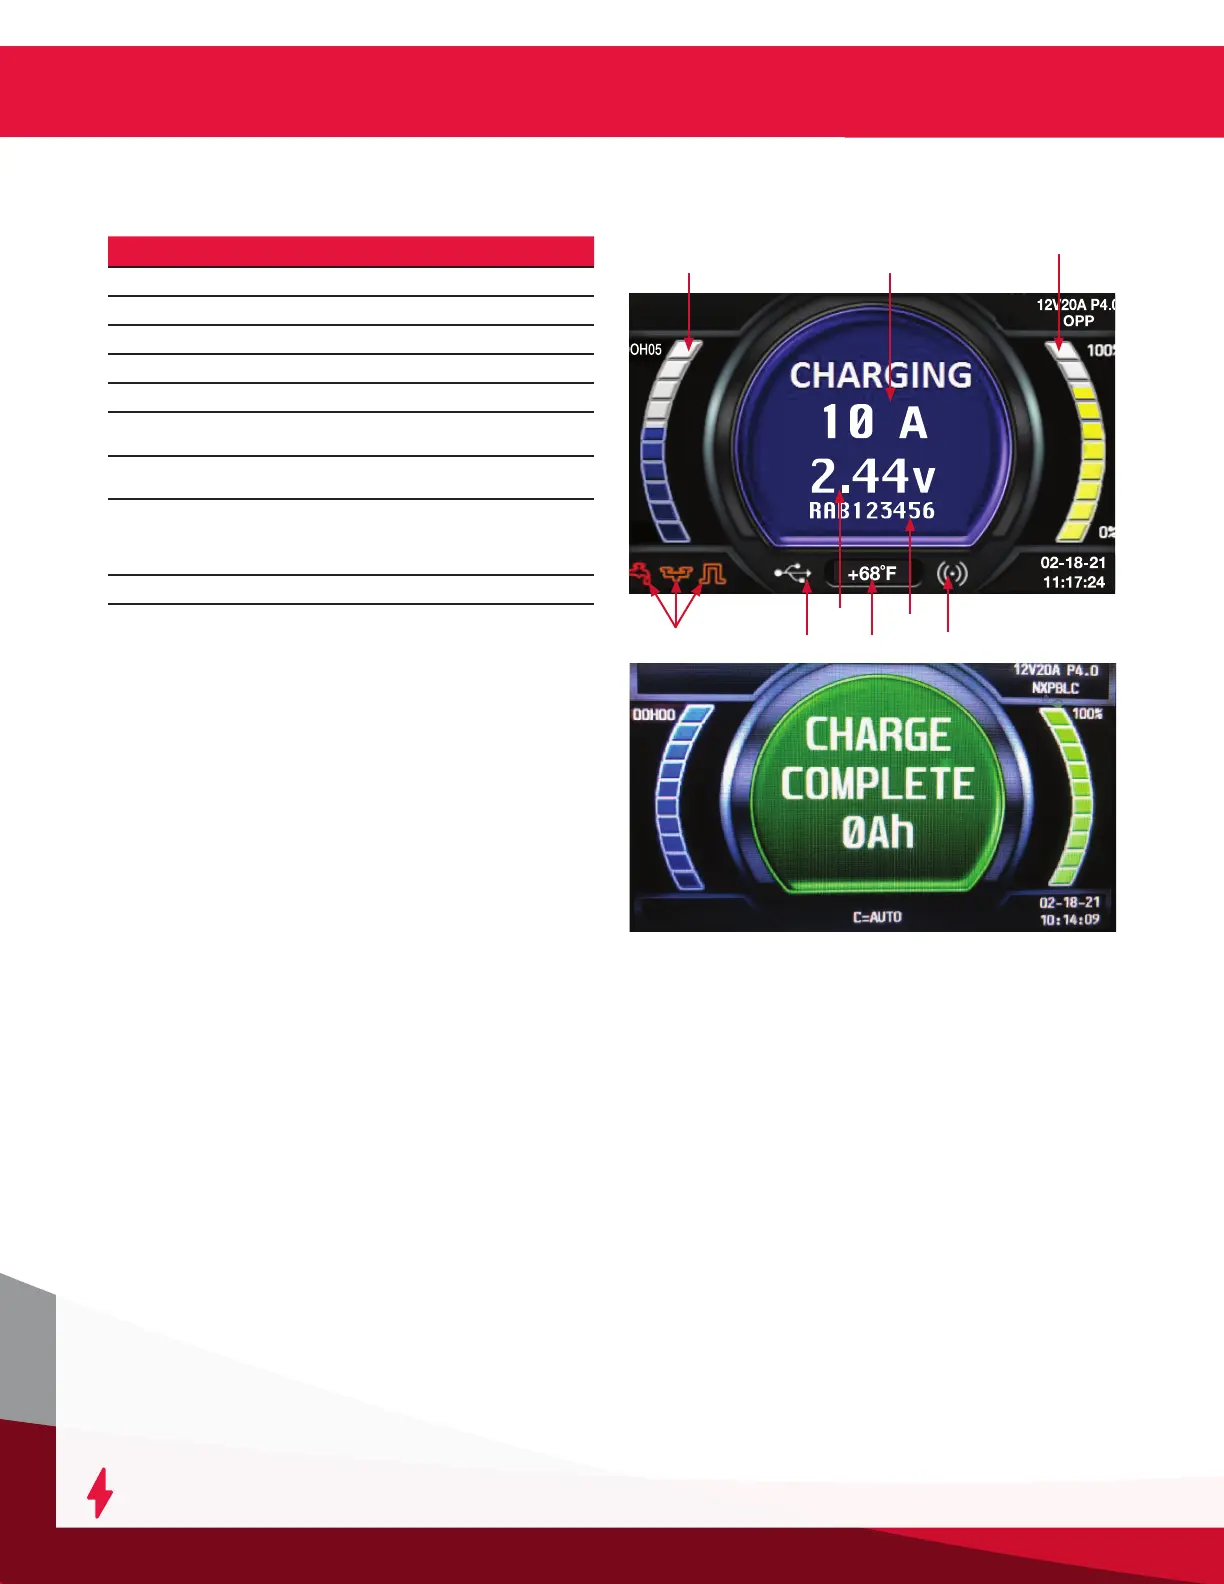
Reference Description
1
Charge time
2
Charging current
3
Percent of charge
4
Wi-iQ
®
battery monitoring device warnings
5
USB connection
6
Charge voltage (total V and V/c), alternates
with Ah returned
7
Battery temperature, alternates with battery
capacity
8
Battery S/N from Wi-iQ® battery monitoring
device
Li-ion only: Max current and voltage
requested by BMS
9
Wi-iQ
®
battery monitoring device link
Charging current (2) is determined by the battery
voltage and state of the charge condition. Charging
current declines automatically as battery voltage rises
during the charge. As the battery charges, the graphical
display will output various charge parameters,
including the percentage of battery capacity (3).
When charging a NexSys
®
iON battery, the battery
BMS controls the charge current and voltage. During
the charge cycle, the BMS through the CAN will send
information to the charger to start, stop and output the
desired current and voltage. If the CAN is lost during
charge cycle, the charger will stop the charge and show
the off-charge display without the message “BMS
CONNECTED”.
Stop Charging
The charging can be paused and restarted where it left
off at any time. Just hit the ENTER/STOP and START
button (marked as number 11 in Control Panel Features
section) Remote is available for controlling at a distance.
Charge Complete
Figure 4: End of charge display
End of Charge Without Equalization
The GREEN charge complete indicator comes on after
proper end of charge. The GREEN charge complete LED
is on and the display shows CHARGE COMPLETE. The
display alternates between:
• Total charging time
• Amp-hours restored to the battery
Any other lit LED indicates a problem during charging.
Please refer to paragraph Control Panel Features for
more information.
If the battery remains plugged in and refresh charge
has been enabled, refreshes will occur to maintain an
optimal charge.
The battery is now ready for use. Push the ENTER/STOP
and START button before unplugging the battery.
End of Charge With Equalization
An Equalize charge can be started manually or
automatically.
Manual Equalization Start
At the end of charge (green LED on or ashing), press on
the Navigate RIGHT/EQUALIZE button. The equalize button
can also be pressed any time during the charge and an
equalize charge will be started after charging is complete.
The start of the equalization charge is indicated by the
symbol. During the equalization charge, the charger
displays the output current and alternates, the battery
voltage and voltage per cell and remaining time.
NOTE: When an equalization charge is manually
started, the output will be set automatically.
1
7
3
9
5
8
6
2
4
Figure 4
 Loading...