EasyManua.ls Logo

EnGenius EWS356-FIT User Manual

EnGenius EWS356-FIT
11 pages
To Next Page IconTo Next Page
Page #1 background imageLoading...
Page #1 background image
EWS356-FIT
Quick Start Guide
EWS356-FIT Quick Start Guide
EnGenius Fit Wi-Fi 6 2×2 Indoor
Wireless Access Point
Quick Start Guide
Technical Specifications
Package Contents
This Quick Start Guide is designed to guide you through the
installation of the Fit 2x2 access point, model EWS356-FIT,
including hardware mounting and configuration.
Wi-Fi 6 technology for high-performance Wi-Fi in high-density,
multi-device environments.
Two spatial streams support up to 1,200 Mbps (5GHz) & 574
Mbps (2.4GHz).
Multiple applications for cloud and on premises solutions.
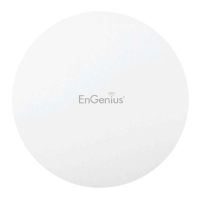
Model: EWS356-FIT
FIT Managed Indoor
Access Point
Mounting Kit
Ceiling Mount Base
(9/16” T-Rail)
Spacer
Ceiling Mount Base
(15/16” T-Rail)
Product Card
Question and Answer IconNeed help?

Do you have a question about the EnGenius EWS356-FIT and is the answer not in the manual?

EnGenius EWS356-FIT Specifications

General IconGeneral
BrandEnGenius
ModelEWS356-FIT
CategoryWireless Access Point
LanguageEnglish

Summary

Technical Specifications

Package Contents

System Requirements

Hardware Overview

LED Indicators

Details the status, color, and behavior of the device's LEDs.

Reset Button

Explains how to reset the device to factory default settings.

Hardware Mounting

Ceiling Mount (T-Rail)

Instructions for mounting the access point using a T-rail ceiling mount.

Ceiling Mount (Hard Ceiling)

Steps for mounting the access point on a hard ceiling.

Wall Mount

Instructions for mounting the access point on a wall.

Powering EnGenius Fit AP

Connecting to a PoE Switch

How to power the AP using a PoE switch.

Powering with a PoE Injector

Steps for powering the AP using a PoE injector.

Powering with a Power Adapter

How to power the AP using a standard power adapter.

Management Plane Options

Cloud Management

Manage the AP via the FitXpress platform (mobile app/web portal).

On-Premises Management

Manage the AP using the FitController appliance.

Standalone Configuration

Configure the AP directly via its local web GUI.

Cloud Management Procedure

Step 1: Connecting Ethernet

Connect the AP to the DHCP-enabled network for cloud access.

Step 2: Register Device

Register the access point with the FitXpress app using QR code.

Step 3: Connect to FitXpress

Device connects to FitXpress platform; firmware may auto-upgrade.

Step 4: Manage with the FitXpress

Log in to the FitXpress app to configure and monitor devices.

On-Premises Management Procedure

Step 1: Connecting Ethernet

Connect the AP to the network for FitController management.

Step 2: Log in to the FitController

Access and log into the FitController management interface.

Step 3: Register Device and Assign to Network

Register and assign discovered devices within FitController.

Step 4: Pairing the Device

Establish an encrypted connection between AP and FitController.

Step 5: Manage with FitController

Navigate FitController to manage network and view statistics.

Standalone Configuration Procedure

Step 1: Access to Local Web

Access the AP's local web GUI for configuration.

Step 2: Configure and Manage the Device

Configure and manage the AP through its local web interface.

Related product manuals