Mounting the SSA
Enterasys S-Series Stand Alone (SSA) Hardware Installation Guide 2-11
TheSSArailkitdoesnotincludescrewsforattachingthemountingbracketstotherackposts.
4. Snapthe10‐32cagenuts,includedintheSSArailkit,intothesquarescrewholesonthefront
mountingearsoftherails.
5. SlidetheSSAontotherailsuntilthefront
oftheSSAisagainstthemountingearsoftherails.
6. SecurethefrontoftheSSAtotherailsbyscrewingthe10‐32screws,includedintheSSArail
kit,intothemountingearsontherightandleftfrontoftheSSA.
7. (Optional)Securetherearofthe
SSAtotherails.See“SecuringtheSSAtotheRearofthe
Rails”onpage 2‐11.
Securing the SSA to the Rear of the Rails
TheoptionalprocedureofsecuringtheSSAtotherearoftheSSArailsapp liestoallrack
installationscenarios(four‐postrack,7‐inchtwo‐postrack,and3‐inchtwo‐postrack).Securing
therearoftheSSAisrecommendedonlyifyouareshippingtherack inwhich
theSSAisinstalled.
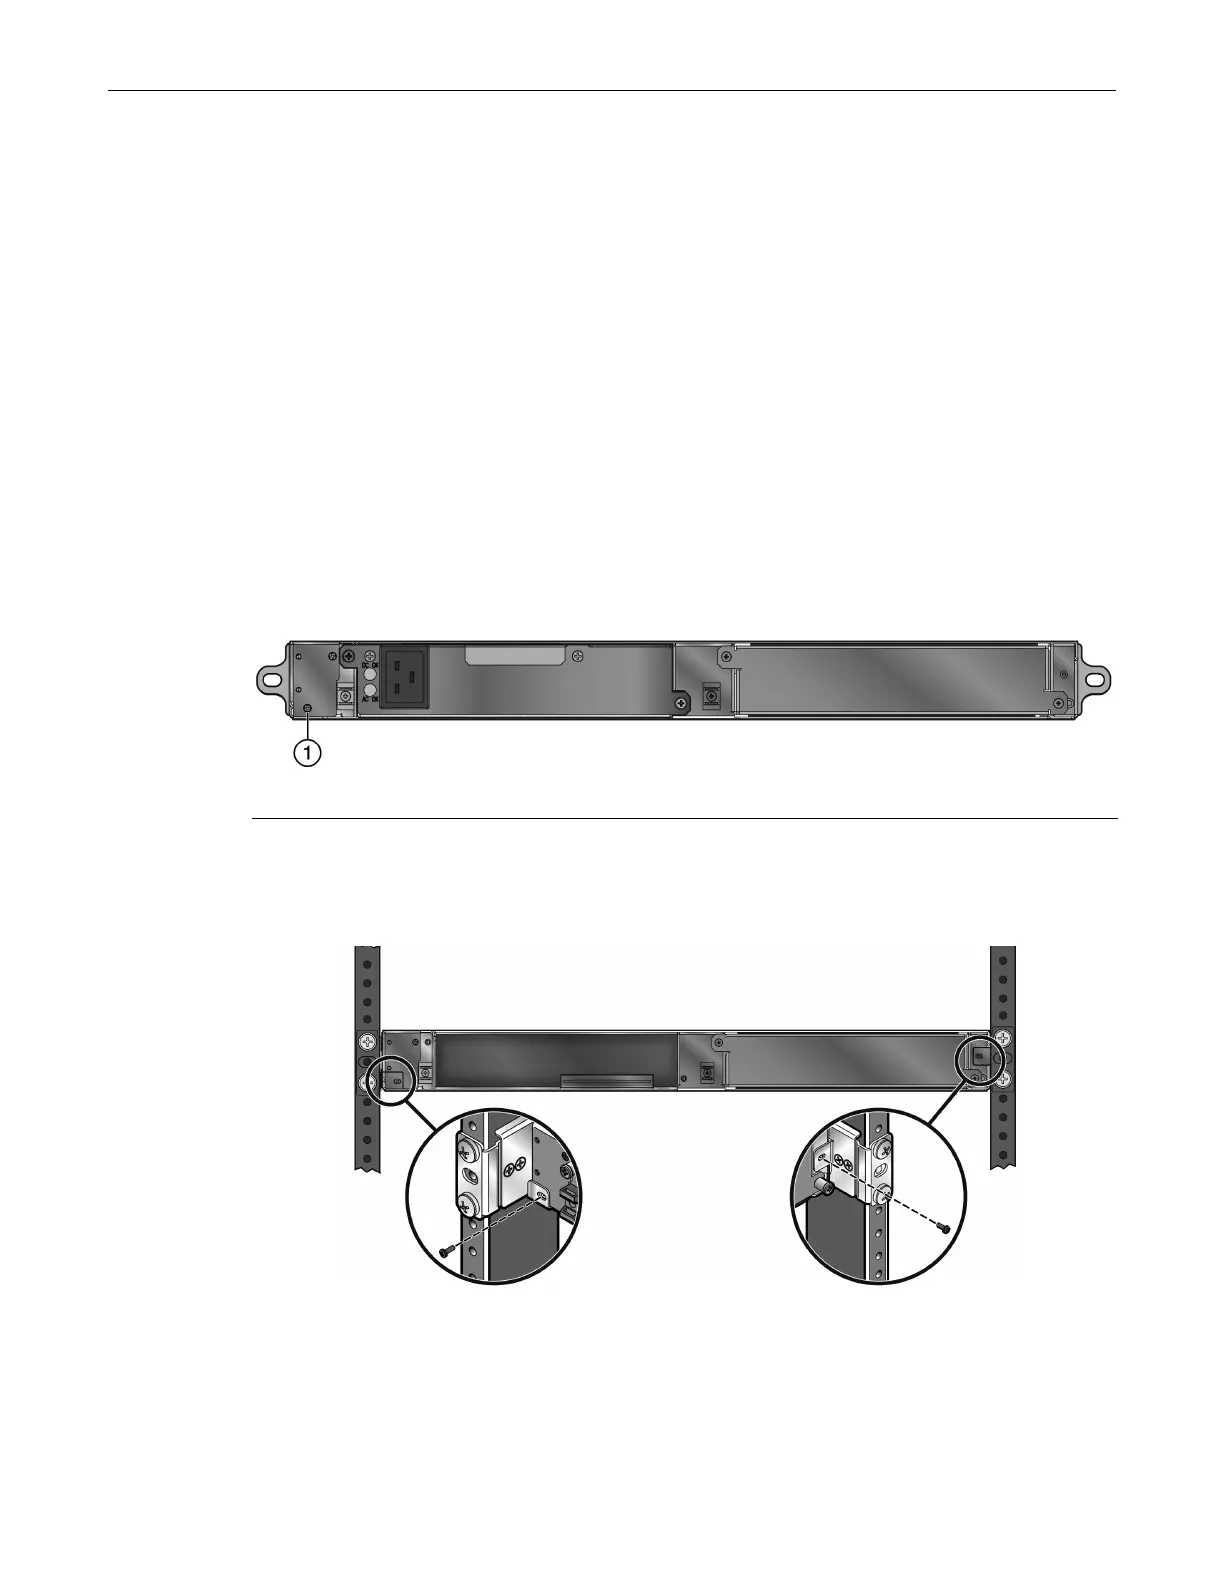
IfyouplantosecuretheleftrearcorneroftheSSA,youmustremovethescrewfromtheleftrear
corneroftheSSAbeforeinstallingtheSSAintherack.SeeFigure 2‐7.
Figure 2-7 Screw to Remove if You Plan to Secure the Left Rear of the SSA
Tosecure therearoftheSSAtothe rails,
screwthe2‐56screws,includedintheSSArailkit,into
thescrewtabsontherightandleftrail.SeeFigure 2‐8.
Figure 2-8 Securing the Rear of the SSA (Four-post Rack Example)
1 Remove this screw before installing the SSA in the rack

 Loading...


