10
Installation
QUALIFIED INSTALLERS ONLY
duCt Collars:
Prior to replace installation, the two supplied duct collars
must be attached to the top of the replace as shown in
the steps below:
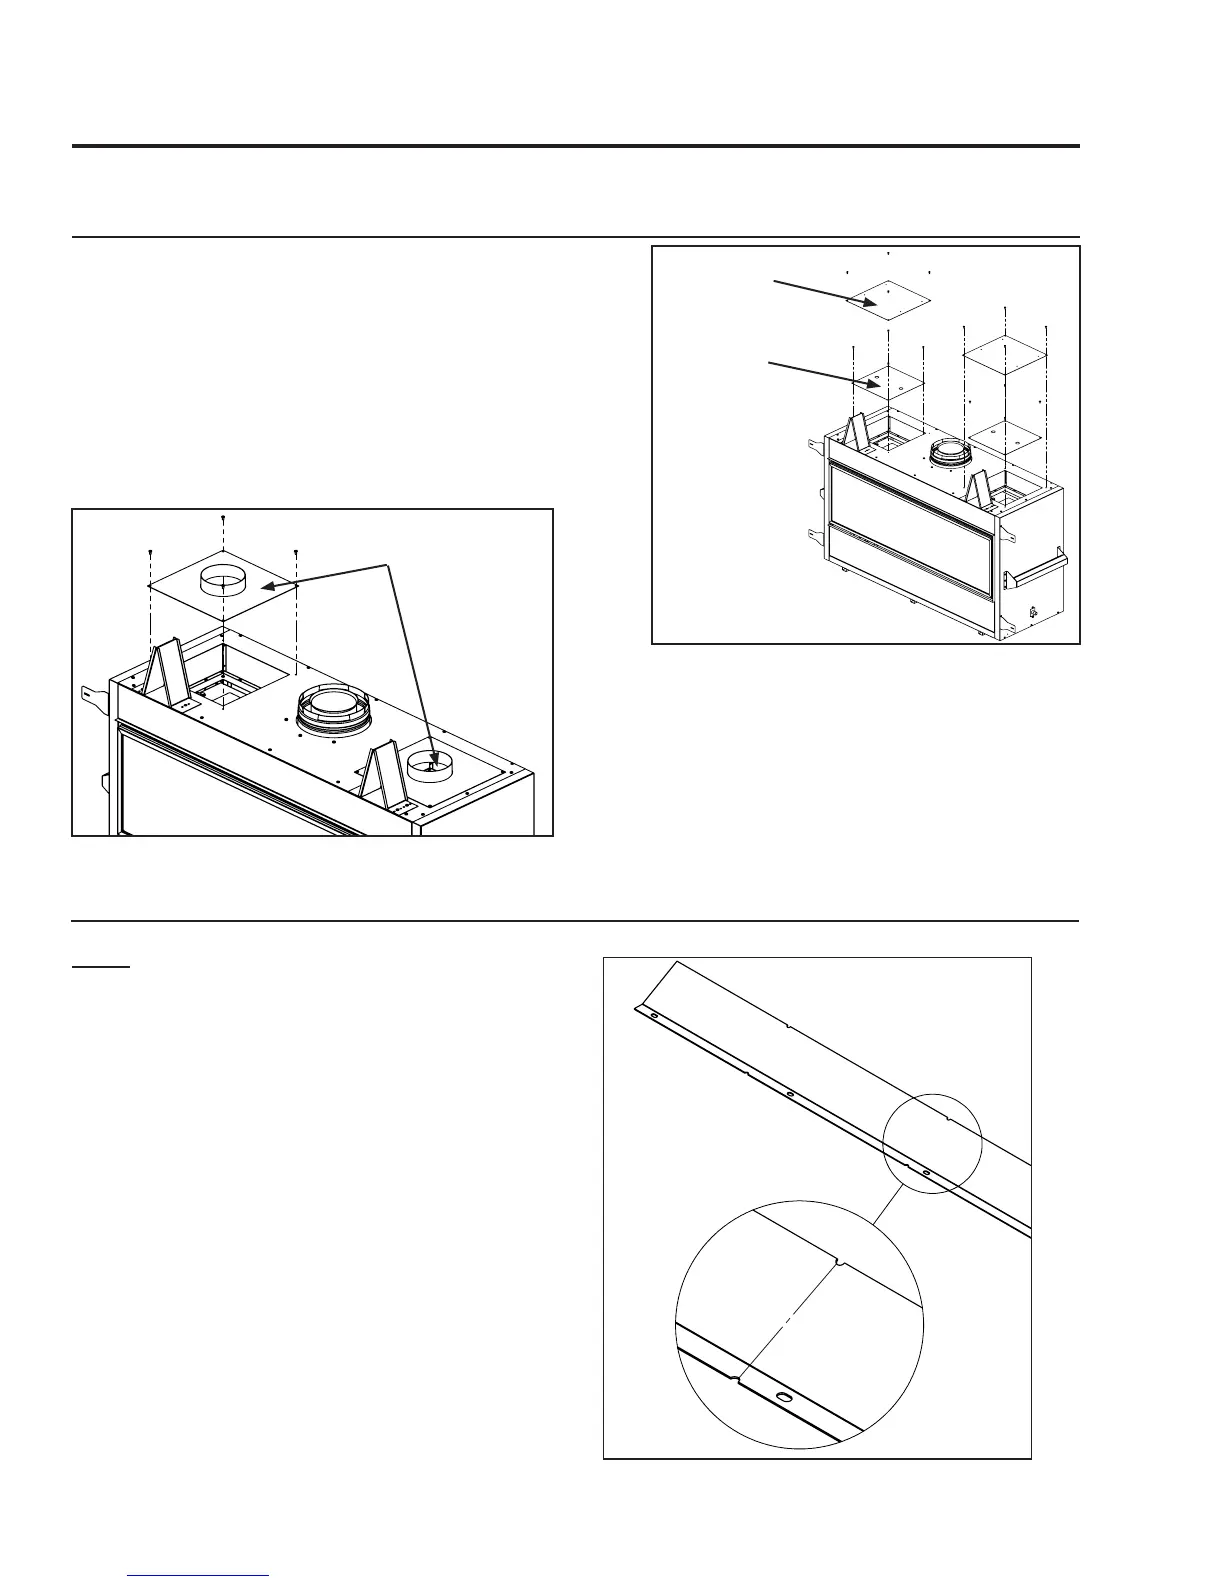
Step 1: Using a T20 screwdriver, remove the inner and
outer cover plates from the replace as shown (Figure
11). Each cover plate has four (4) mounting screws.
Both sets of cover plates are no longer required and can
be recycled. Retain eight (8) of the removed mounting
screws to secure the duct collars.
Inner Cover
Plate (x2)
Outer Cover
Plate (x2)
Figure 11. Cover Plate Removal
Step 2: Attach the supplied duct collars to the top
of the cabinet as shown (Figure 12). Secure the
collars by re-using the eight (8) screws saved in the
previous step.
Duct Collars
Figure 12. Duct Collars Installed
Figure 13. Trimmable Deector trim notches
Note: You can install the Cool Surface System
without the Combustible Facing Kit. Doing so
requires a non combustible facing material
(see Owner’s Manual for replace installation
instructions).
Step 1: Prior to installation of the CSS Combustible
Facing Kit determine your unit. Then retreive the
trimable defelctor. The deector is trimable to t the
unit being installed. It comes in the length required
to t a C60 and must be trimmed to t either the
C44 or the C34. Notches on the top and bottom of
the trimable deector show where to cut it. The rst
notch on the far left will size it for a C44 and the
second notch will size it for a C34.
Combustible FaCing Kit (optional):