EasyManua.ls Logo

Epever LandStar E Series - User Manual

Epever LandStar E Series
2 pages
Print Icon
To Next Page IconTo Next Page
Loading...
HUIZHOU EPEVER TECHNOLOGY CO., LTD. Tel: +86-752-3889706 Website: www.epever.com
1 2
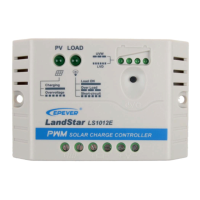
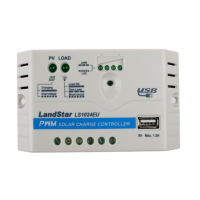
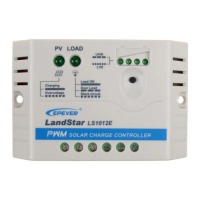
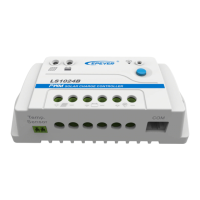
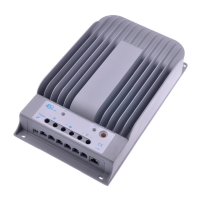
Solar Charge Controller
1. Safety Information
Read all the instructions in the manual before installation.
DO NOT disassemble or attempt to repair the controller.
Install an external fast-acting fuse or breaker as required.
Disconnect the solar module and fast-acting fuses/breakers near the battery
before installing or moving the controller.
Power connections must remain tight to avoid excessive heating from a
loose connection.
Only charge batteries that comply with the controller's parameters.
The battery connection may be a single battery or a bank of batteries.
Risk of electric shock! The PV and load can produce high voltages when the
controller is working.
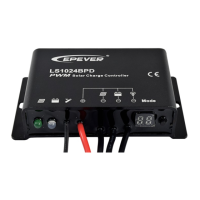
2. Overview
The LandStar E/EU series controller is a PWM charge controller that adopts
the most advanced digital technique. It's an easy operation and cost-efficient
controller featured as:
3-Stage intelligent PWM charging: Bulk, Boost/Equalize, and Float
Support 3 charging options: Sealed, Gel, and Flooded
Battery status LED indicator indicates battery situation
Battery temperature compensation function
With humanized settings, the operation is more comfortable and convenient
The USB provides a power supply that can charge electronic equipment(LS
EU series only)
Battery type and load output can be set via the button
Extensive Electronic protection
3. Product Features
PV Terminals
Load Switch Button
Battery Terminals
Battery status LED indicator
Load Terminals
Load status LED indicator
USB output interface
(LS EU series only)
Charging status LED
indicator
Mounting Hole Φ4.5
4. Wiring
Connect the system in the order of battery load PV array
following Figure 2-2," Schematic Wiring Diagram," and disconnect the system
in the reverse order❸❷❶.
NOTE: Do not connect the circuit breaker or fast-acting fuse while
wiring the controller. Ensure that the leads of "+" and "-" poles are
connected correctly.
NOTE: A fast-acting fuse whose current is 1.25 to 2 times the
controller's rated current must be installed on the battery side with a
distance from the battery not greater than 150 mm.
WARNING: The controller has no PV reverse connection protection;
please connect it correctly.
5. LED Indicators
1) Charging and load status indicator
Indicator
Color
Status
Instruction
Charging status
LED indicator
Green
On Solid
In Charging
OFF
No Charging
Fast Flashing
Battery Over
Voltage
Load status LED
indicator
Green
On Solid
Load ON
OFF
Load OFF
Slowly Flashing
Overload
Fast Flashing
Load short circuit
2) Battery status indicator
LED2
LED3
LED4
Battery Status
×
×
×
Under voltage
×
×
×
Over-discharge
Battery LED indicator status during voltage is up
×
×
12.8V U
bat
13.4V
×
13.4V U
bat
14.1V
14.1V U
bat
Battery LED indicator status during voltage is down
×
12.8VU
bat
13.4V
×
×
12.4VU
bat
12.8V
×
×
×
U
bat
12.4V
NOTE:
The above voltage values are measured in the 12V system at 25; please
double the values in the 24V system.
"" states LED indicator on; "×" states LED indicator off.
6. Operating
1) Load ON/OFF Setting
Press the button to control the load output when the controller is powered on.
2) Battery Type Setting
Operation:
Step 1: Enter the setting mode by pressing the button for 5s until the battery
status LEDs are flashing.
Step 2: Select the desired mode by pressing the button.
Step 3: The mode is saved automatically without any operation for 5S, and the
LED stops flashing. Battery Type Indicator shows as below:
LED1
LED2
LED3
Battery type
×
×
Sealed(Default)
×
Gel
Flooded
NOTE: "" states LED indicator on "×" states LED indicator off
Figure 1 Product Feature
Figure 2 Connection diagram
Thank you for selecting the LandStar E/EU series solar charge
controller. Please read this manual carefully before using the
product and pay attention to the safety information.
Do not install this product in humid, salt spray, corrosion, greasy,
flammable, explosive, dust accumulative, or other severe
environments.

Questions and Answers

  • J
    Jason ArnoldAug 13, 2025
    What to do if the Load LED indicator is fast flashing on my Epever LandStar E?
    • V
      veronica79Aug 13, 2025
      If the load LED indicator on your Epever Controller is flashing rapidly, it indicates a short circuit. The controller will automatically resume operation after 10 seconds following the first short circuit. If a second short circuit occurs, press the button to resume operation after 3 seconds.
  • B
    Bradley QuinnAug 17, 2025
    Why is the charging LED indicator fast flashing on my Epever LandStar E?
    • E
      edwardsdanielAug 17, 2025
      If the charging LED indicator on your Epever Controller is flashing rapidly, it means the battery voltage is higher than the over voltage disconnect voltage (OVD). Check if the battery voltage is too high and disconnect the solar module.
  • J
    Jay RobinsonAug 20, 2025
    What to do if the Load LED indicator is slowly flashing on my Epever LandStar E?
    • R
      richard04Aug 21, 2025
      If the load LED indicator on your Epever Controller is flashing slowly, it indicates an overload. Reduce the load and press the button once. The controller will resume working after 3 seconds.
  • G
    Gwendolyn MartinAug 25, 2025
    How to fix a charging LED indicator that is off during daytime on my Epever LandStar E Controller?
    • R
      Roberto FriedmanAug 25, 2025
      If the charging LED indicator is off on your Epever Controller during the daytime when sunshine falls on PV modules properly, it could be due to a PV array disconnection. Check if the PV and battery wire connections are correct and tight.
  • B
    Briana DavisAug 28, 2025
    Why is there no charging status LED indicator with a normal connection on my Epever Controller?
    • M
      Mikayla PooleAug 28, 2025
      If there is no charging status LED indicator with a normal connection on your Epever Controller, the input voltage of the solar module may be lower than the battery voltage. Measure the input voltage of the solar module; it must be higher than the battery voltage.
  • J
    Joshua CortezSep 1, 2025
    What does it mean when the Battery LED1 indicator is slowly flashing on my Epever LandStar E?
    • E
      Ethan HarrisSep 1, 2025
      If the battery LED1 indicator is flashing slowly on your Epever Controller, it indicates that the battery is under voltage. When the load output is normal, the LED status will return to ON automatically when fully charged.
  • J
    Joe CruzSep 5, 2025
    What does it mean when the Battery LED1 indicator is fast flashing on my Epever LandStar E Controller?
    • L
      Laura BradleySep 5, 2025
      If the battery LED1 indicator is flashing rapidly on your Epever Controller, it means the battery is over discharged. When the controller cuts off the output automatically, the LED status will return to ON automatically when fully charged.
  • B
    Bryan ThompsonSep 8, 2025
    Why is there no LED indicator on my Epever Controller?
    • J
      Johnathan MaldonadoSep 8, 2025
      If there is no LED indicator on your Epever Controller, it could be because the battery voltage is lower than 6V. Measure the battery voltage with a multi-meter. A minimum of 6V is required to start the controller.

Epever LandStar E Series Specifications

General IconGeneral
ModelEpever LandStar E Series
CategoryController
TypePWM
System Voltage12V/24V Auto
PWM ControlYes
Temperature Compensation-3mV/°C/2V(Default)
Max. PV Open Circuit Voltage50V
Operating Temperature-35°C to +55°C
Maximum PV Input Voltage50V
Rated Current10A, 20A
DisplayLCD
Battery TypeSealed, Gel, Flooded
Self-consumption<10mA
Max PV Input Power (24V)260W(10A) / 520W(20A)
ProtectionOvercharge, Over-discharge, Short-circuit
Max PV Input Power (12V)130W(10A) / 260W(20A)

Related product manuals