16000 - X-Axis Replacement
9
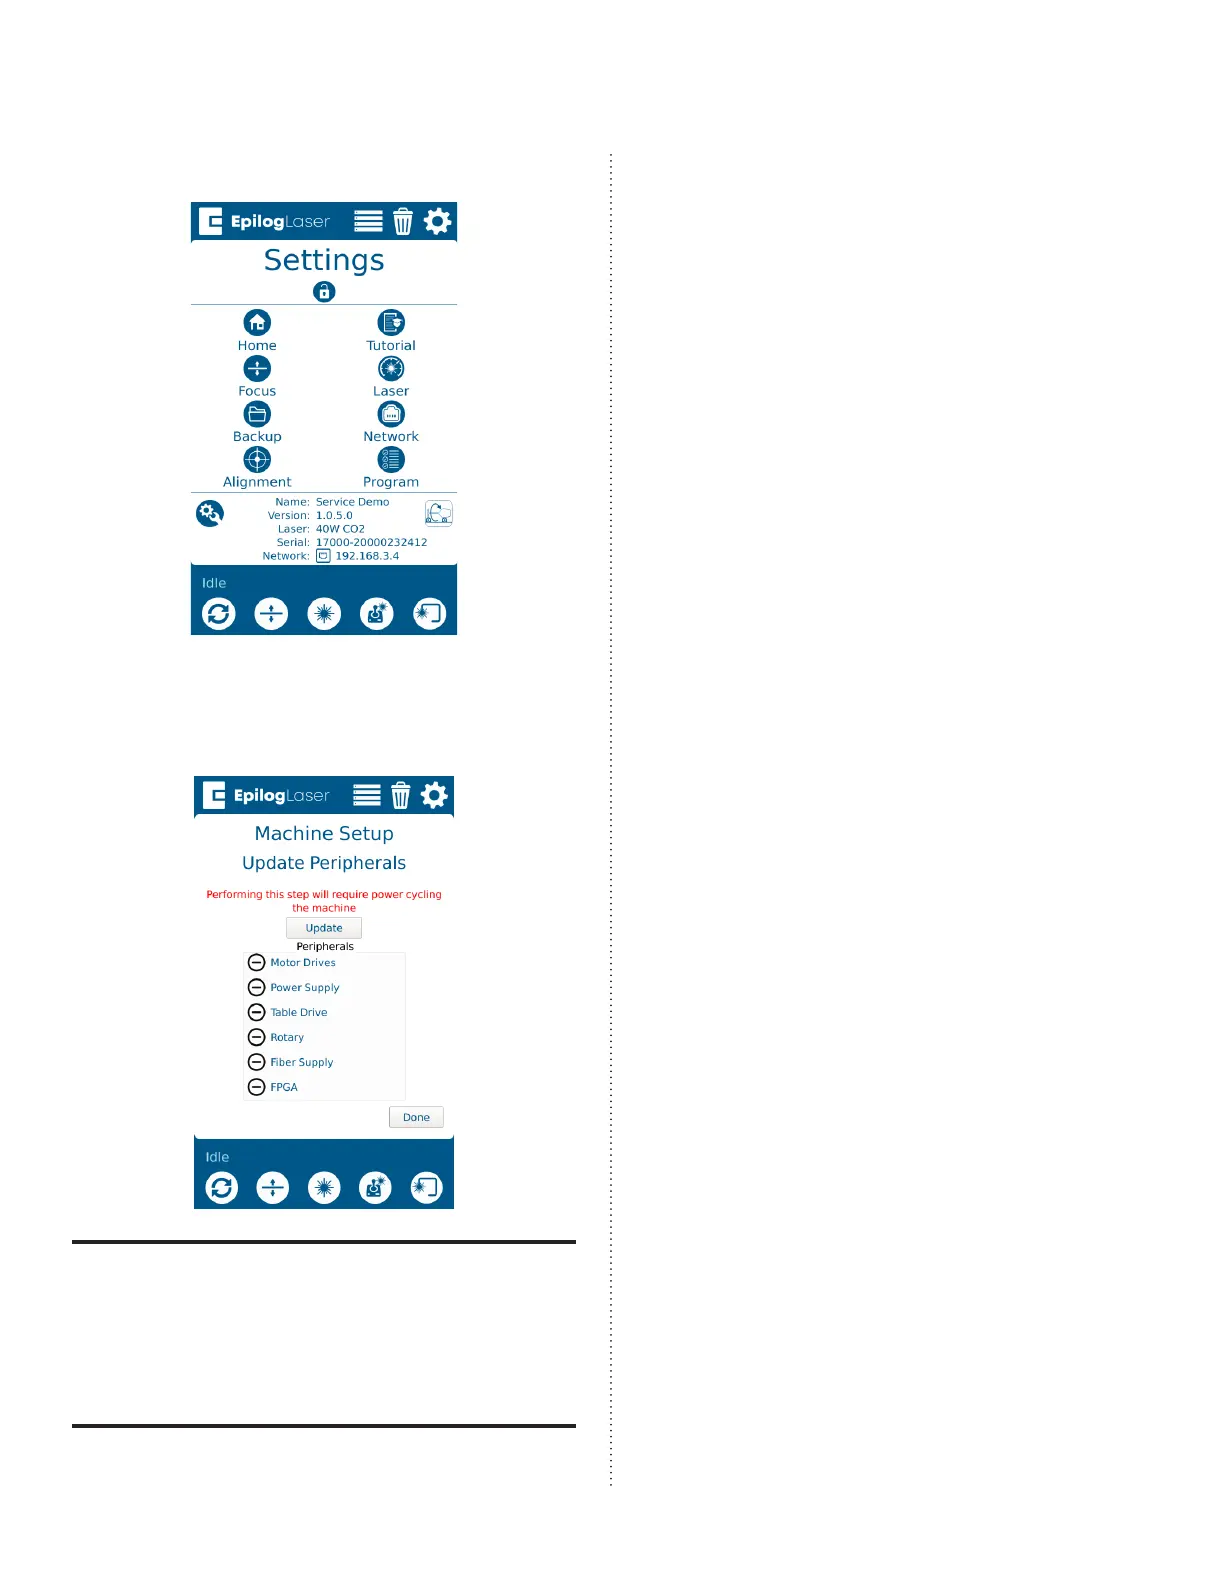
2. Press Program to enter the Peripheral
Update menu:
3. Once in the Peripheral Update menu,
select Motor Drives and FPGA. Press
Update:
When running a peripheral update, do
not power o the engraver. During a
peripheral update it is common for the
display to power o. Once the update
has been applied, the engraver will
prompt to restart.
4. Once the engraver prompts you to
restart, power cycle the engraver.
Aer replacing the x-axis assembly,
complete a full focus calibration and laser
alignment.
If further assistance is required, contact
Epilog Laser Technical Support by phone at
303-215-9171, or by email at
tech@epiloglaser.com.

 Loading...


